¶ HOWTO gloCOM GPO deployment on Windows Server
¶ MSI Installer for gloCOM
The MSI installer has properties that can be modified, allowing administrators to auto-provision the gloCOM application when installing it on the end-user's machine. This means that administrators can provide profile info while installing the application so that when the end-user starts its gloCOM application, they will automatically be logged in without needing to set up their profile.
This installer should be used in GPO deployment on Windows Server.
The Orca application should be installed to set/change these properties. If the Orca application is not installed, please follow the instructions: How to install Orca.
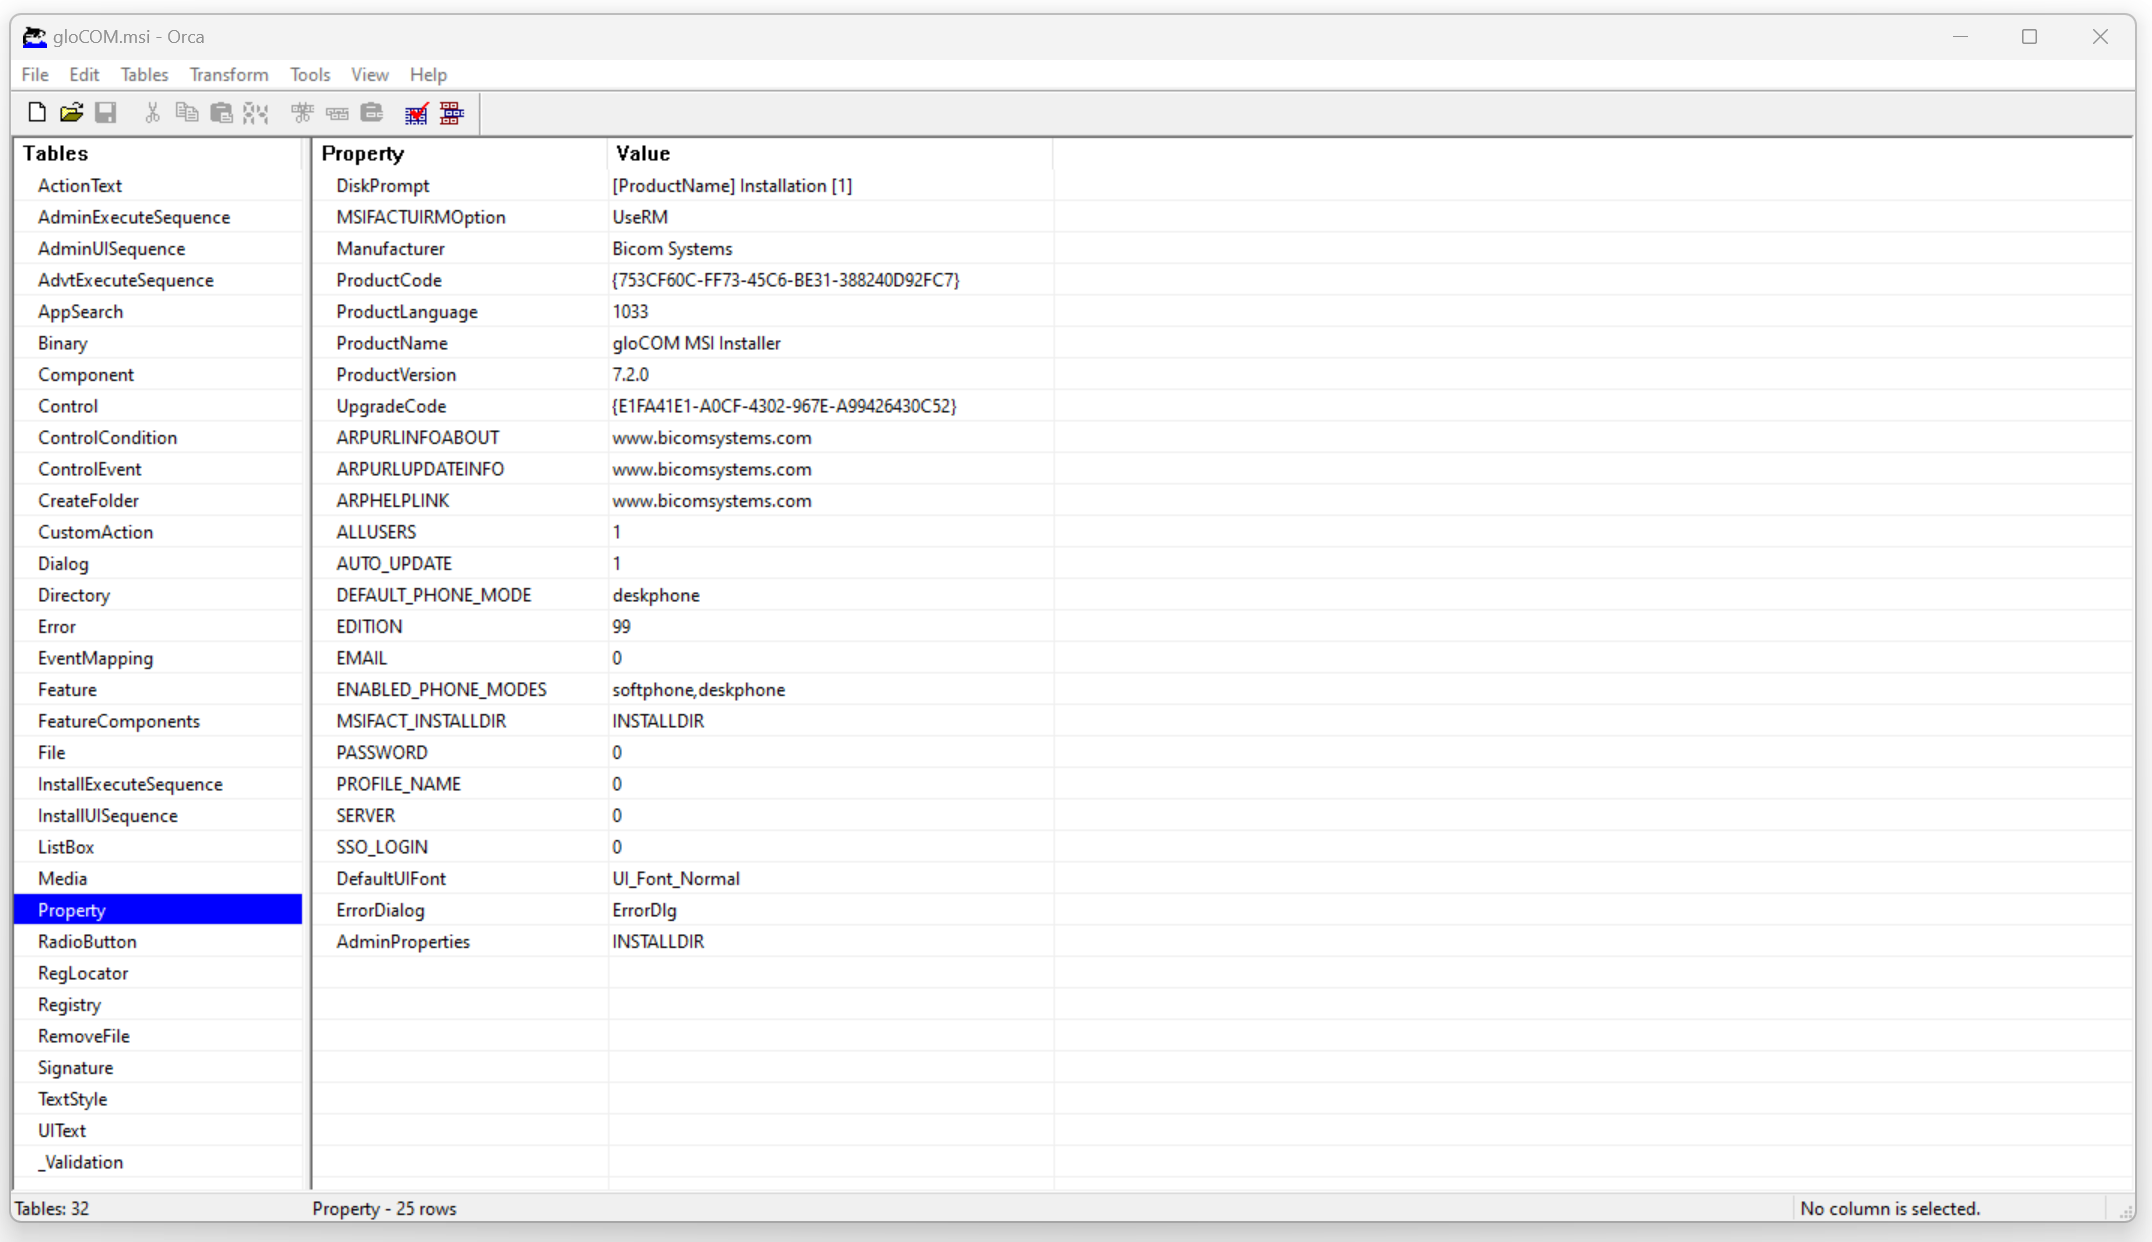
Once the Orca application is installed, right-click on the MSI installer and select the Edit with Orca option. When the application is opened, switch to Properties on the left side of the window. Please, see the picture below.

Properties that can be changed are as follows:
- AUTO_UPDATE: By default, it is set to 1. If it is set to 0, the application will not check for updates in the background.
- ENABLED_PHONE_MODES: By default, it is set to "softphone, deskphone". This property determines which phone mode the user can use. It can be either a "softphone" or a "deskphone." Also, it can be a combination of both or an empty string, meaning no phone mode is enabled.
- DEFAULT_PHONE_MODE: By default, it is set to "deskphone". This property should always contain either the "deskphone" or the "softphone", so it can be determined which phone mode will be used as a default when making calls.
- EDITION: By default, it is set to 99, which means it will use the first available edition. Possible values are as follows:
- 1 - Business
- 2 - Agent
- 4 - Supervisor
- 6 - Office
- SSO_LOGIN: By default, it is set to 0. This means that the email/password should be used. If it is set to 1, the user should log in via SSO, not email/password.
- SERVER: Enter the pbxware host/domain.
- EMAIL: The user's email is used only if SSO_LOGIN is set to 0 and represents an extension's email.
- PASSWORD: The user's password is used only if SSO_LOGIN is set to 0 and represents an extension's password.
- PROFILE_NAME: The name of the profile if multiple login profiles are used.
If SSO_LOGIN is set to 1, SERVER is the only required field.
If SSO_LOGIN is set to 0, SERVER, EMAIL, and PASSWORD are the required fields.
To change any of the properties, navigate to the Transform menu, select the New Transform option from it, and change the properties that need to be changed. After changing the desired properties, navigate to the Transform menu, select the Generate Transform option and choose the location where the mst file should be saved. This file is then specified in the GPO on Windows Server.
¶ Auto-provision the gloCOM application via the command line
When both the msi and mst files are available, follow these steps to install the gloCOM application:
- Open the command prompt.
- Navigate to the directory containing the msi and mst files. (For example, enter the "cd Downloads" within the command prompt to navigate to the MSI installer's directory.)
- Run the "msiexec /i gloCOM.msi TRANSFORMS=gloCOM.mst" command.
¶ Install/Uninstall the gloCOM application via MSI
There are multiple ways to install the gloCOM application via MSI installer.
The following list explains how to install the gloCOM application:
- First: Double-click the MSI installer.
- Second: Open the command prompt. Navigate to the directory containing the MSI installer and run the following command: "msiexec /i gloCOM.msi".
- Third: Open the command prompt as an administrator. Navigate to the directory containing the MSI installer. Run the following command: "msiexec /i gloCOM.msi /qn". The /qn flag means it is a silent install requiring administrator privileges. An install wizard or any windows will not appear during a silent install. There should only be an installer process in the taskbar. Once the process disappears from the taskbar, the gloCOM application should be installed and ready to use.
There are multiple ways to uninstall the gloCOM application via the MSI installer.
The following list explains how to uninstall the gloCOM application:
- First: Uninstall the gloCOM application via the Control Panel.
- Second: Open the command prompt. Navigate to the directory containing the MSI installer and run the following command: "msiexec /x gloCOM.msi".
- Third: Open the command prompt as an administrator. Navigate to the directory containing the MSI installer. Run the following command: "msiexec /x gloCOM.msi /qn". The /qn flag means it is a silent uninstall requiring administrator privileges. An uninstall wizard or any windows will not appear during a silent uninstall. There should only be an uninstaller process in the taskbar. Once the process disappears from the taskbar, the gloCOM application should be uninstalled.
¶ Update the gloCOM application via MSI
To update the gloCOM application via MSI, please follow these steps:
- Open the command prompt.
- Navigate to the directory containing the MSI installer.
- Run the "msiexec /fvomus gloCOM.msi" command.
For more information, please visit the Applying Small Updates by Reinstalling the Product.
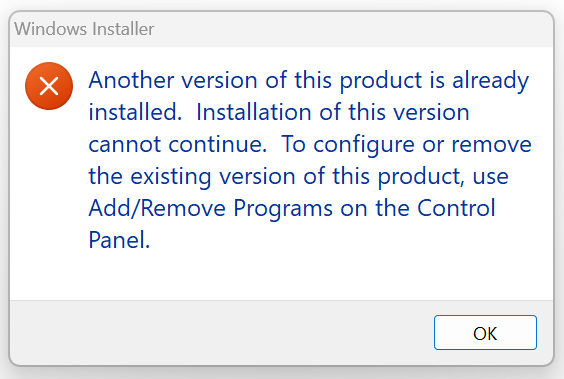
Updating the gloCOM application by double-clicking on the MSI installer is not possible. Instead of updating the gloCOM application, a warning message will pop up, as shown in the picture below.
