¶ Meeting
A Meeting module as part of the gloCOM Desktop application allows organizing meetings that support features like audio conferencing, video conferencing, chat, screen-sharing, local recording, and much more. Meetings can be private (only invitees can join) or public (anyone with the number or link can join). Creating meetings within the gloCOM Desktop application requires a meeting license. Otherwise, joining an ongoing meeting can be accomplished by receiving a meeting invitation or joining by meeting number.
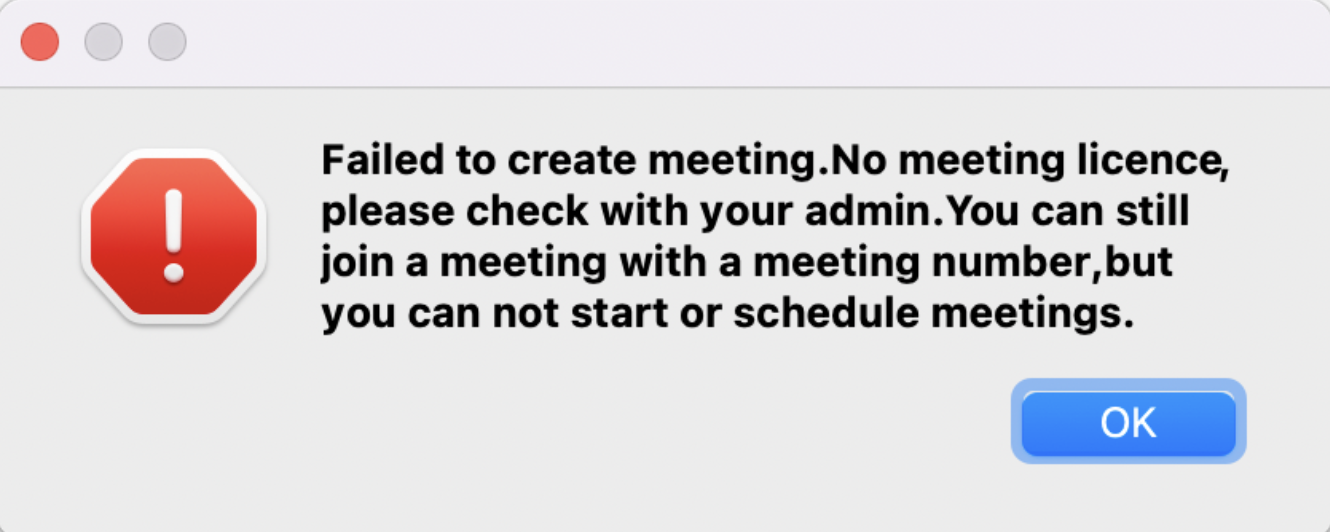
Without a license, the user can only join the meeting.
¶ Granting Necessary Permissions (macOS only)
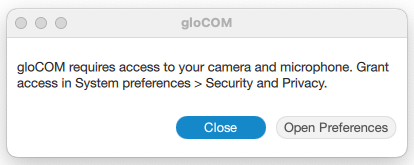
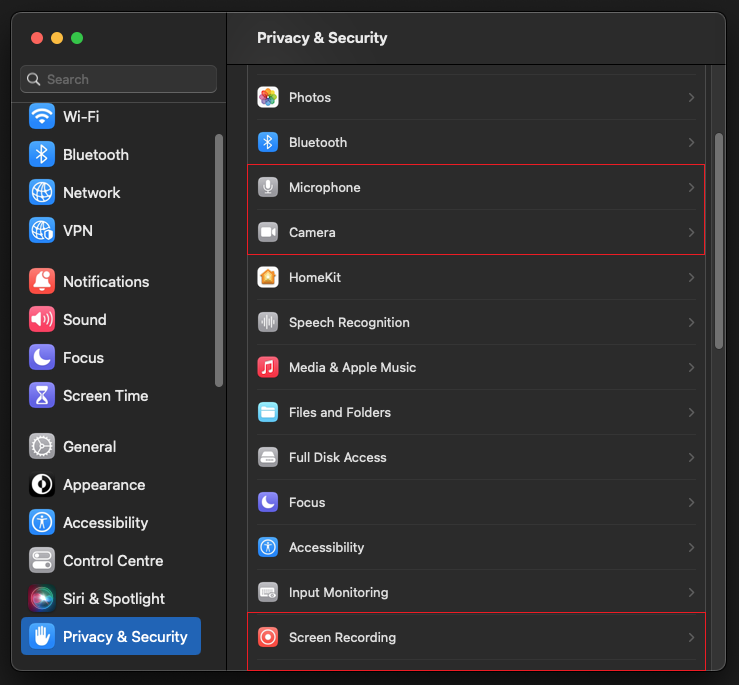
If users are experiencing issues with using the microphone, camera, or screen sharing during a meeting on macOS, they should check their security settings.
The gloCOM Desktop application needs permission for:
- Camera for video communication.
- Microphone for audio communication.
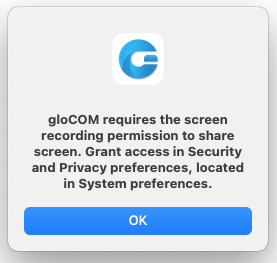
- Screen Recording for screen sharing.
- Accessibility for remote control.
If necessary permissions for the Microphone, Camera, or Screen Sharing have yet to be granted, a pop-up dialogue asking for them will be displayed.
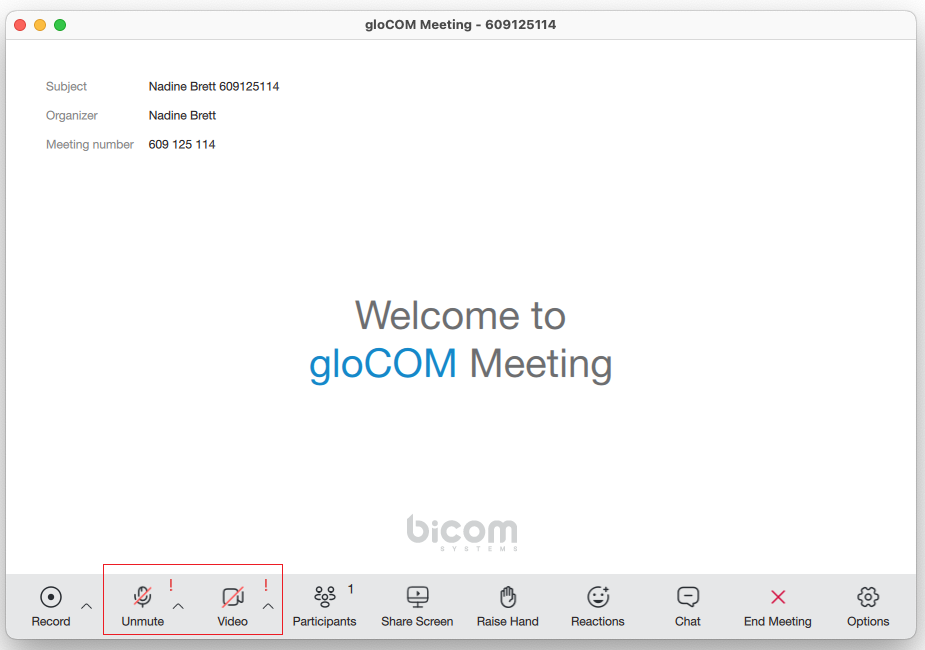
A red exclamation mark will also appear next to the icons in the option bar as a warning that permissions have not been granted.
To turn these options on/off, please navigate to System Settings -> Privacy & Security.
¶ Start a Meeting
There are a few ways to start a meeting.
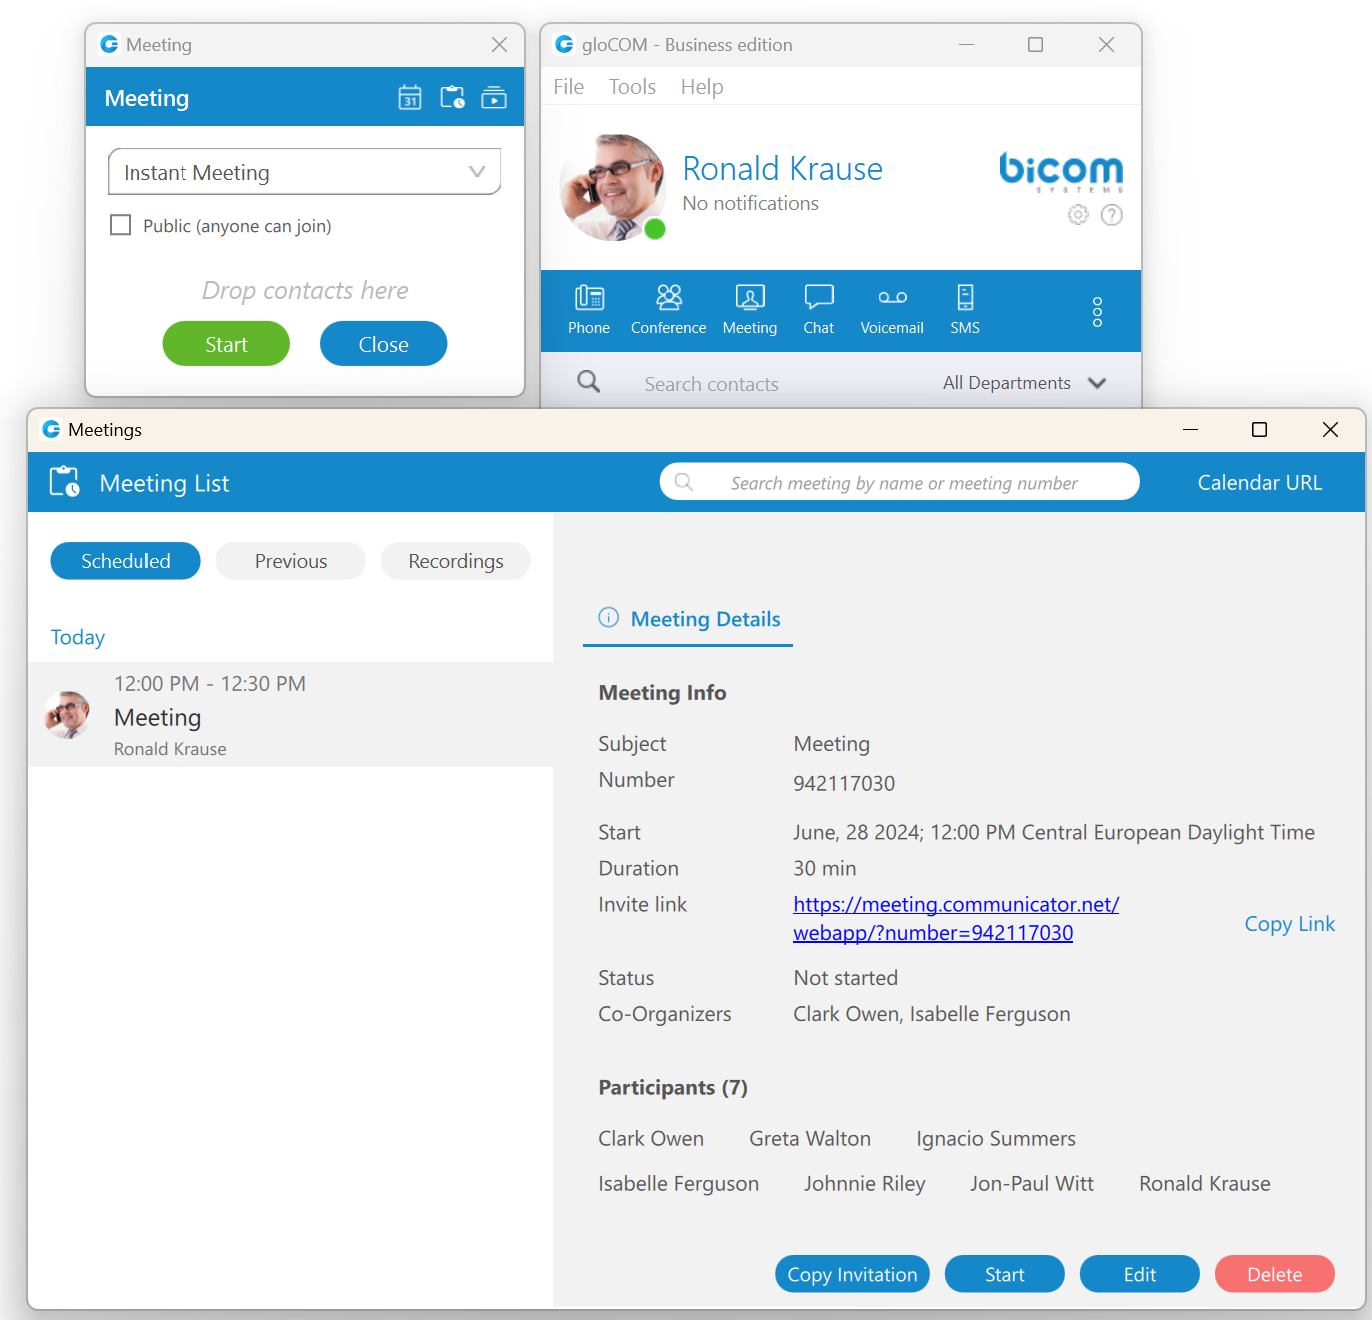
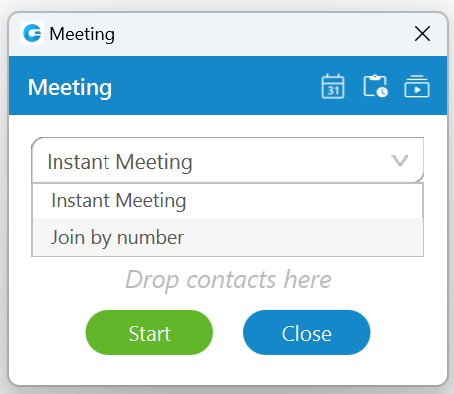
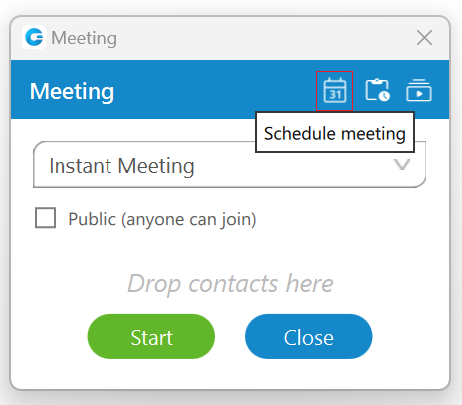
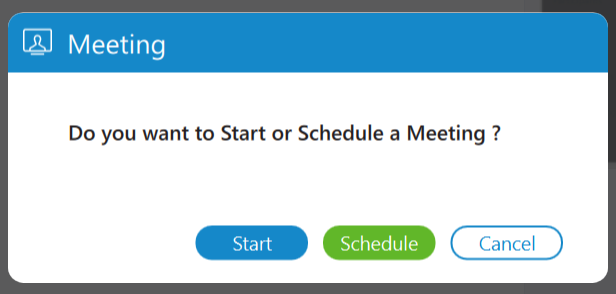
The first way is to click on the Meeting button within the navigation bar. A Meeting window will appear with various options. Through this window, a meeting can be created, scheduled, or joined. Also, meeting and recordings lists can be accessed.
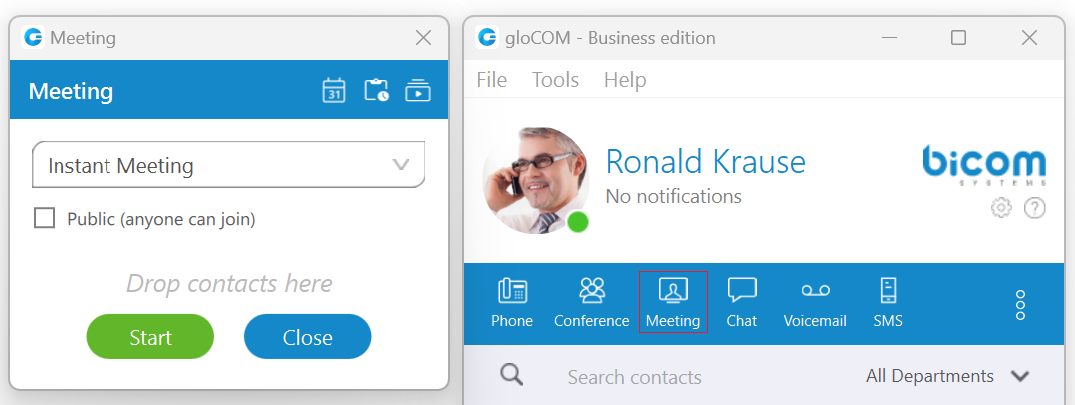
Furthermore, when creating an instant meeting, users can decide whether the meeting should be private (only invitees can join) or public by checking the checkbox next to the "Public (anyone can join)" label.
An instant meeting can be started with or without participants, who can be added after the meeting begins. Participants can be added to the list by dragging contacts from the contact list and dropping them into the participants list within the Meeting window. To remove participants from the participant list click the X button. When everything is ready, click the Start button to start an instant meeting or the Close button to close the window.
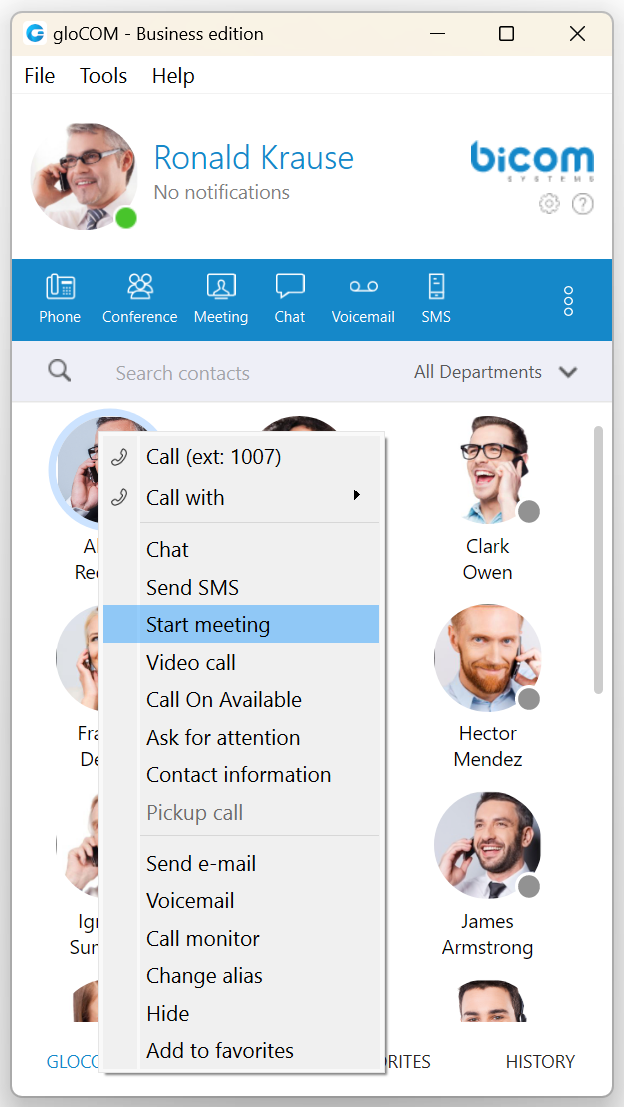
The second way is to right-click on the desired contact within the contact list and select the "Start meeting" option from the drop-down menu, which will start a meeting instantly.
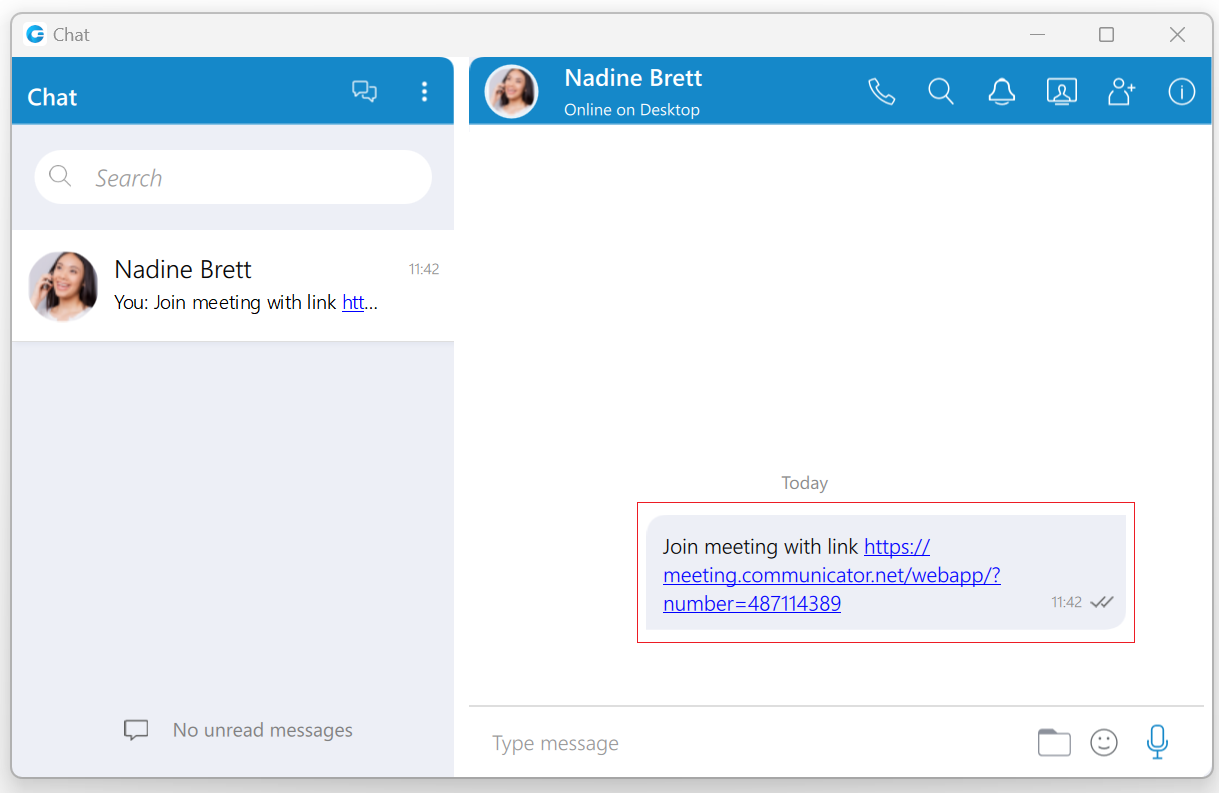
The third way to start or schedule a meeting is through chat conversation, which can be done by clicking the Meeting button within the navigation bar. Both one-to-one and group chat conversations support this ability.

When a meeting is started from the chat conversation, a meeting join link will be automatically sent to the chat. This link can be used to join the meeting quickly via web or mobile application.
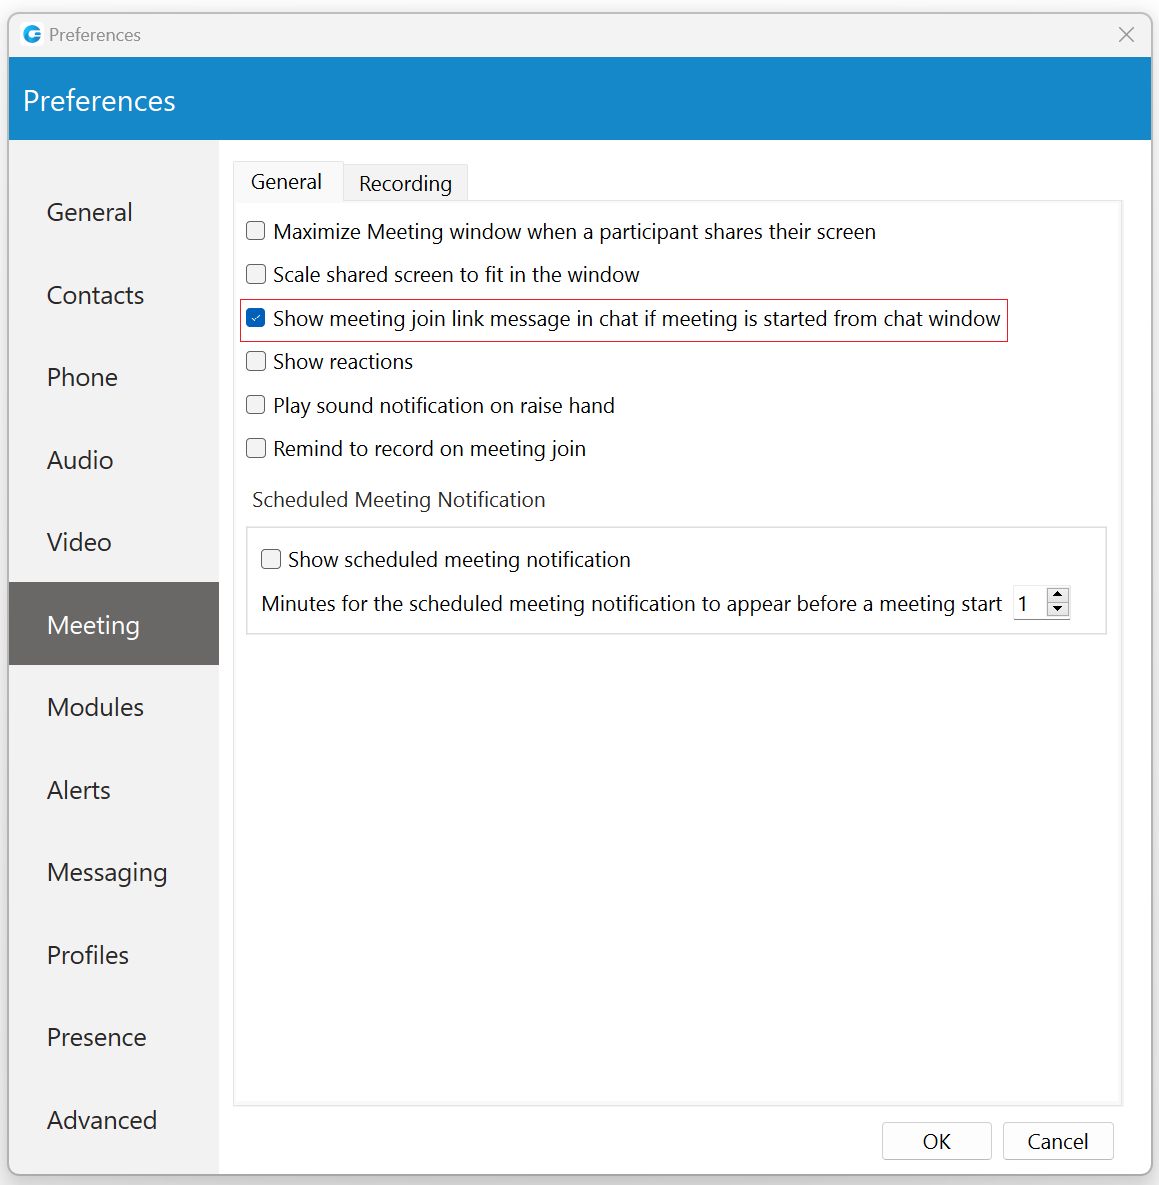
This option is turned on by default. To turn it off, please navigate to Preferences -> Meeting and uncheck the checkbox next to the "Show meeting join link message in chat if meeting is started from chat window" option.
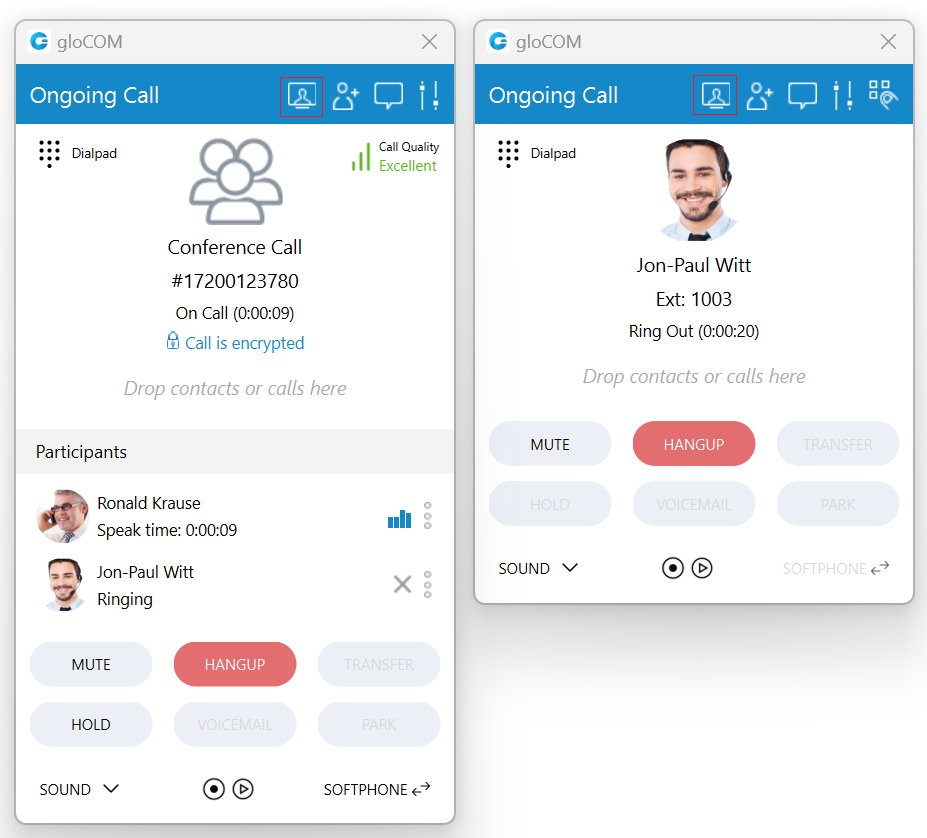
Finally, the fourth way is to start a meeting through an ongoing one-to-one/conference call by clicking the Meeting button within the call/conference window.
¶ Join by Number
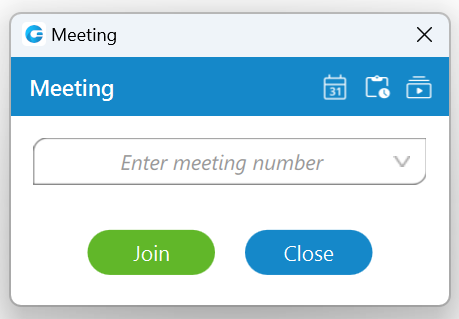
Join by number allows users to join a meeting by entering an existing meeting number. To do so, select the "Join by number" option from the drop-down menu within the Meeting window and enter the meeting number provided by the meeting organizer.
¶ Schedule a Meeting
Schedule a Meeting allows users to arrange a meeting in advance. To do so, click on the Schedule meeting button.
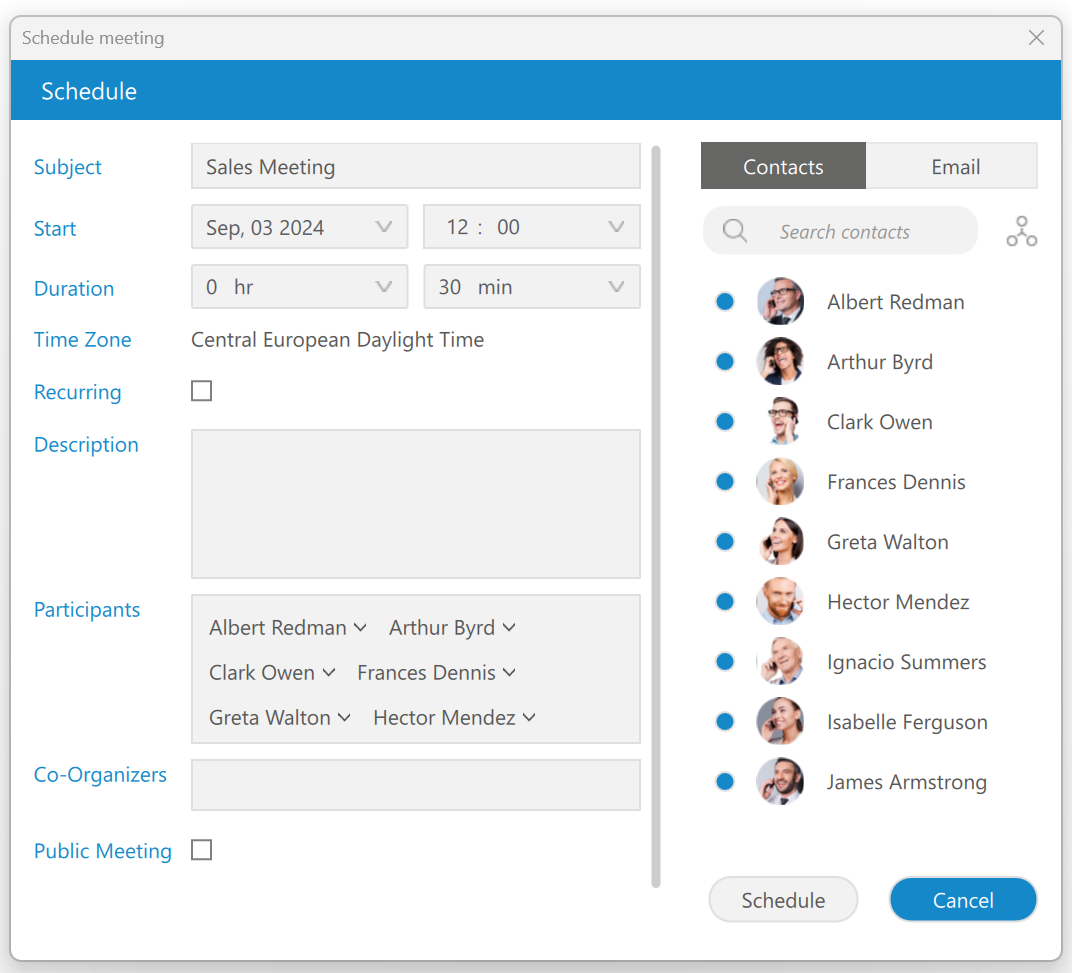
While scheduling a meeting, the following information needs to be provided:
- Subject: Provides information on the given topic for the meeting. (Required)
- Start:
- Date: Provides information on which day a meeting will occur.
- Time: Provides information on the time of day a meeting will occur.
- Duration: Provides information on how long the meeting will be.
- Time Zone: Provides information on the time zone in which a meeting will be scheduled.
- Recurring: Provides information on whether the meeting is recurring or not (If it will repeat, e.g., every Thursday at 3 pm) and how long it will recur (e.g., stop after ten meetings).
- Description: Provides the user to describe a meeting in a few sentences.
- Participants: Provide information on who is supposed to attend the meeting. (The user can add participants by selecting them within the contact/email list on the right side of the window or by entering their email if they are not on the list.)
- Co-Organizers: Provides information on who the co-organizer of the meeting is.
- Public Meeting: Provides users with the ability to decide whether to make a meeting public (anyone can join) or private (only called parties can join).
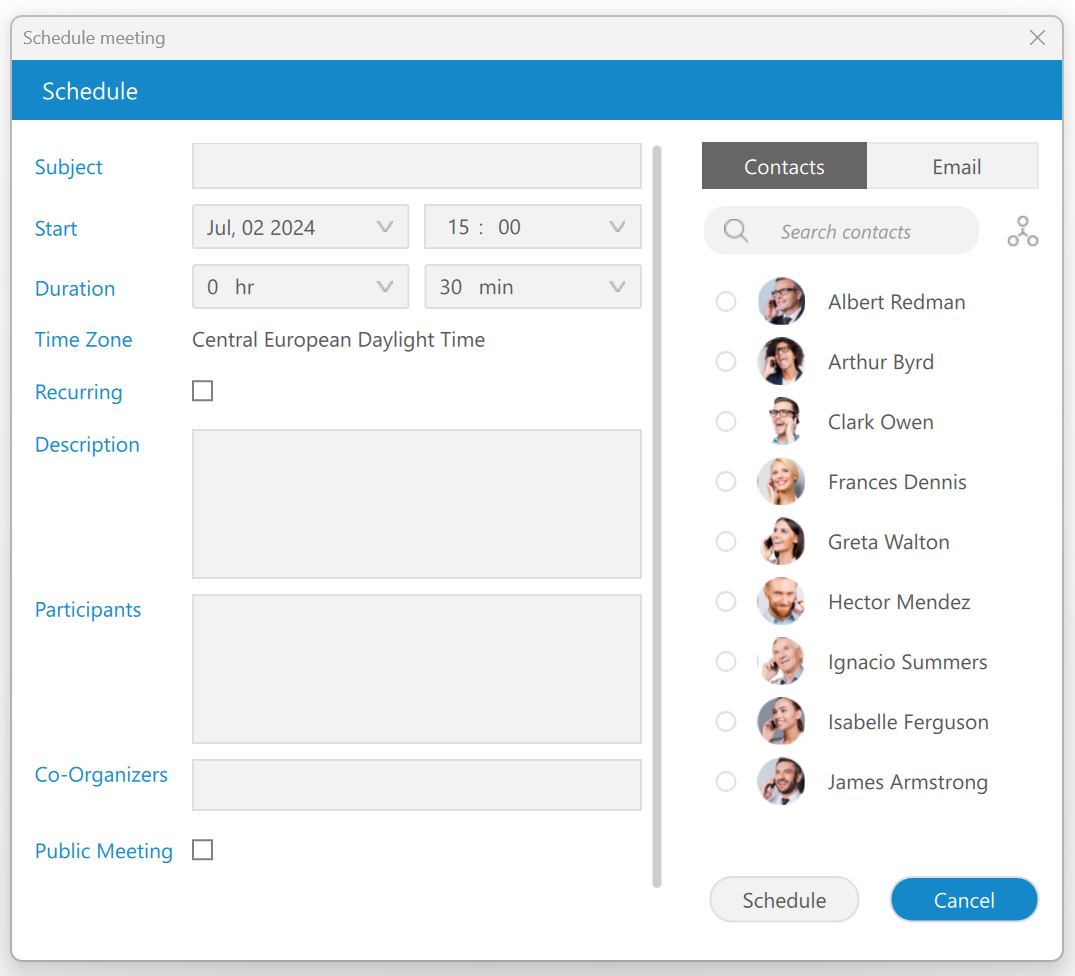
The search field and departments button can be used to filter contacts while scheduling a meeting.
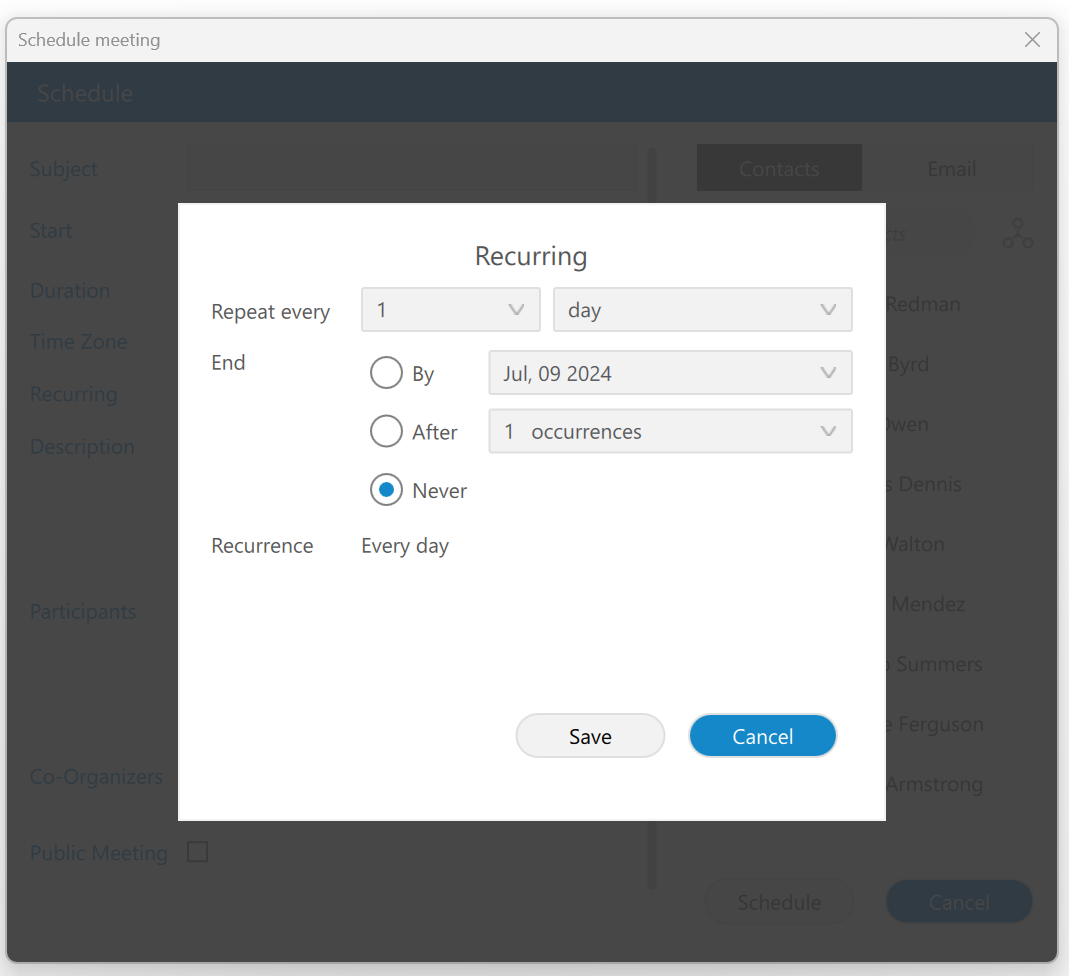
¶ Recurring Meetings
A Recurring meeting is one that repeats every set time (every day, week, or month). For example, every week on Tuesday, you have a sales meeting. Users can edit recurring meetings to suit their needs.
¶ Schedule a Meeting from the Chat
Meetings can be scheduled from the chat. Clicking the Meeting button within the context bar will open a pop-up modal asking users whether they want to start an instant meeting or schedule a meeting with all chat participants.
Clicking the Schedule button within the pop-up window opens the Schedule Meeting window. Note that the participant list is pre-populated with all chat participants, so they do not need to be added manually.
It is also possible to add new ones and remove existing ones.
The meeting subject is also pre-populated with the chat name + Meeting (for example, Sales Meeting). This field is also editable.
When everything is entered and ready for scheduling, a user should press the Schedule button to confirm changes. The meeting will then be added to the Scheduled Meetings list, which can be managed like all scheduled meetings.
Besides the option to Schedule a meeting from the chat, the user is also able to:
- Start an instant meeting with all participants from that chat by pressing the Start button within the pop-up window.
- Choose the Cancel button to close the pop-up modal and cancel starting or scheduling a meeting.
¶ Scheduled Meeting Notification
As the name suggests, Schedule Meeting Notification shows the scheduled meeting notification N minutes before the meeting starts, allowing the user to start the meeting.
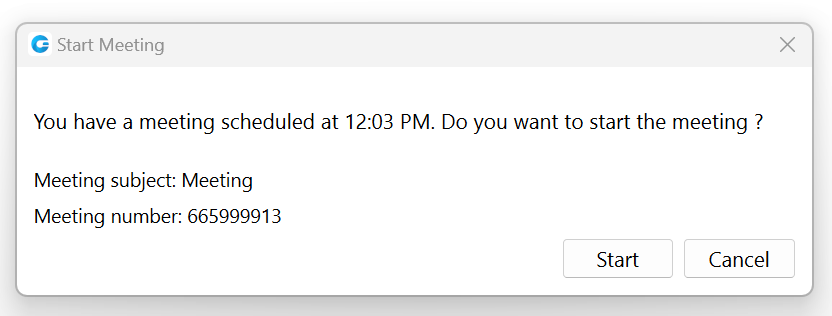
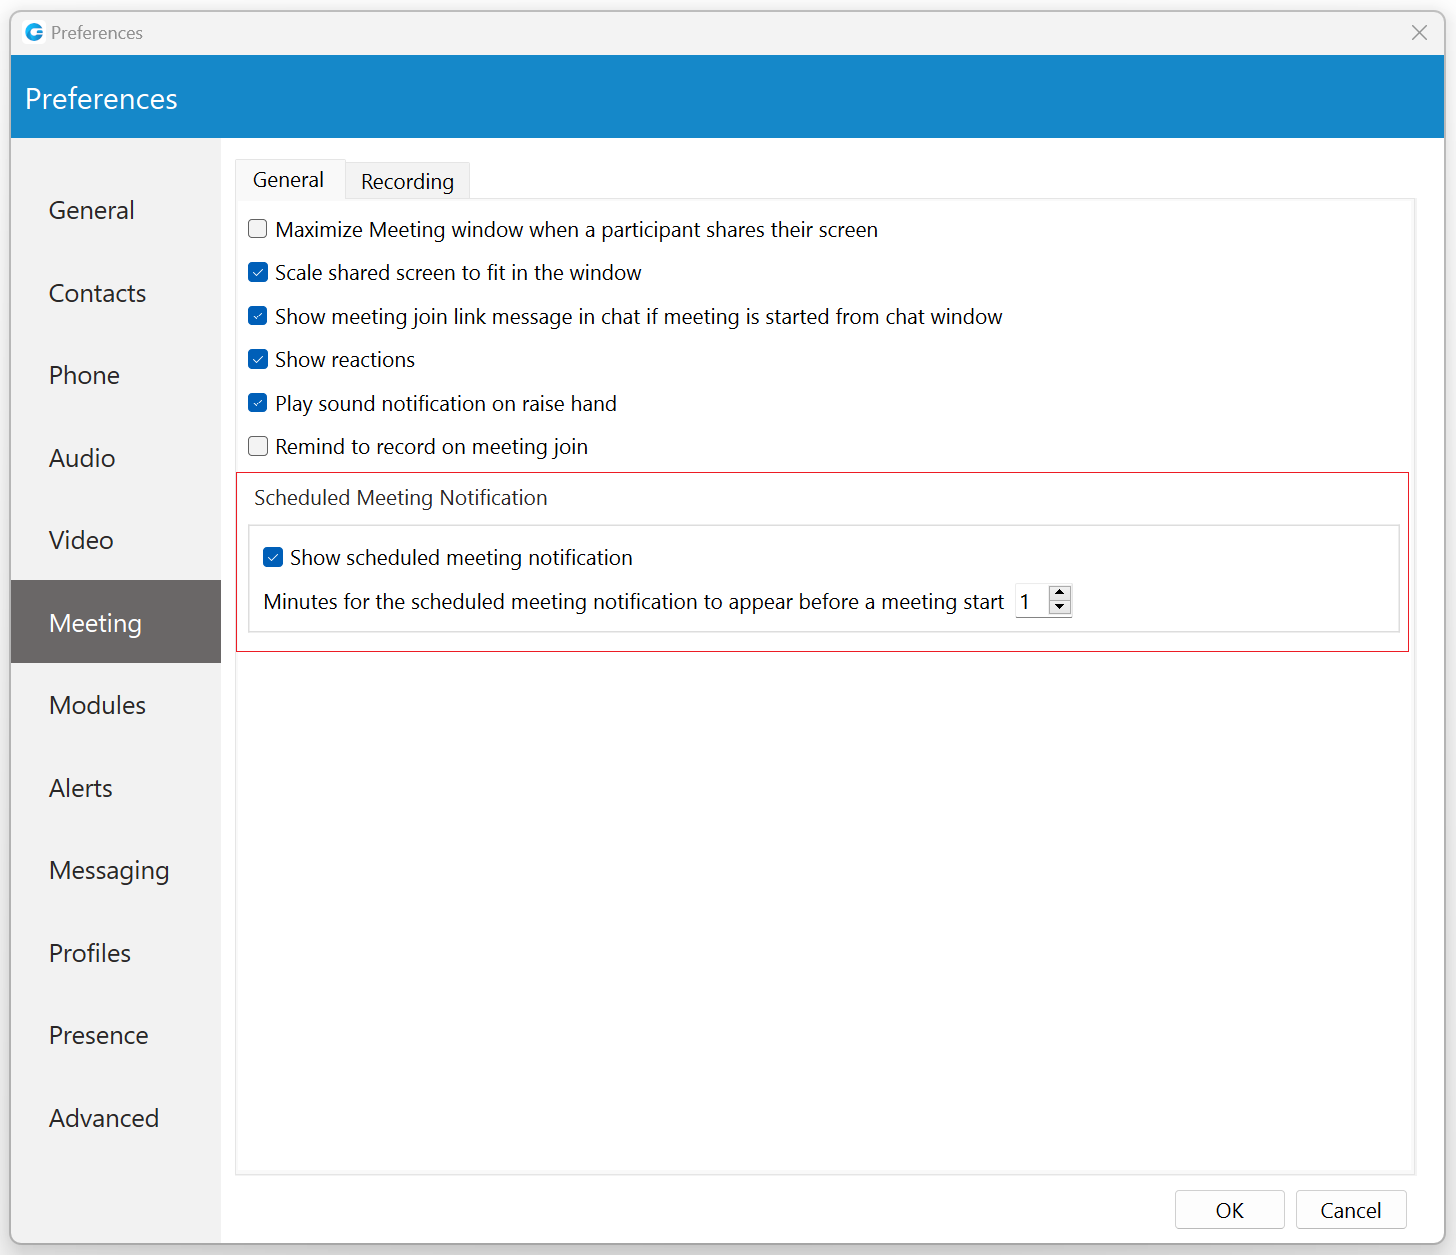
The N represents the value that depends on the settings set within the Preferences -> Meeting tab, within the gloCOM Desktop application (for example, 10 minutes, 2 minutes, 1 minute, etc.). To disable the Schedule Meeting Notifications, please uncheck the checkbox next to the “Show scheduled meeting notification” option. By default, this option is enabled.
¶ Pre-expiry Notification
Pre-expiry notification is a feature designed to automatically notify all meeting participants ten minutes before the end of the maximum meeting duration based on the license/package type. This notification is a gentle reminder that the meeting is approaching its conclusion. If the message is not closed, it will countdown automatically until the end of the meeting. Also, if someone joins the meeting less than ten minutes before the end, they will get a message with the exact time remaining for that meeting.
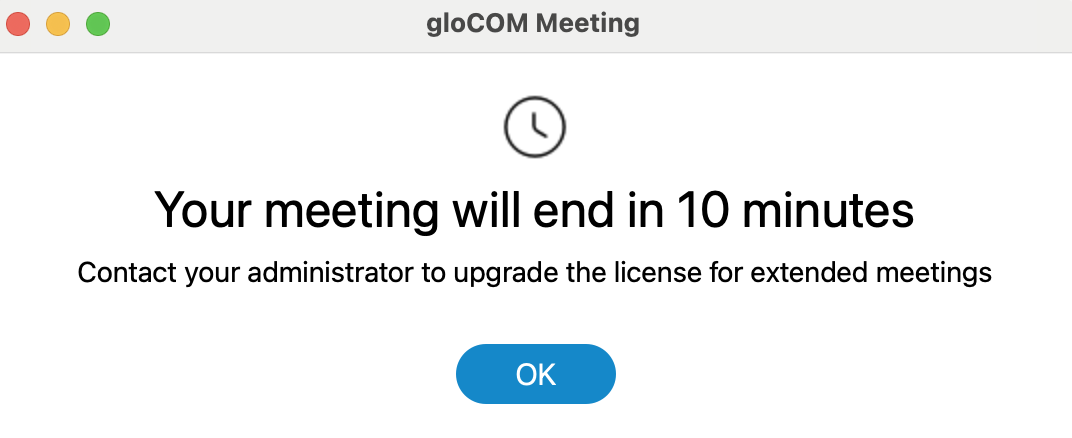
This message pops up in front of all opened windows on your machine, even if the meeting screen on the desktop app is minimized!
¶ Meeting List
To see the list of all ongoing, scheduled, finished meetings, or meeting recordings, please click the Meeting list button within the Meeting window.
![]()
Meetings can be searched within this window, and the Calendar URL can be copied and pasted into the user's calendar client.
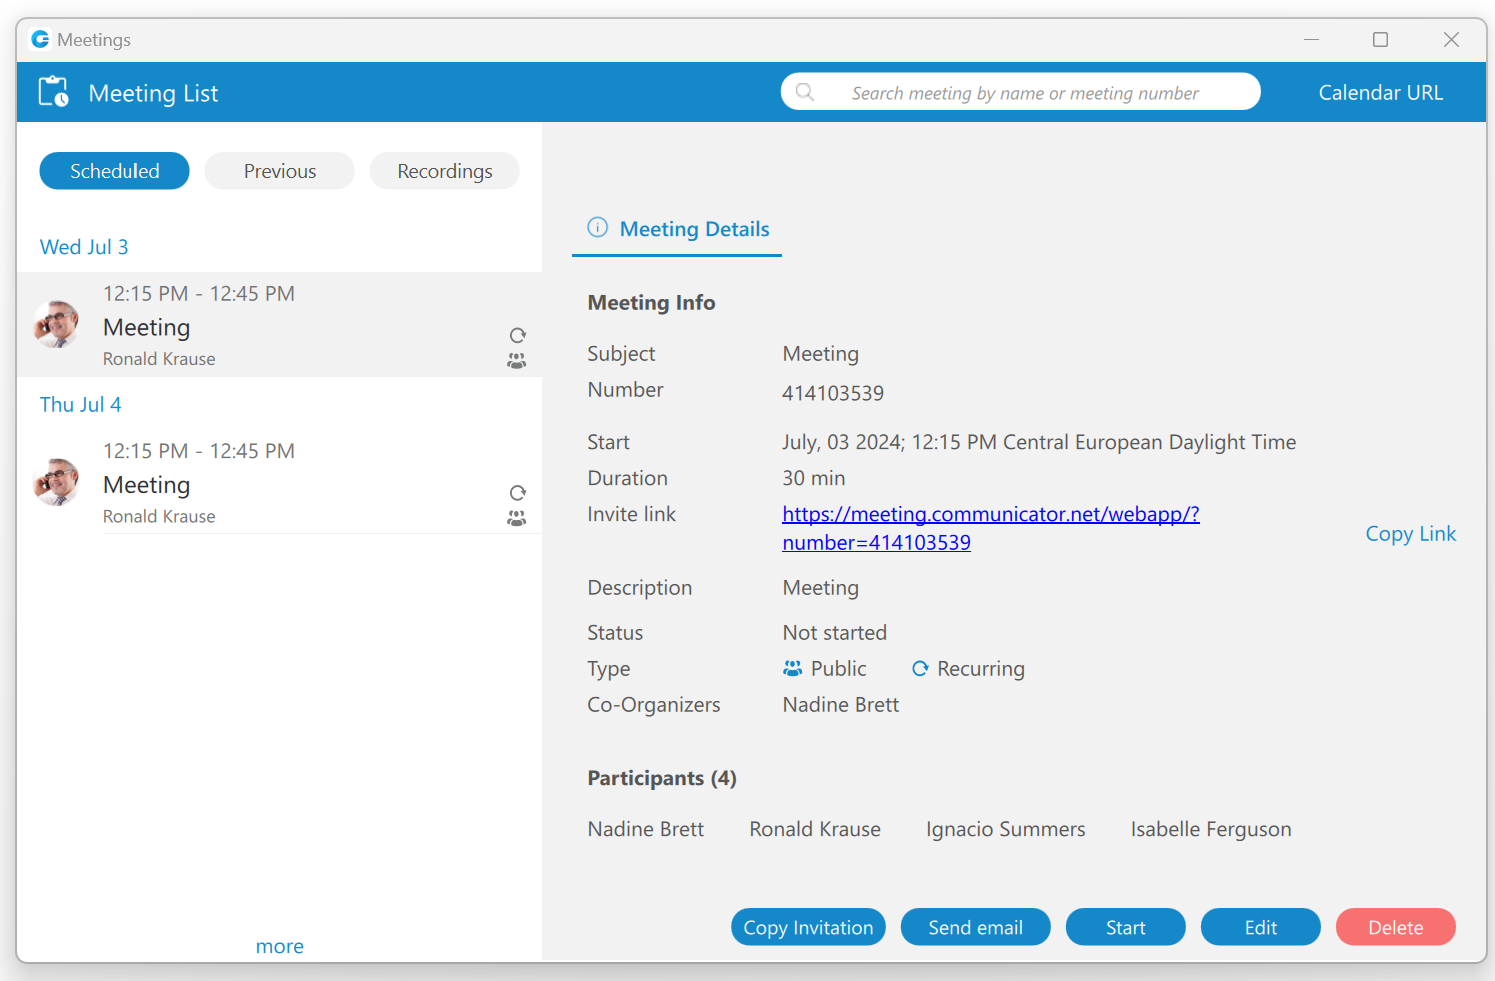
¶ Scheduled Tab
Under the Scheduled tab, scheduled and in-progress meetings can be found. Scheduled meetings are all meetings planned for the future. In-progress meetings are a particular category of meetings that represents all currently active meetings to which the user has been invited.
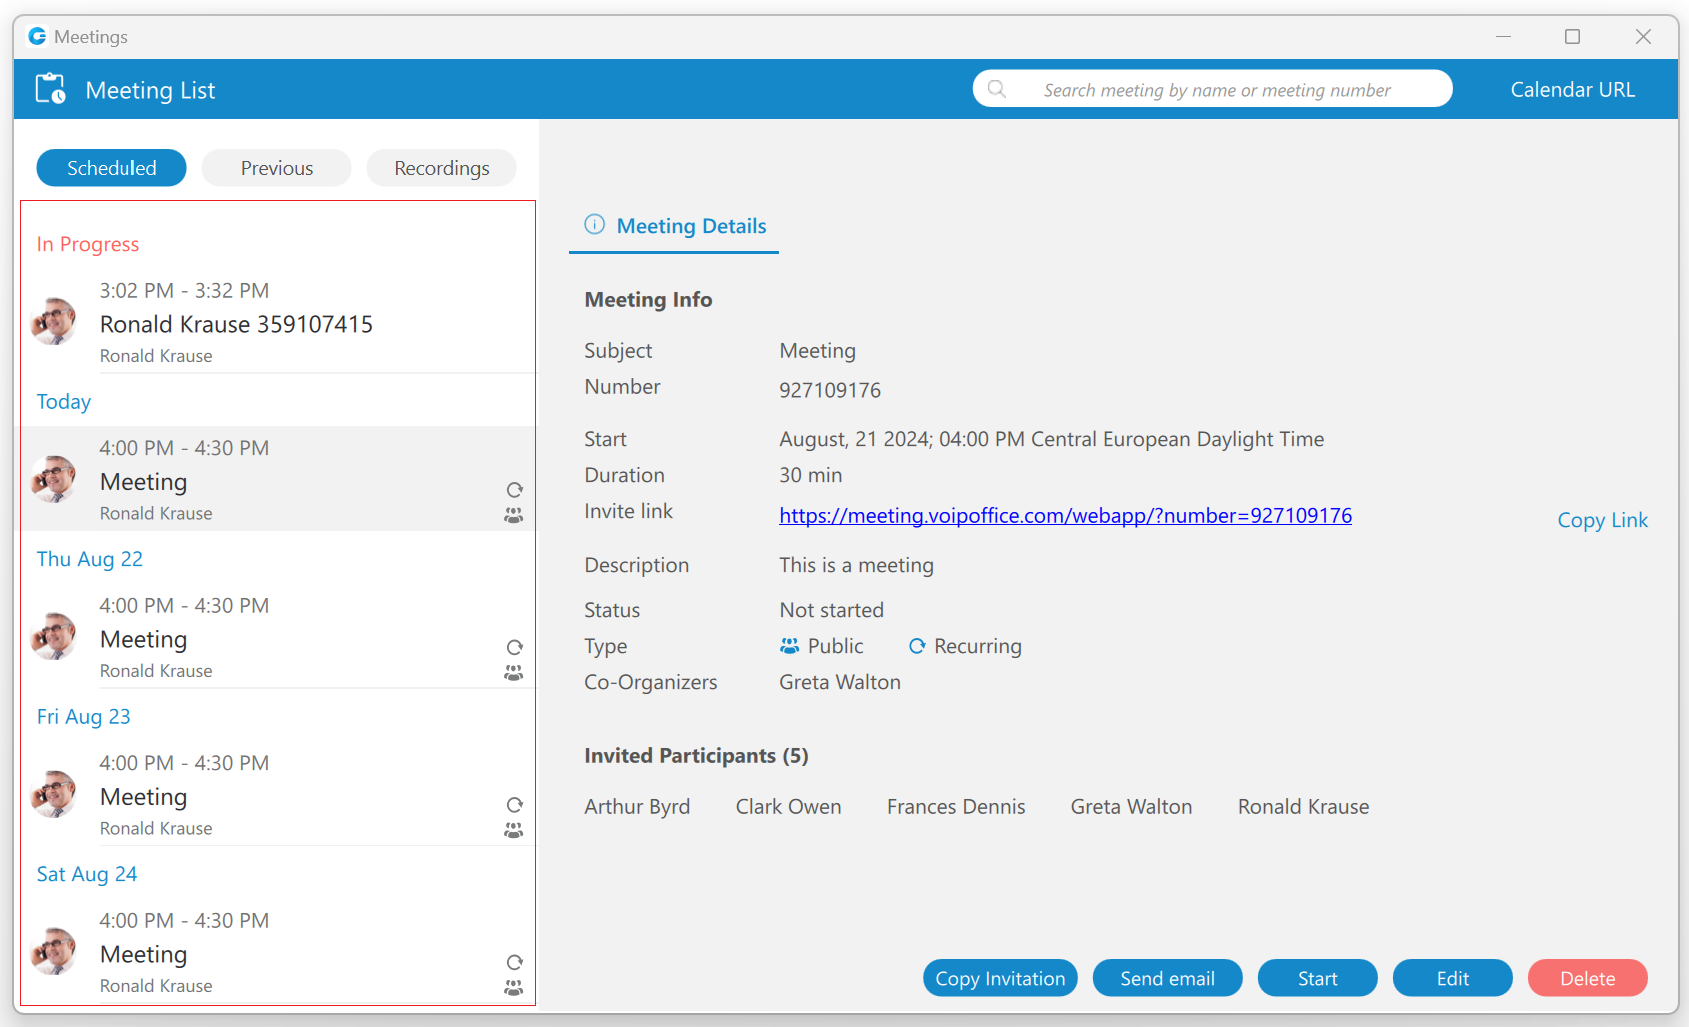
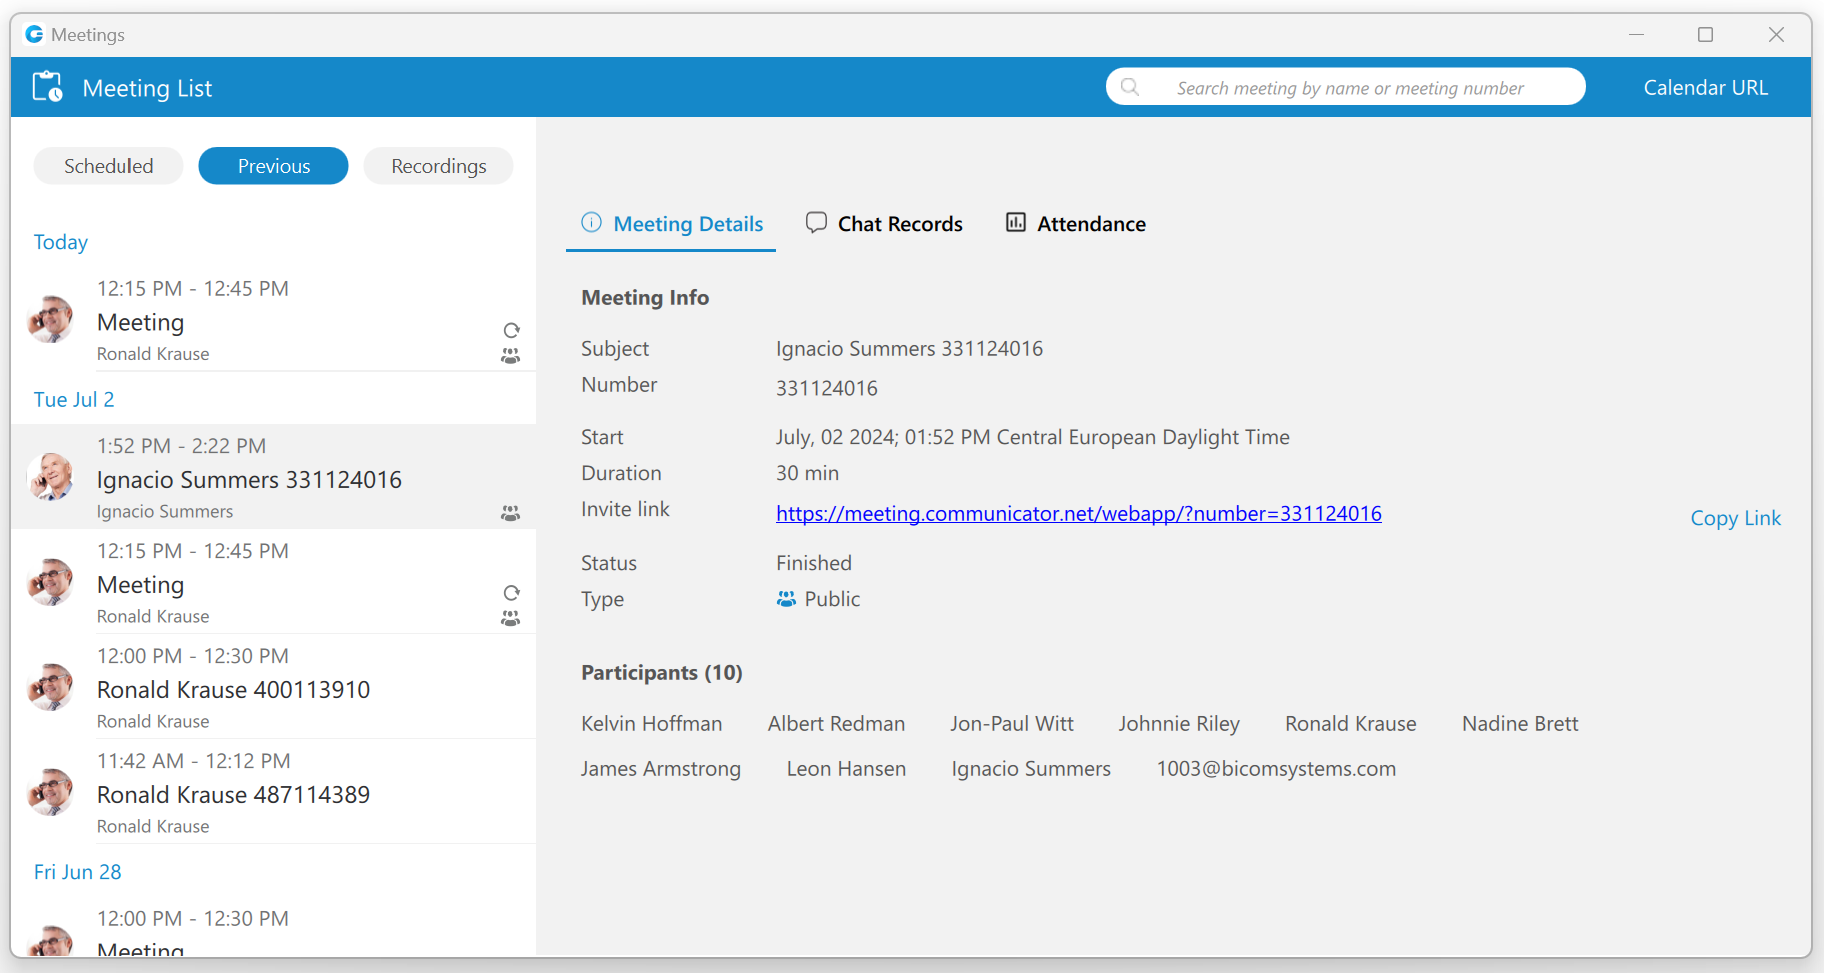
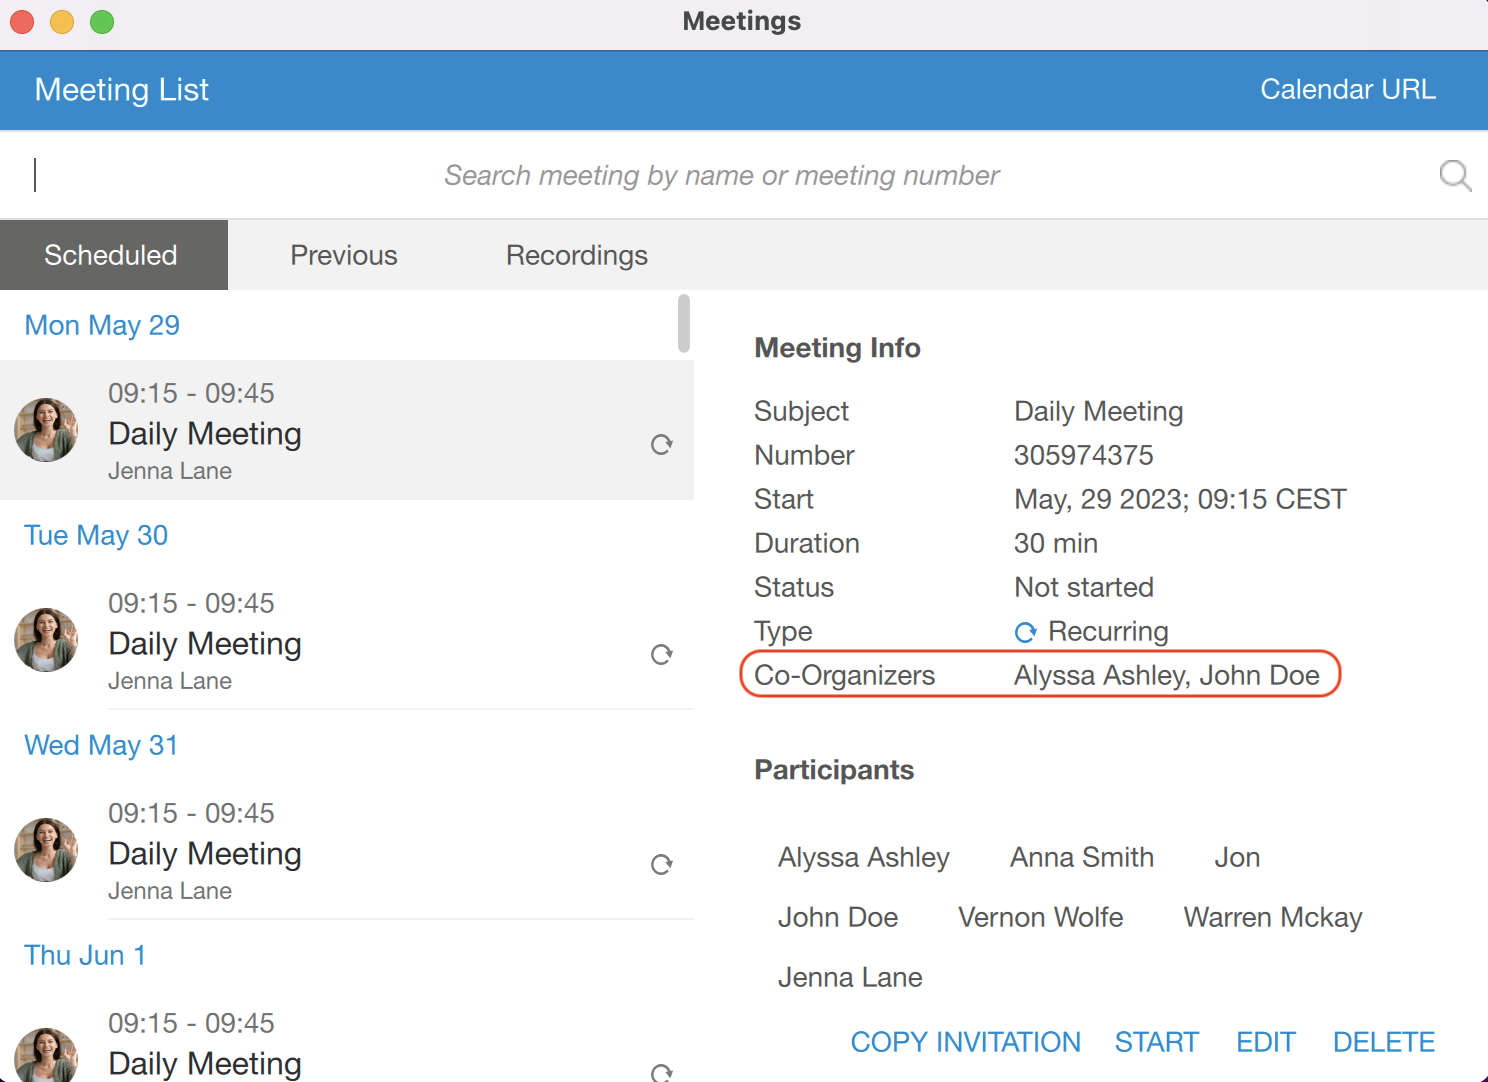
¶ Meeting Details
The Meeting Details tab with the following information will be displayed for the selected meeting:
- Subject: Provides information on the given topic for the meeting.
- Number: A randomly assigned number associated with an instant or scheduled meeting.
- Start: Start time and the day the meeting will occur.
- Duration: How long the meeting will be.
- Invite link: The link that can be used to join the meeting.
- Description: Provides the user with a short description of the given topic.
- Status: The state of the meeting (e.g., Not started, In progress, Finished).
- Type: Provides information that the meeting is recurring, public, or both.
- Co-Organizers: Provides information on who the co-organizer of the meeting is.
- Participants: Provides information on who is supposed to attend the meeting.
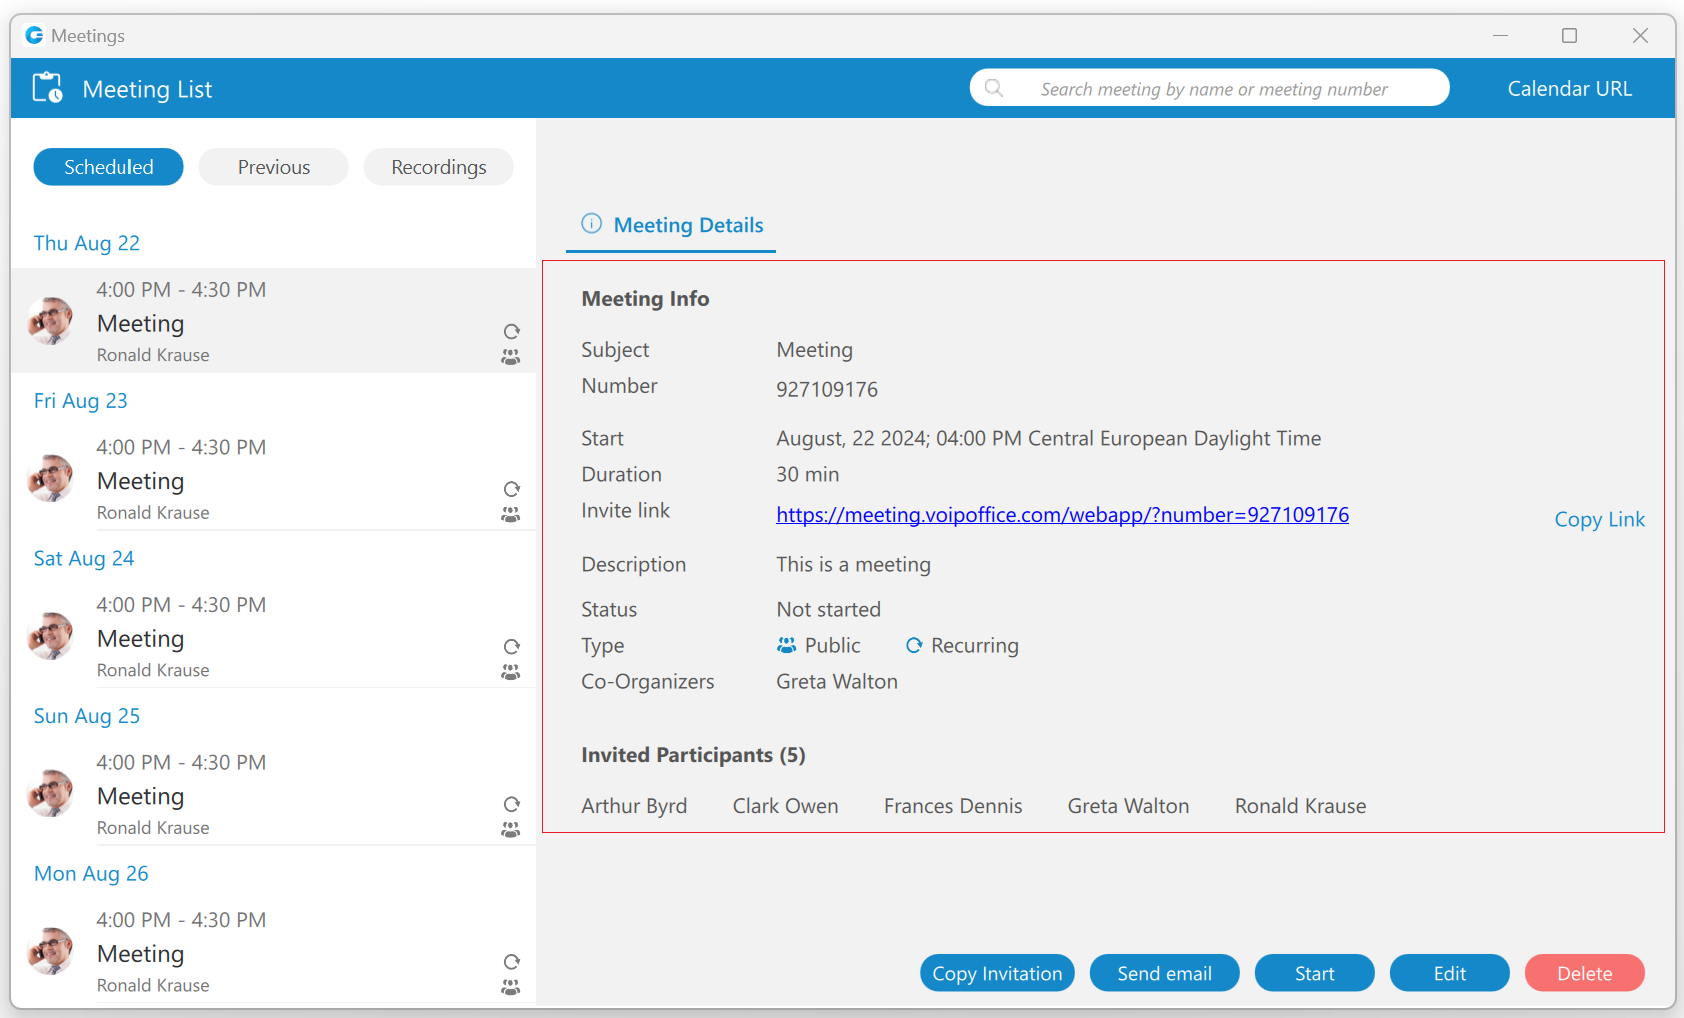
The user can copy the invitation link by pressing the "Copy link" label.
The Meeting Details will be displayed for the selected meeting.
Depending on the meeting type and meeting status, the user will be presented with different button options.
The following list shows the meaning of those buttons:
- Join button: Allows the user to join the ongoing meeting.
- Copy Invitation button: Allows the user to copy a meeting invitation easily.
- Send email button: Allows the user to send an email, which is visible only for public meetings that have not been finished yet.
- Start button: Allows the user to start a scheduled meeting. (Only the meeting organizer and Co-Organizers can start the scheduled meeting.)
- Edit button: Allows the user to edit the scheduled meeting. (Only the meeting organizer and Co-Organizers can edit the scheduled meeting.)
- Delete button: Allows the user to delete the meeting. (Only the meeting organizer and Co-Organizers can delete the meeting.)
¶ Previous Tab
Under the Previous tab, all finished meetings can be found.
The Meeting Details, Chat Records, and Attendance tabs are available for the selected meeting.
¶ Meeting Details
The Meeting Details tab with the following information will be displayed for the selected meeting:
- Subject: Provides information on the given topic for the meeting.
- Number: A randomly assigned number associated with an instant or scheduled meeting.
- Start: Start time and the day the meeting will occur.
- Duration: How long the meeting will be.
- Invite link: The link that can be used to join the meeting.
- Description: Provides the user with a short description of the given topic.
- Status: The state of the meeting (e.g., Not started, In progress, Finished).
- Type: Provides information that the meeting is recurring, public, or both.
- Co-Organizers: Provides information on who the co-organizer of the meeting is.
- Participants: Provides information on who is supposed to attend the meeting.
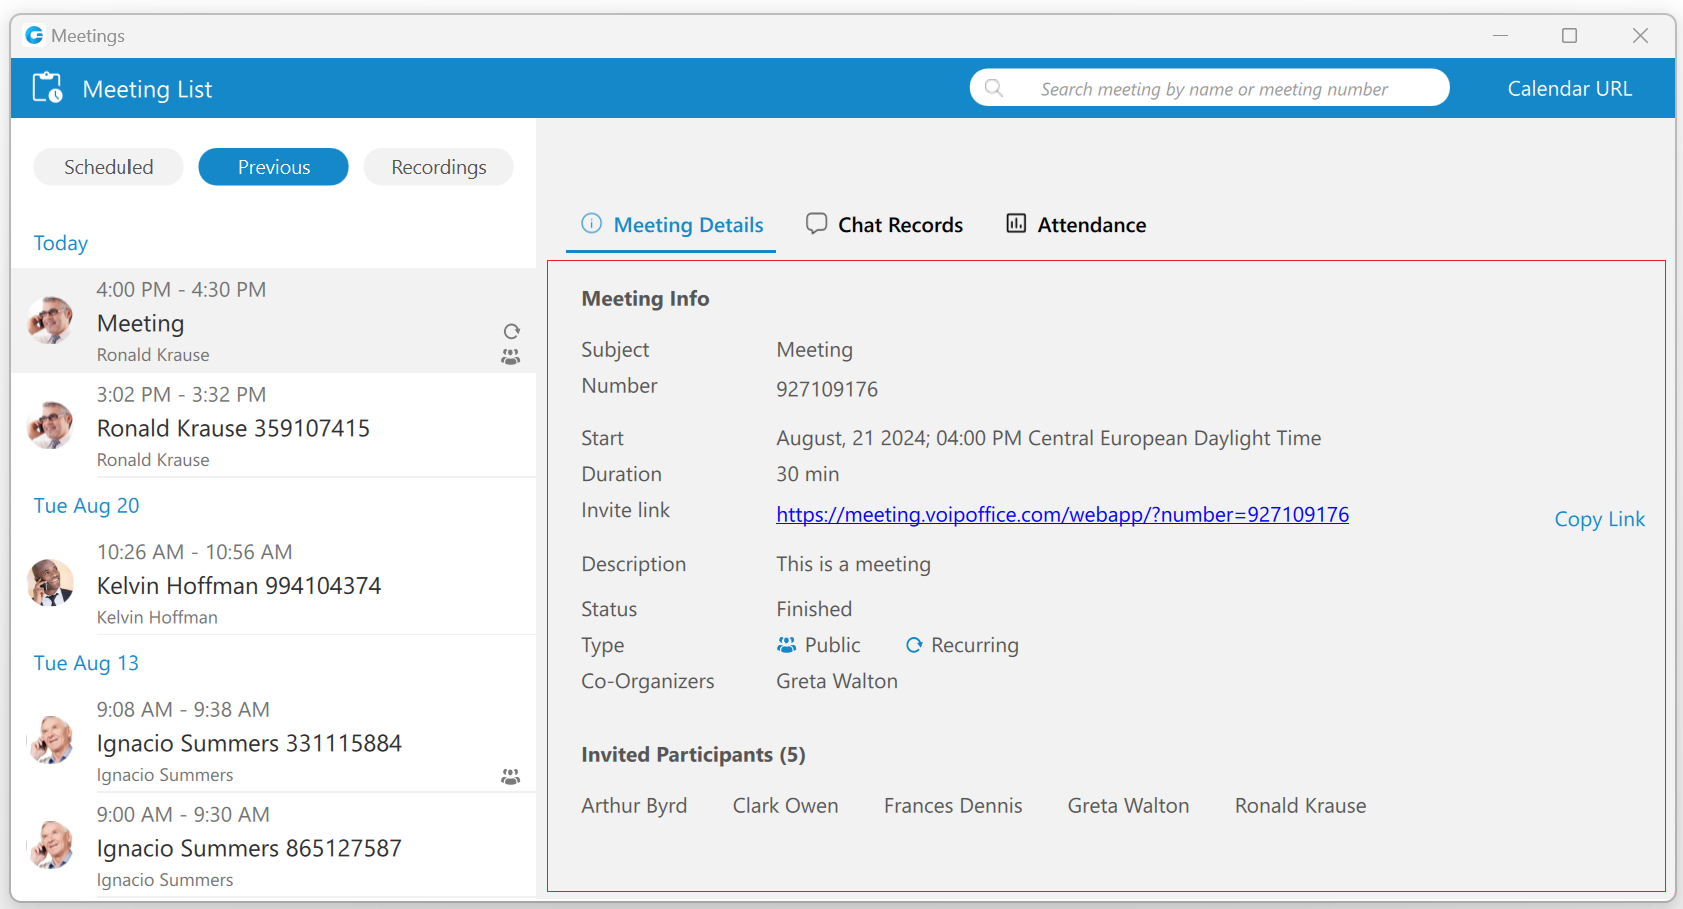
The Copy button allows the user to copy meeting. Pressing it will open the Schedule meeting window with copied meeting details.
Only the meeting organizer and Co-Organizers can copy the meeting.
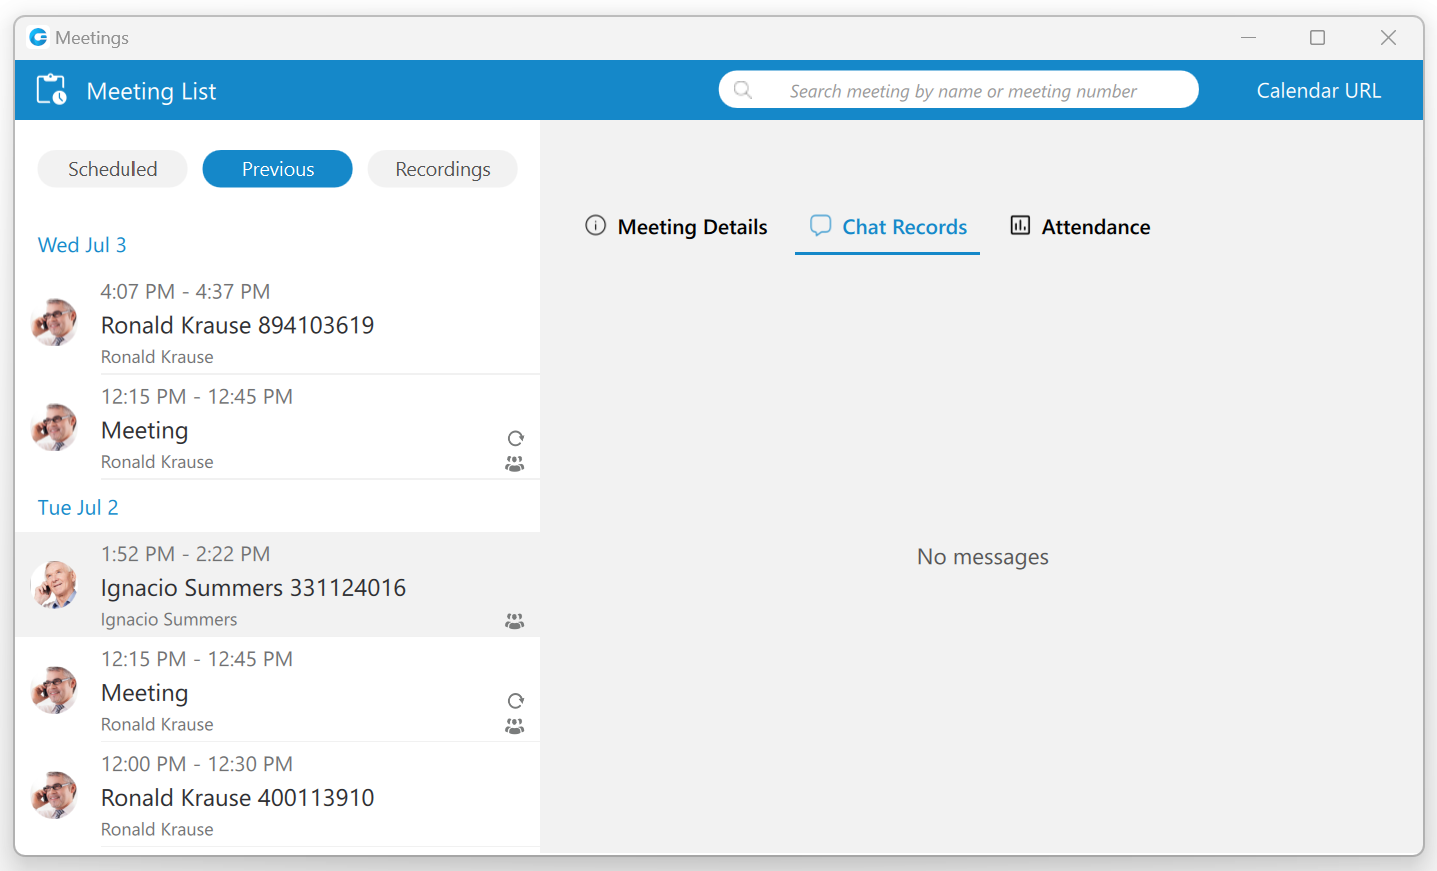
¶ Chat Records
The Chat Records tab displays all chat messages exchanged during the meeting, which can be helpful when something important is shared.
¶ Meeting Attendance Report
The meeting attendance report gives information about the meeting and is available only for finished meetings. To see it, please navigate to the Meeting List window, click on the Previous tab, and select the Attendance tab on the right side of the window.
After selecting it, the following information will be displayed:
- Meeting Name
- Participants
- Start - End Time
- Duration
- Average attendance
- Participants Engagements
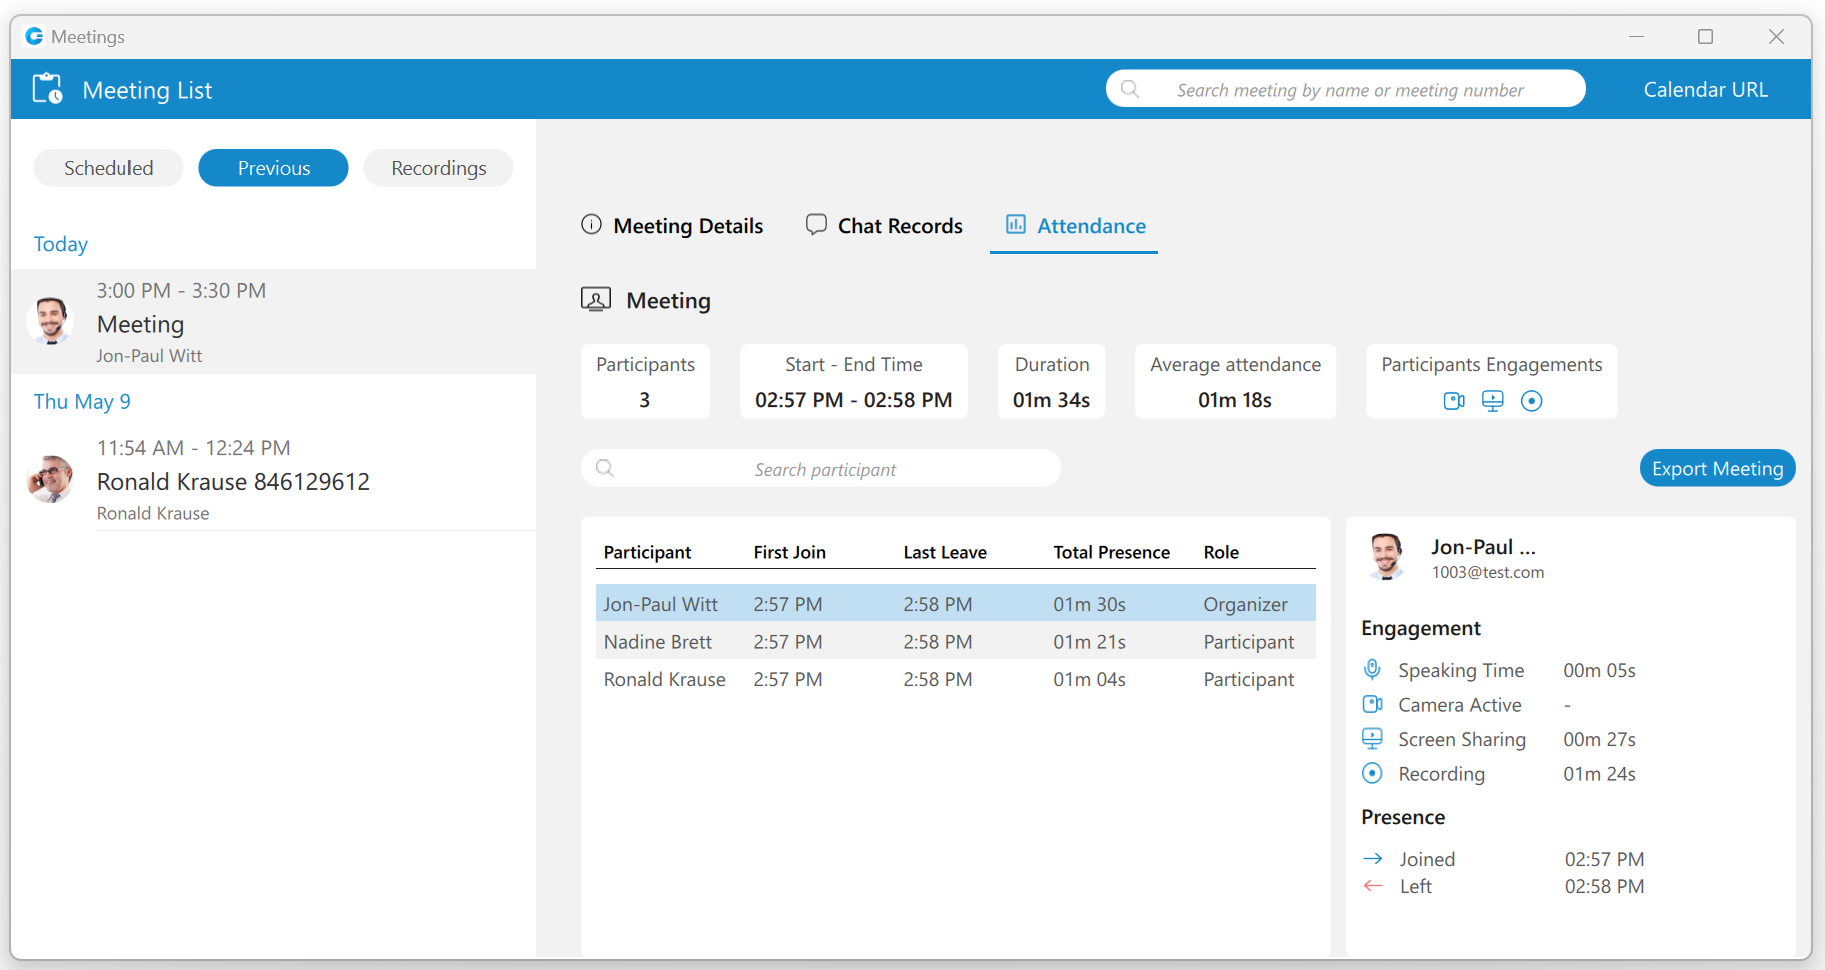
The search field and the Export Meeting button are located below the info section. The search field allows for the filtering of participants, and the Export Meeting button can be used to create a CSV report containing information about the participants' engagement. The report should distinguish between participants who joined via audio-only, video, or both, offering insights into different modes of engagement.
And finally, below the search field is the list of participants who attended the meeting. Selecting one of them will display information about their Engagement and Presence.
¶ Recordings Tab
Under the Recordings tab, all meetings for which recordings can be converted or have already been converted can be found.
The user can access recordings through the Meeting window by pressing the Recordings list icon or the Recordings tab within the Meeting list window.
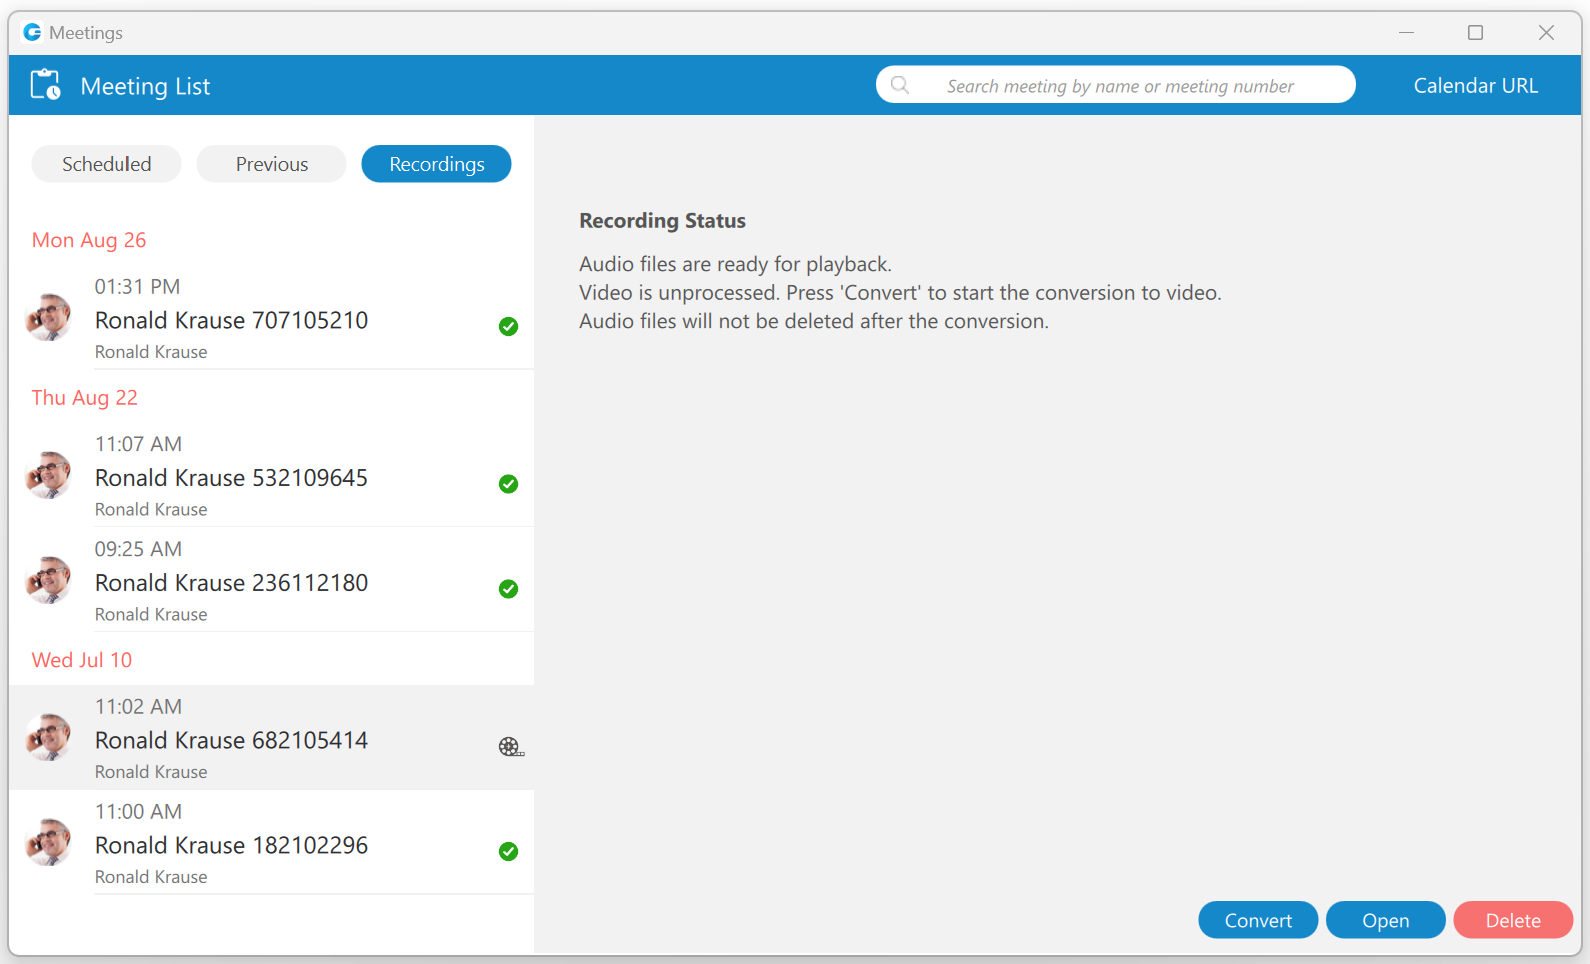
Depending on the recording status, the user will be presented with different button options.
The following list shows the meaning of those buttons:
- Convert button: Allows the user to convert the meeting record so it can be played.
- Play button: Allows the user to play the meeting.
- Open button: Allows the user to open the recording location on the computer.
- Delete button: Allows the user to delete the recording.
¶ Meeting Interface
The meeting interface contains various options that can be used during a meeting.
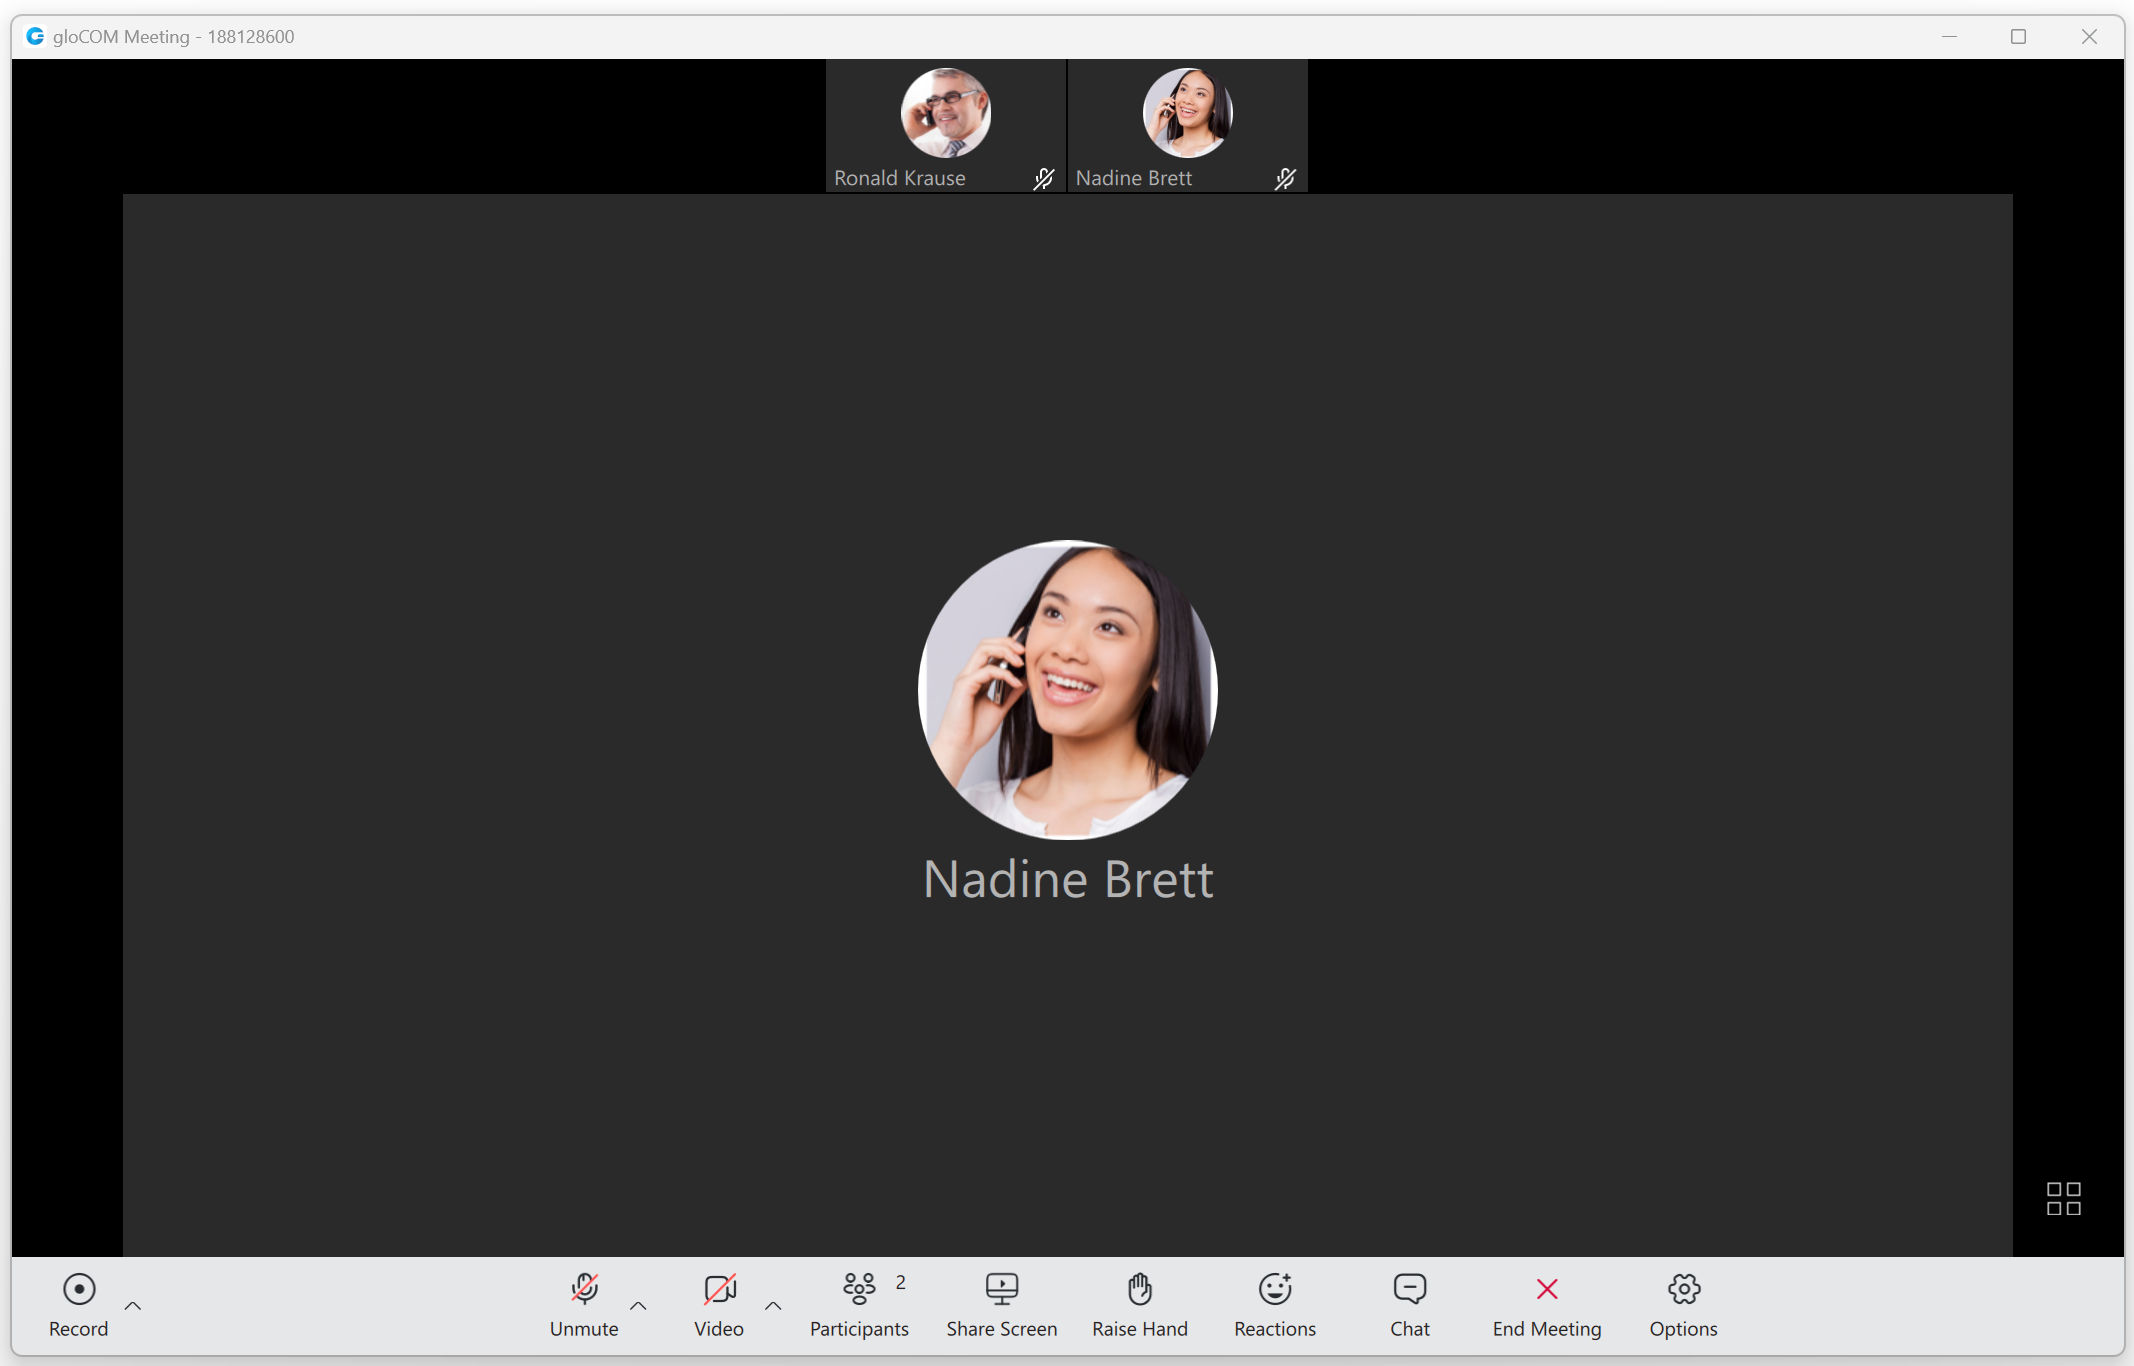
The meeting interface consists of:
- Meeting Layout: Allows users to change the participants' layout during a meeting by clicking on the Speaker/Grid layout button at the bottom right corner of the layout.
- Record: Records audio, video, chat history, and screen sharing on a computer.
- Mute/Unmute: Allows users to mute/unmute their microphone.
- Video: Allows users to turn on/off their camera.
- Participants: Allows users to see the list of participants and invite new ones. If someone is missing, they can be re-invited. A new invite message to join the meeting will be sent to the invitees.
- Share Screen: Allows users to share their screen.
- Raise Hand: Allows users to raise their hands.
- Reactions: Allows users to send reactions.
- Chat: Open the chat window. The meeting window will expand with the chat on the right, where users can exchange messages during a meeting..
- End/Leave Meeting: Allows users to end/ leave a meeting. Only the organizer and co-organizer can end a meeting.
- Options: Shows additional options for screen sharing, video, participants, and the meeting.
¶ Meeting Layout
Users are able to change the participants' layout during a meeting by clicking on the Speaker/Grid layout button at the bottom right corner of the layout. They can switch between the Speaker and Grid layouts. The Speaker layout focuses on one video stream, either the person currently speaking or the one the user pins. It is also a default view when a screen-sharing session is active.

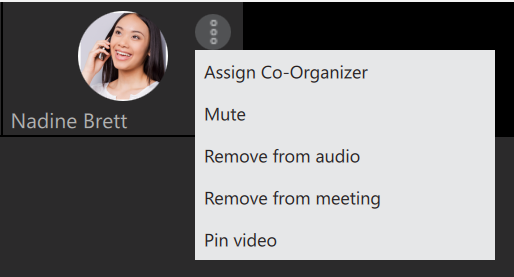
The three dots button in the upper right corner of the participant's video contains the following options:
- Assign/Remove Co-organizer: Allows an organizer and co-organizer to assign other participants as co-organizers. (Only the meeting organizer can remove co-organizer privileges.)
- Mute: Allows an organizer and co-organizer to mute other participants.
- Remove from audio: Allows an organizer and co-organizer to remove other participants from audio.
- Remove from meeting: Allows an organizer and co-organizer to remove other participants from the meeting.
- Pin/Unpin video: Allows users to pin/unpin the participant's video. It sets their video as the main video on display for the viewer.
The Grid layout shows participants in the grid and automatically changes the number of video streams based on the number of participants.
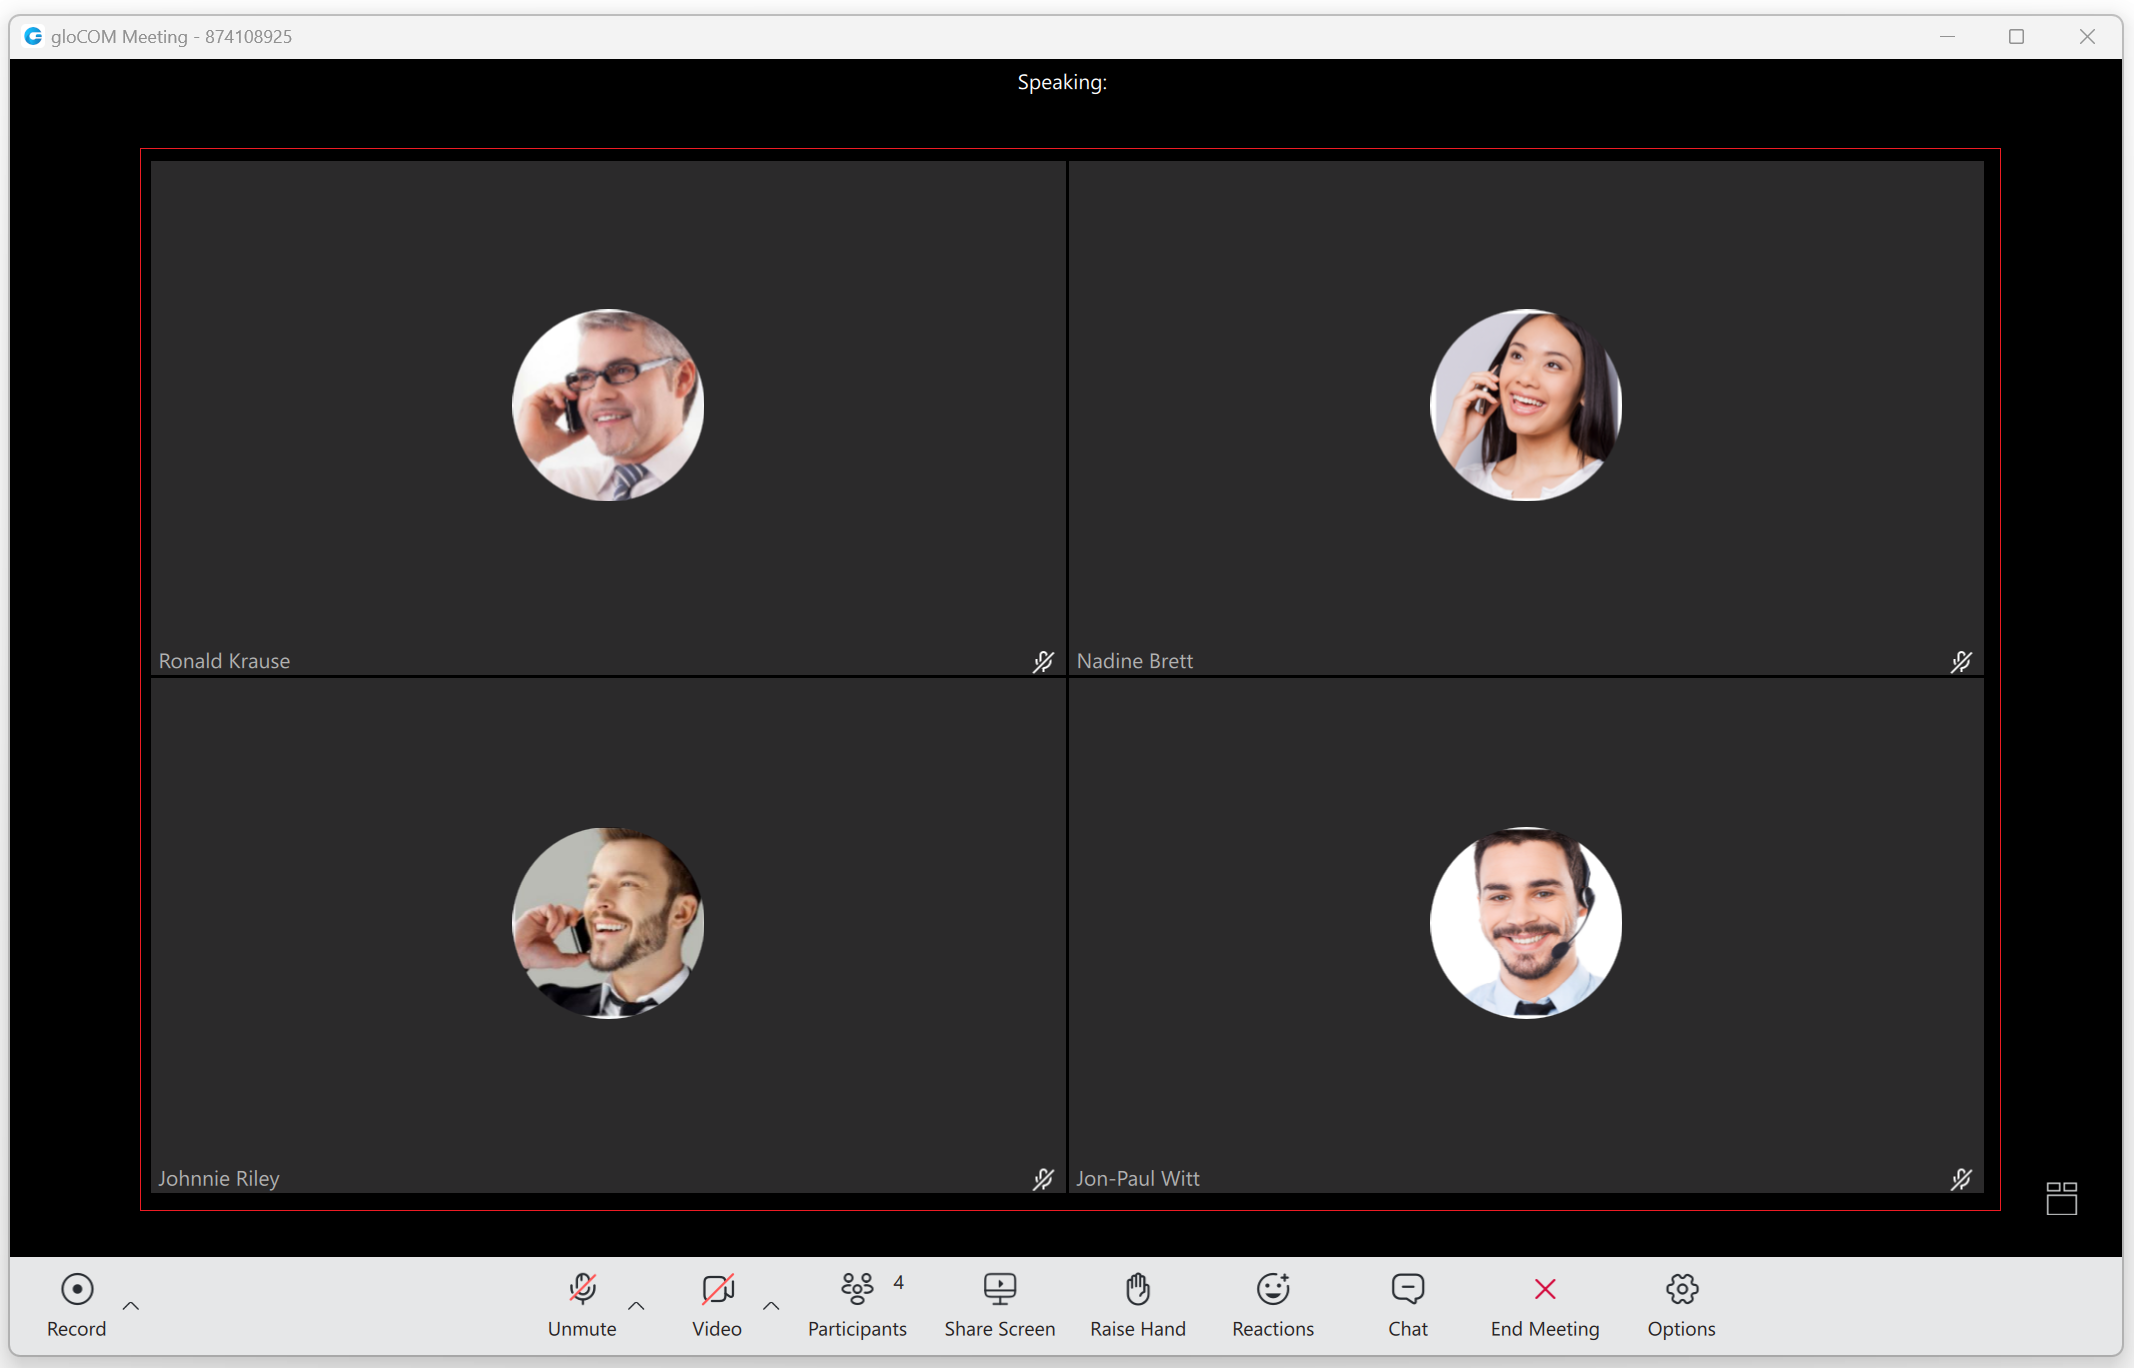
It follows the following conditions:
- Up to 45 participants = grid size 12 (user + 11)
- 46 - 60 participants = grid size 9 (user + 8)
- Over 60 participants = grid size 6 (user + 5)
Participants will be sorted to have those who spoke last be among the first video streams.
The Meeting is now able to run 100 active video participants in one meeting.
¶ Meeting Recordings
The Meeting Recordings feature allows audio, video, chat history, and screen sharing to be recorded during meetings. While recording, the application stores the necessary information on a computer to generate a recording after the meeting ends. This way, the meeting can be held without fear that the converting process will interfere with the ongoing meeting.
To start recording, click the Record button in the far left corner of the toolbar at the bottom of the window.

Once clicked, the button will change its look. Two buttons, Pause and Stop, will appear, allowing users to pause and stop recording. To record their audio, users must use the option "Join by computer" otherwise, it will not be recorded.

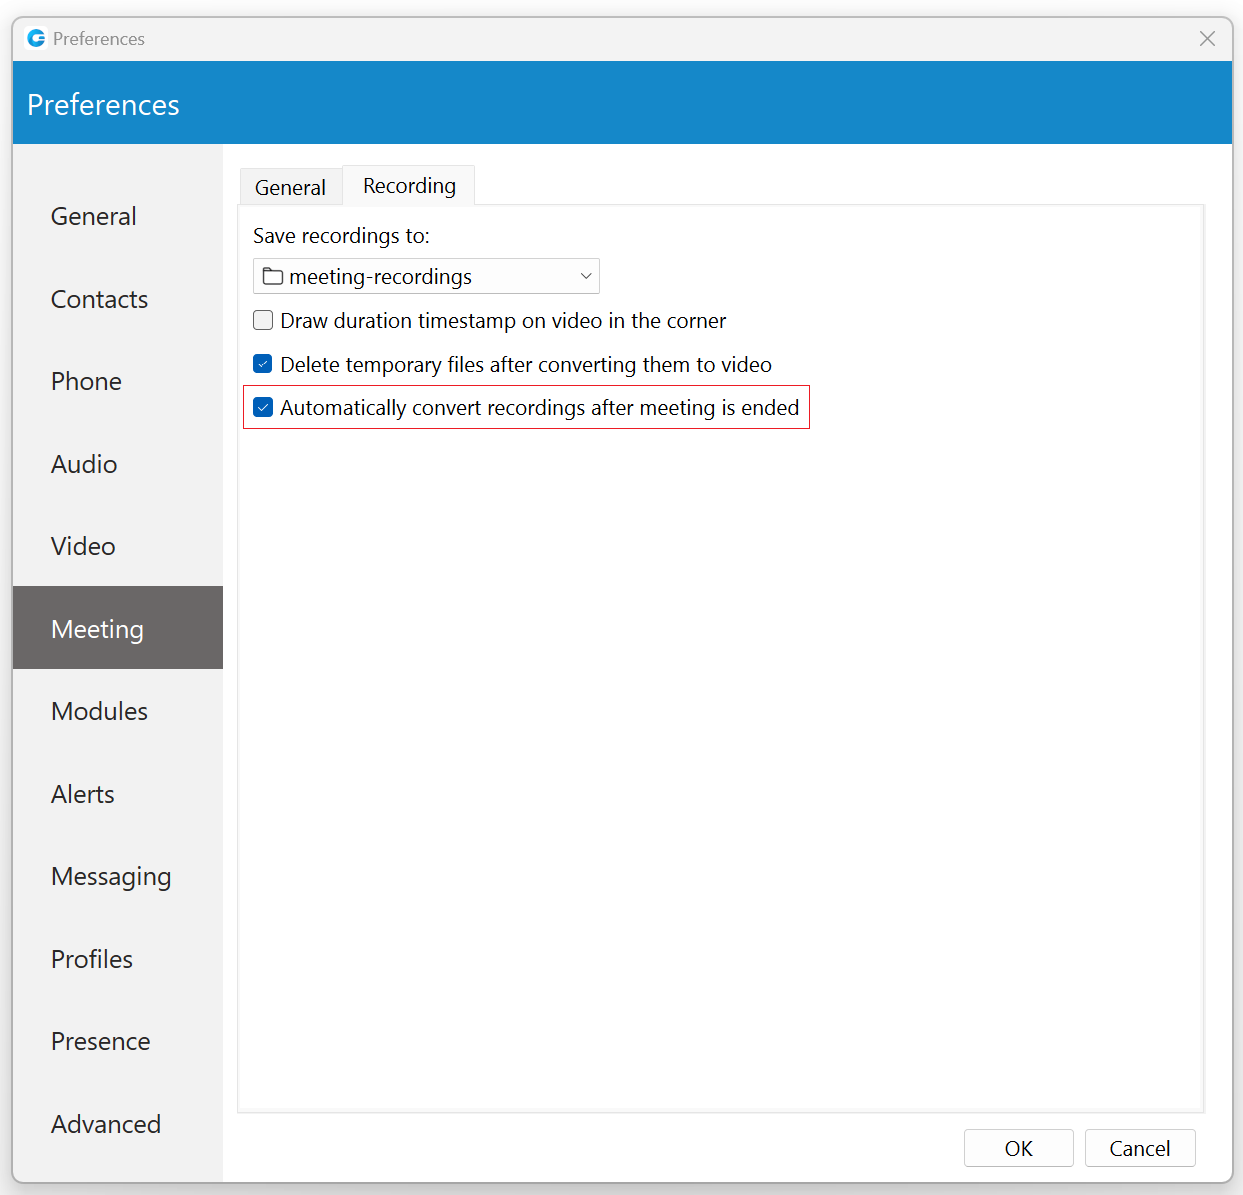
The arrow next to the Record button lets users choose whether to record all services or just audio. Selecting the "Recording settings" option will open options related to recordings. Here, users can choose where to save their recordings. They can also decide whether to draw the duration timestamp on video, delete temporary files after converting them to video, or automatically convert recordings after the meeting ends.
![]()
Converting recordings requires significant computer resources.
Generated recordings can be found under the Recordings tab within the Meeting List window. After navigating to the Recordings tab and selecting the desired meeting from the list, the Recording Status will be displayed on the right side of the window. Depending on the recording status, the user will be presented with different button options.
The following list shows the meaning of those buttons:
- Convert button: Allows the user to convert the meeting record so it can be played.
- Play button: Allows the user to play the meeting.
- Open button: Allows the user to open the recording location on the computer.
- Delete button: Allows the user to delete the recording.
By default, every meeting recording will be converted automatically. To turn off the automatic conversion, please navigate to Preferences -> Meeting -> Recording and uncheck the following option: "Automatically convert recordings after meeting is ended".
¶ Configurable Recording Reminder Option
The Recording reminder feature reminds the user to record an important meeting.
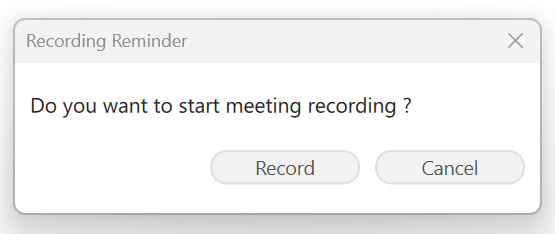
To record a meeting, the user should press the Record button in the pop-up window, and the recording will start. The user should also choose the Cancel button if they do not want to record that meeting.
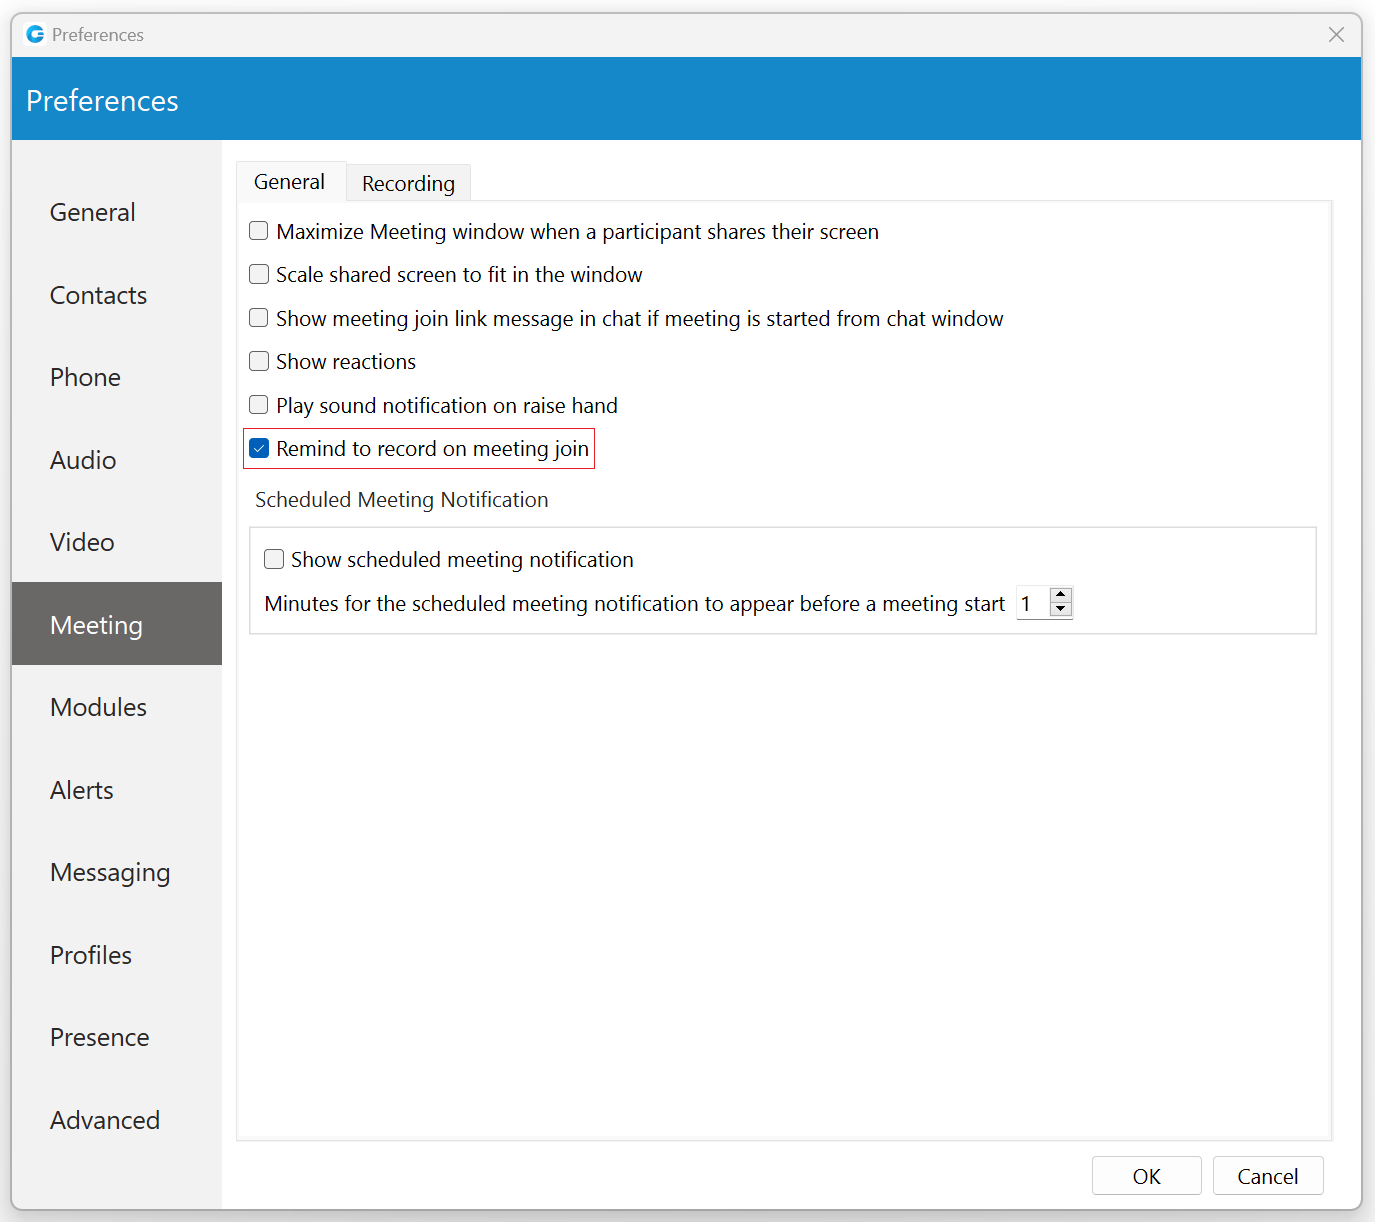
By default, this option is disabled.
To enable this option, please navigate to Preferences -> Meeting -> General and check the checkbox next to the "Remind to record on meeting join" option. When enabled, any time a user creates or joins a meeting, a pop-up window appears asking if the user wants to record the meeting.
¶ Save Chat History in Meeting Recordings
Like audio and video files, chat history is now included in the recording output as a text file since it is an important part of the conference. This file will contain all data, such as links, emojis, text messages, etc, that participants exchange through the meeting chat.
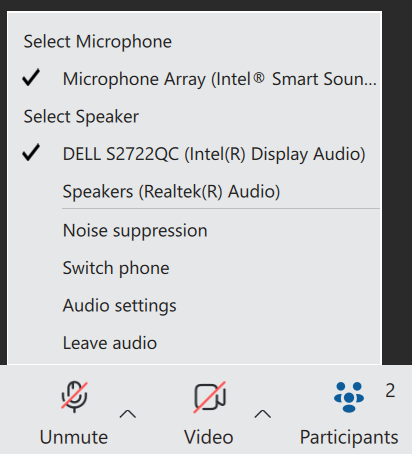
¶ Audio
Here, users can mute/unmute themselves, select a microphone and speaker devices, reduce background noise, switch phones, leave audio, and open audio settings related to audio devices.
In addition, they can mute themselves by pressing the Mute button. If the user is currently muted and attempts to speak, a prompt will appear to inform them that they are muted.
![]()
"You are muted" notification will appear when a user attempts to speak while muted.
¶ Video
Here, users can turn on/off their camera, blur their background, choose their virtual background, and open video settings related to the meeting.
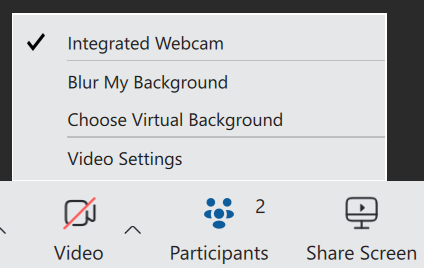
In addition, they can turn on/of their camera by pressing the Video button.
![]()
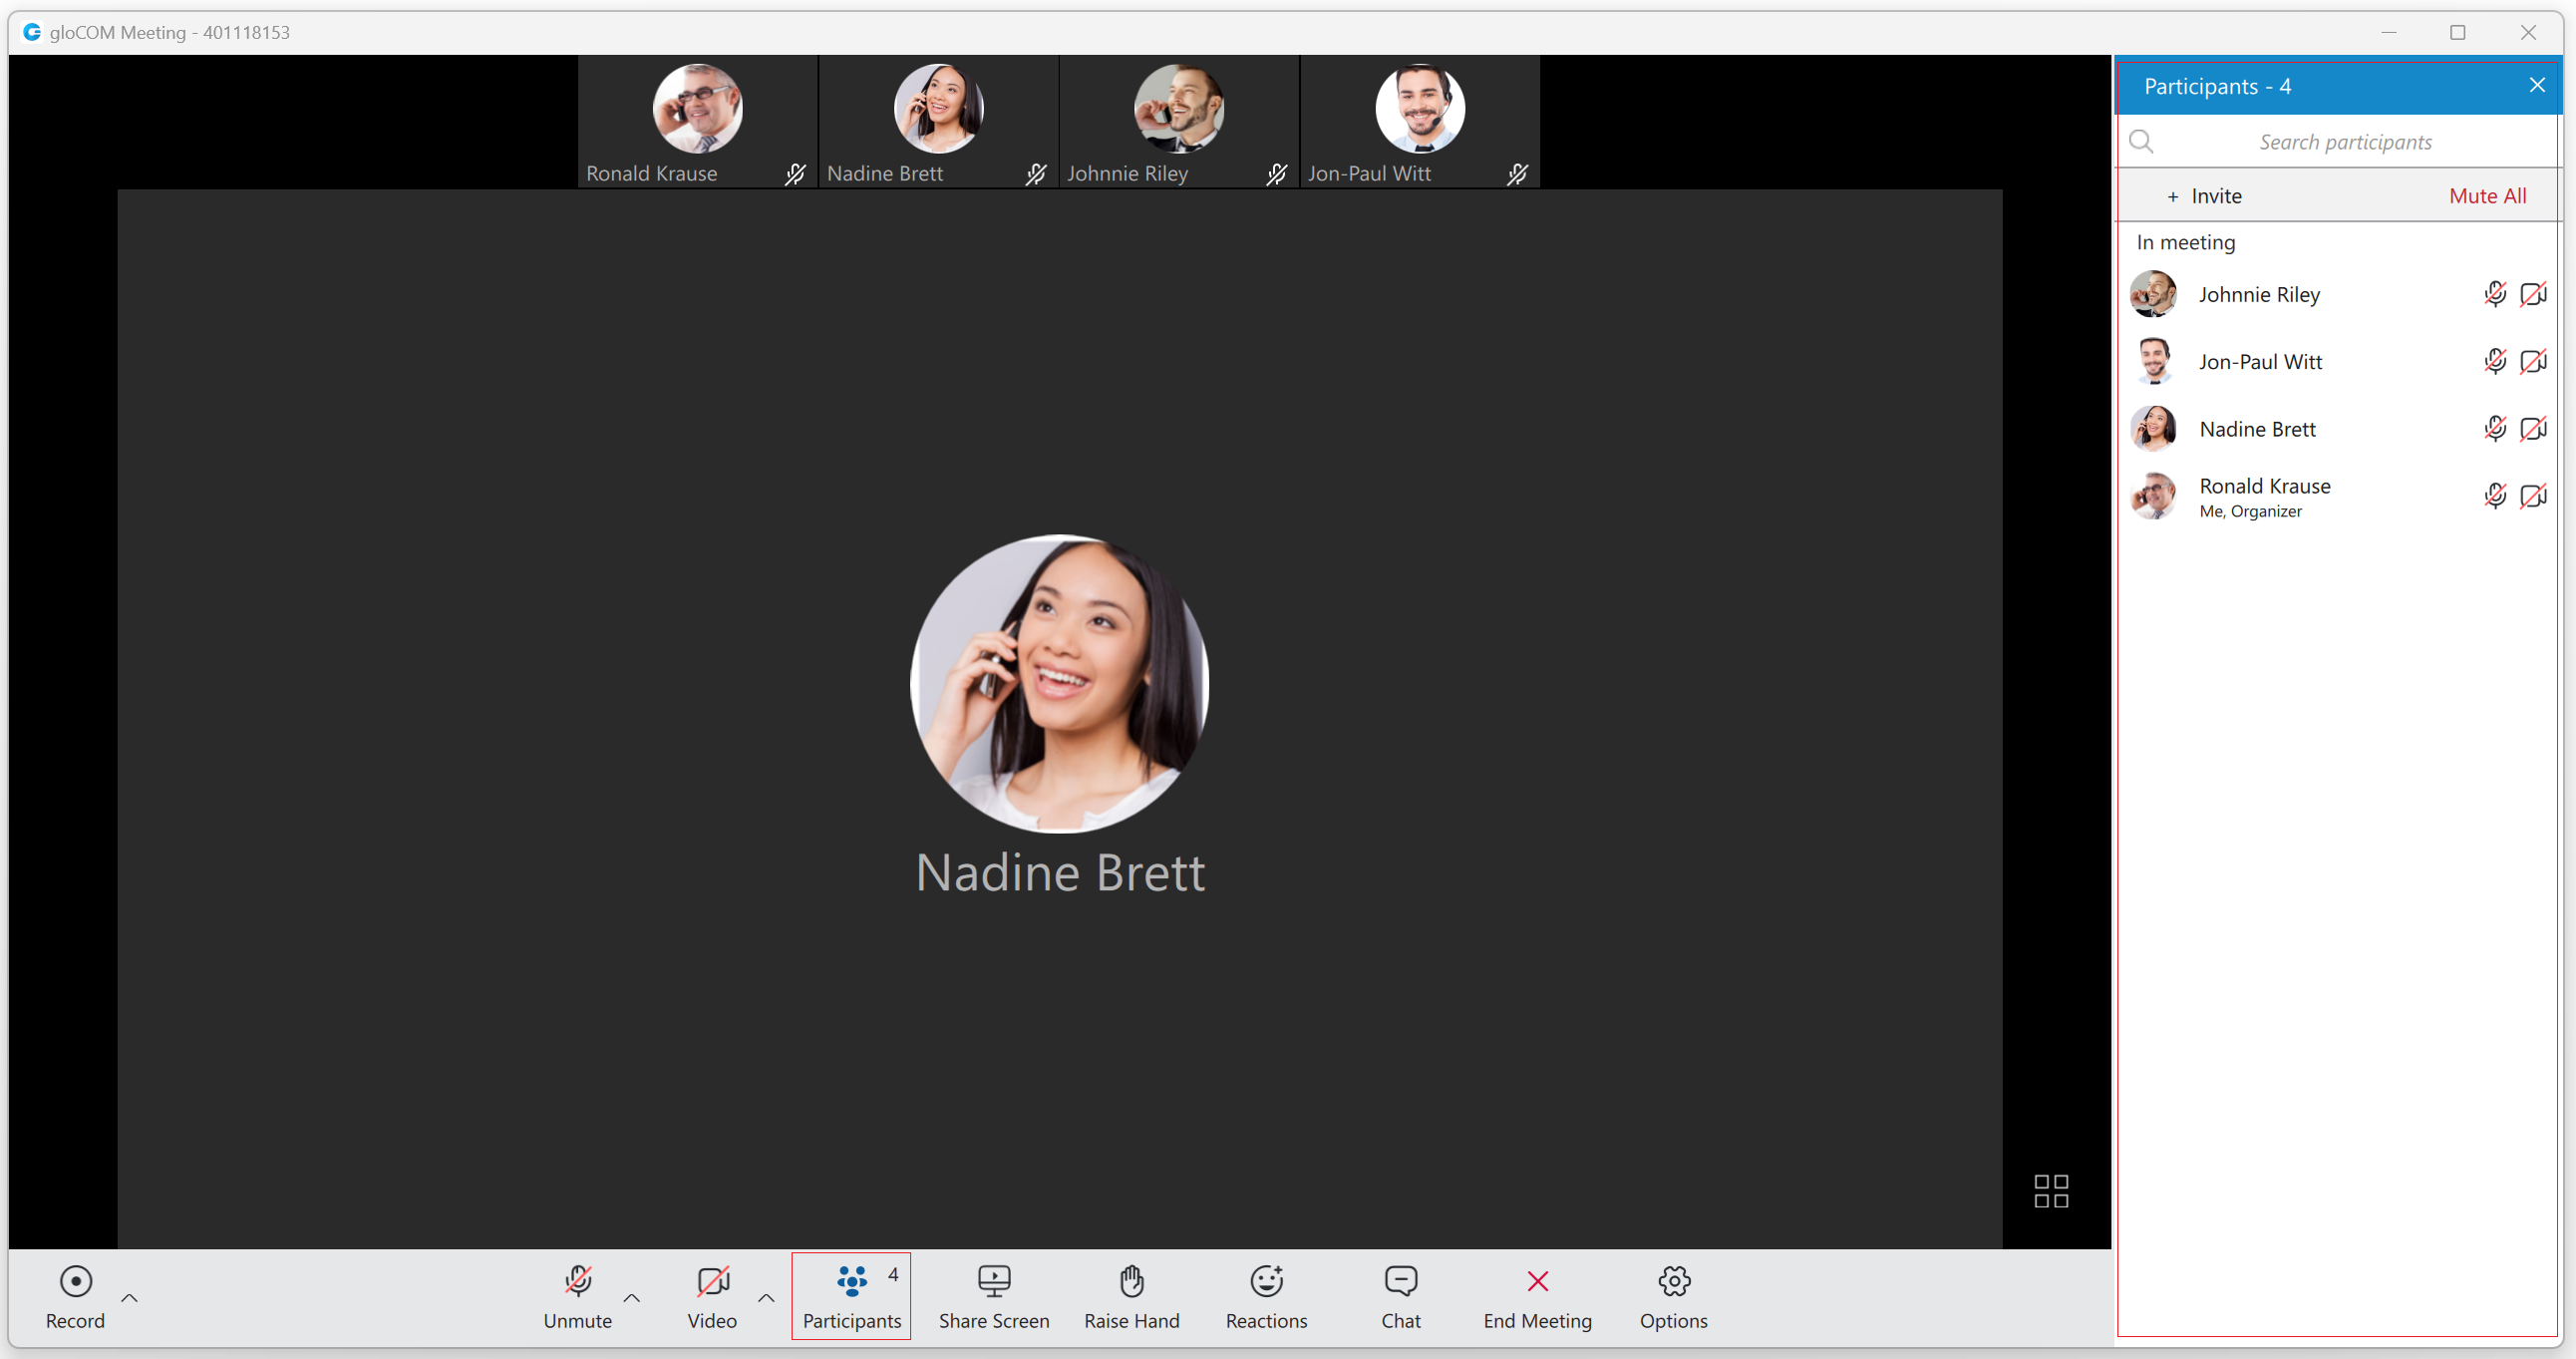
¶ Participants List
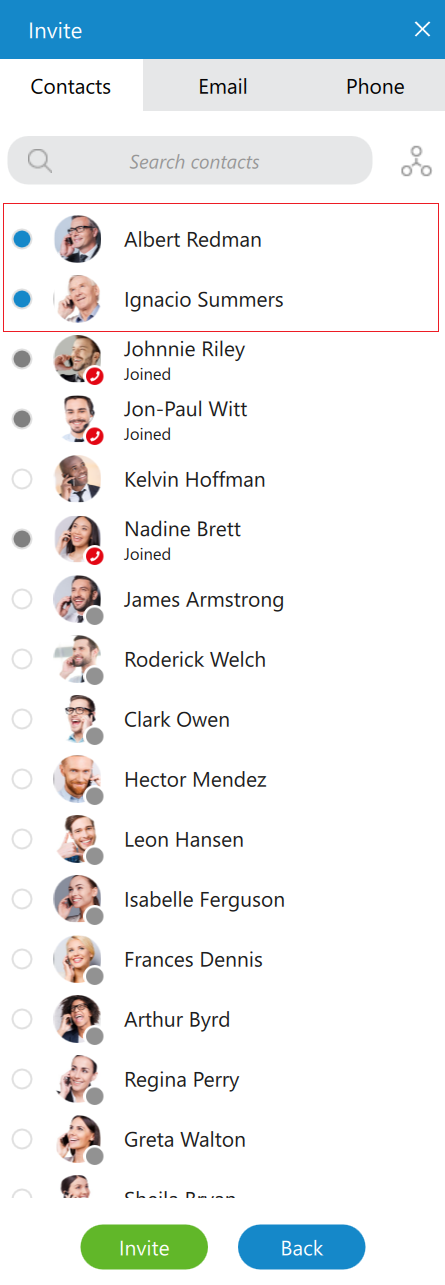
Clicking this button displays a list of all meeting participants. Participants can be filtered through this list, and new ones can be invited using a contacts list, email, and phone.
Inviting new participants via phone cannot be done if users have joined their audio by computer.
When selecting new participants is finished, click the Invite button at the bottom of the list to invite them. Clicking the Back button cancels the invitation and displays the participants' list.
Organizers and co-organizers can mute all participants by pressing the Mute All button.
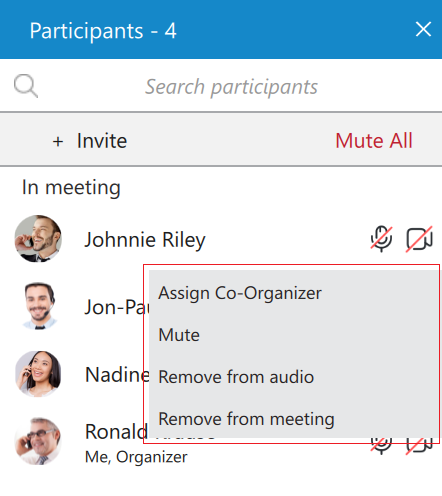
An organizer and co-organizer can assign other participants as co-organizers and mute them. They can also remove other participants from the audio and from the meeting. All this can be done by clicking on the participant within the list and selecting the desired option from the drop-down menu.
Only a meeting organizer can remove co-organizer privileges.
All participants can mute/unmute themselves and turn on/off their cameras through this list.
Participants can be re-invited to the meeting if they have left it.
¶ Avatars for External Participants
Web and mobile users can now upload their avatar picture, which will be visible to all participants during a meeting.
For external users, uploaded avatars from the web client will be displayed on all other participants' clients (desktop, web, mobile).
An external user refers to any participant who joins the meeting via mobile, web, or a gloCOM desktop client connected to a different PBX.
![]()
If the user has the gloCOM extension, the corresponding gloCOM (desktop) user avatar will be displayed for desktop app users, not the uploaded avatar from the web client. However, uploaded avatars from web clients will be displayed for web and mobile participants.
¶ Share Screen
Users can click the Share Screen button to broadcast their screen to the meeting participants.
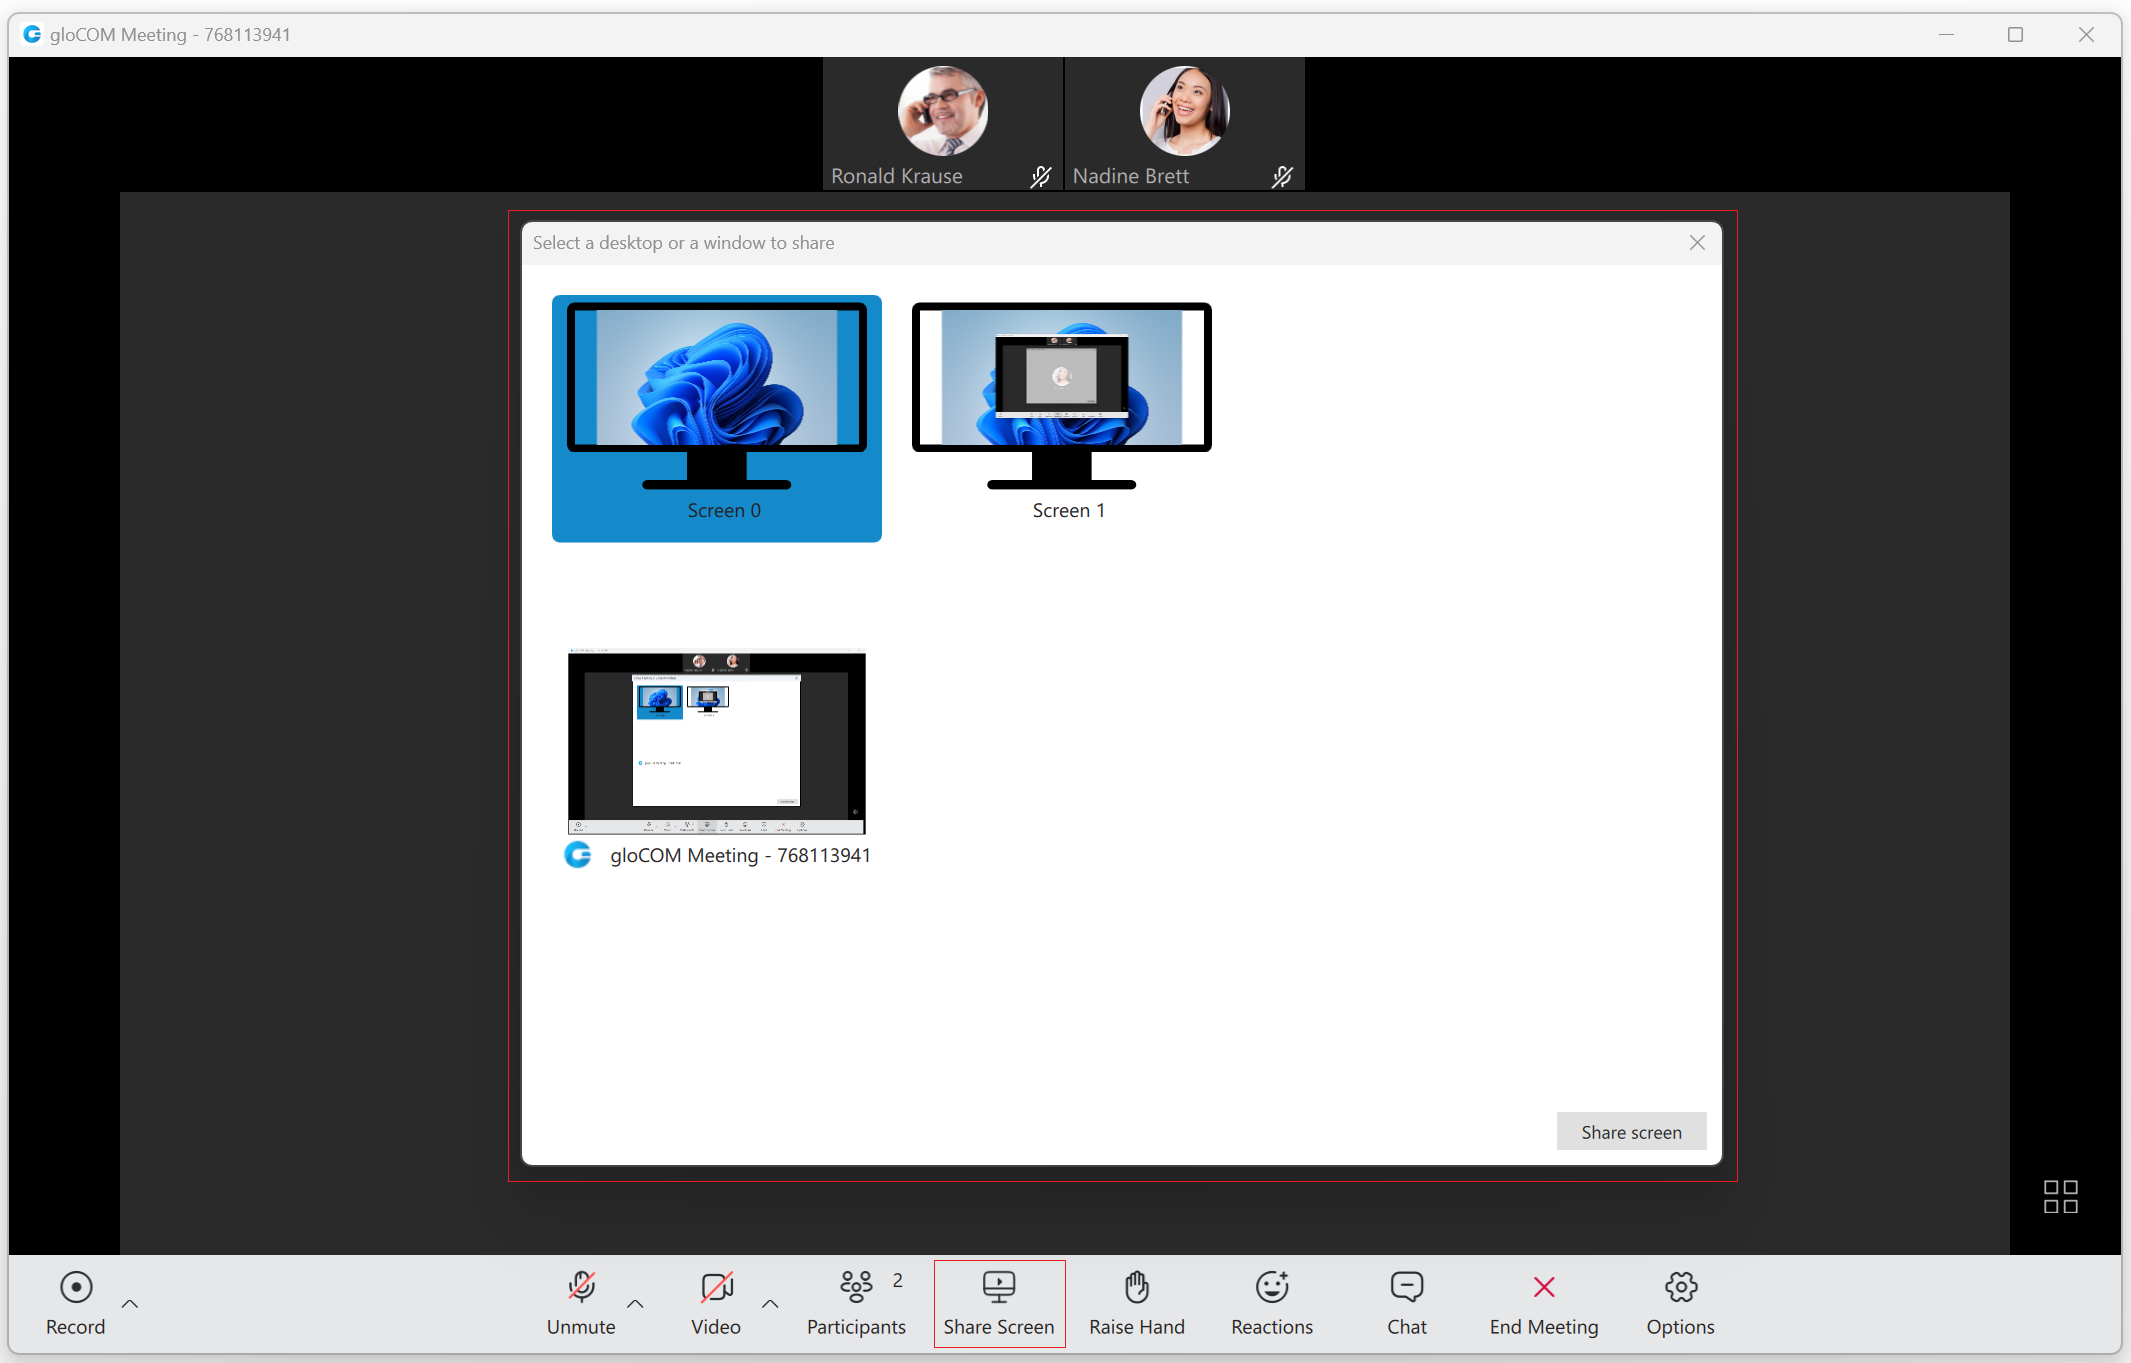
After clicking the Share Screen button, several screen-sharing options will be displayed.
Options are as follows:
- Whole screen: Share everything on the screen.
- Select a window: Only the selected window will be shared. (e.g., Google Chrome)
Once the desired area has been selected, click on the Share screen button to start screen sharing. When the screen sharing is started, the context bar with the previously mentioned options will appear.

Besides the options mentioned before, users have the ability to:
- Start a New Share: This option allows users to select a new area for screen sharing without stopping active sharing.
- Pause sharing: Momentarily pause screen sharing.
- Stop sharing: Permanently stop screen sharing.
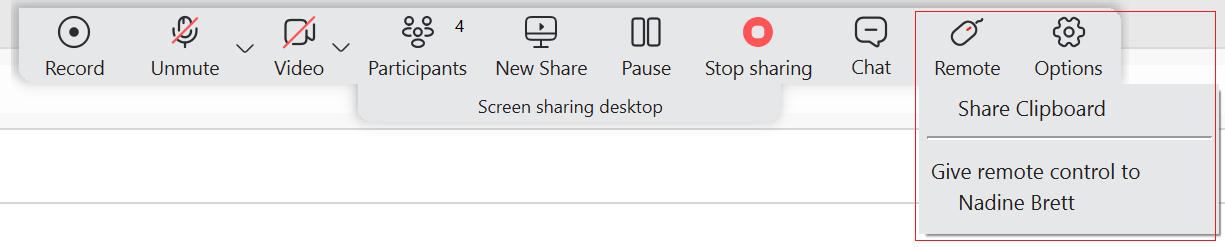
- Remote control: This option allows users to give other participants control of their computer. Once control is given, the other party will be able to use the user's computer as their own, e.g., move the mouse and input from the keyboard. Furthermore, clipboard sharing can also be enabled/disabled, allowing the other side to copy the current clipboard text and paste it on the remote-control host while the remote control is active.
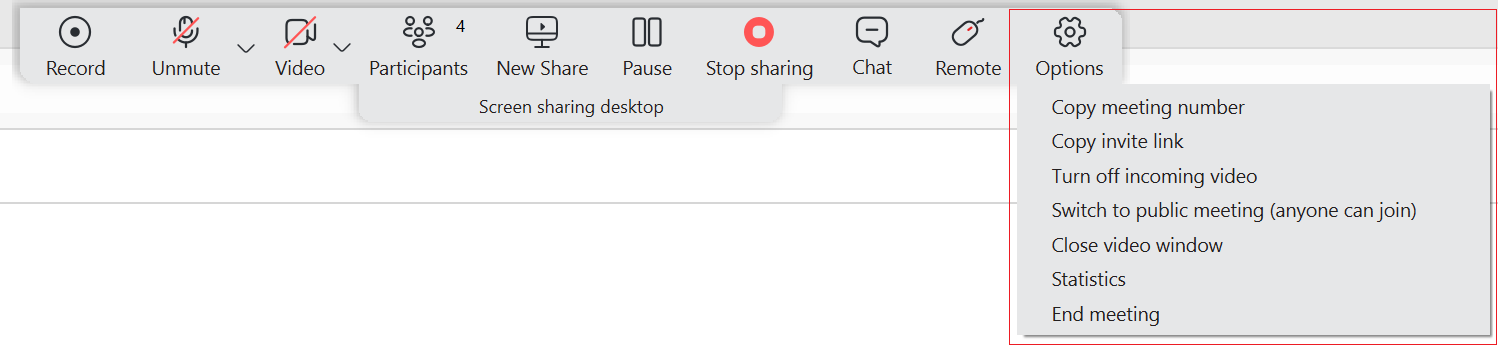
Under Options, the next options can be found as follows:
- Copy meeting number: Copies the meeting number.
- Copy invite link: Copies the invite link.
- Turn off/on incoming videos: Turns off/on incoming videos.
- Switch to public meeting (anyone can join)/Make meeting private: Toggle meeting privacy between regular and private during an ongoing meeting. Only the organizer can toggle the meeting from private to public and public to private.
- Close video window/Show participant's video window: Close/show participant's video window.
- Statistics: Statistics provide the user with details about the network quality during the meeting. The statistics include metrics about Audio, Video, and Screensharing quality. Additionally, users can access the participants list and chat through this window.
- End/Leave meeting: End/Leave meeting can be done by selecting this option.
¶ Clipboard Sharing
To enable this option, a remote control must be activated. Selecting the Share Clipboard option will allow the other side to copy the current clipboard text and paste it on the remote-control host while the remote control is active. The presenter can disable clipboard sharing anytime by selecting the Share Clipboard option again.
The presenter who uses the web application can not give remote control or enable clipboard sharing (to web/desktop users). In other words, it is impossible to take control of someone's computer and access their clipboard if they are in a meeting using the web app.
Only presenters who use the desktop app can turn on/off remote control and clipboard sharing (to web/desktop users).
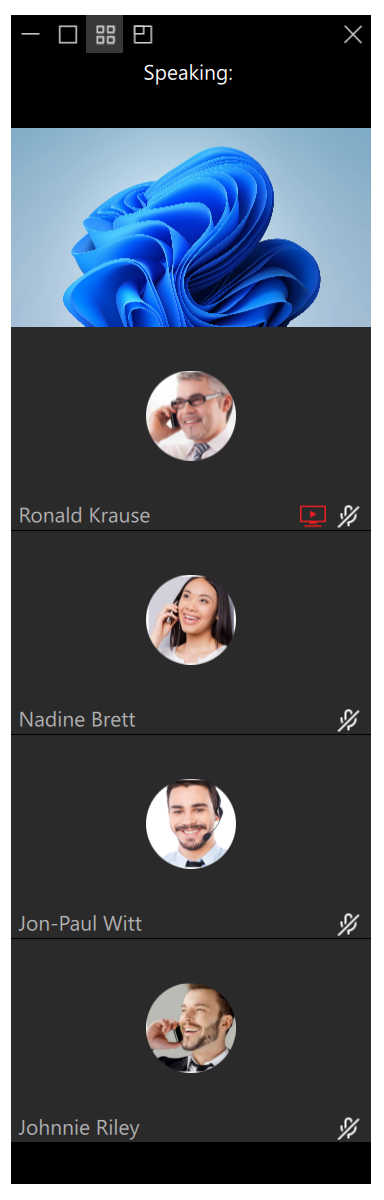
¶ Video Window
While the screen sharing is active, the video window appears on the presenter's side. It shows the current speaker and allows the presenter to adjust what will be displayed within the window. In addition to displaying the current speaker, the list of participants and the screen-sharing preview can also be displayed by clicking the Show list and Show screen sharing preview buttons in the window's upper left corner, respectively. If the presenter wants to minimize/close this window, they can click the minimize/close button in the window's upper left/right corner, respectively.
¶ Screen Sharing Notifications
¶ Notification on the Viewer's Side
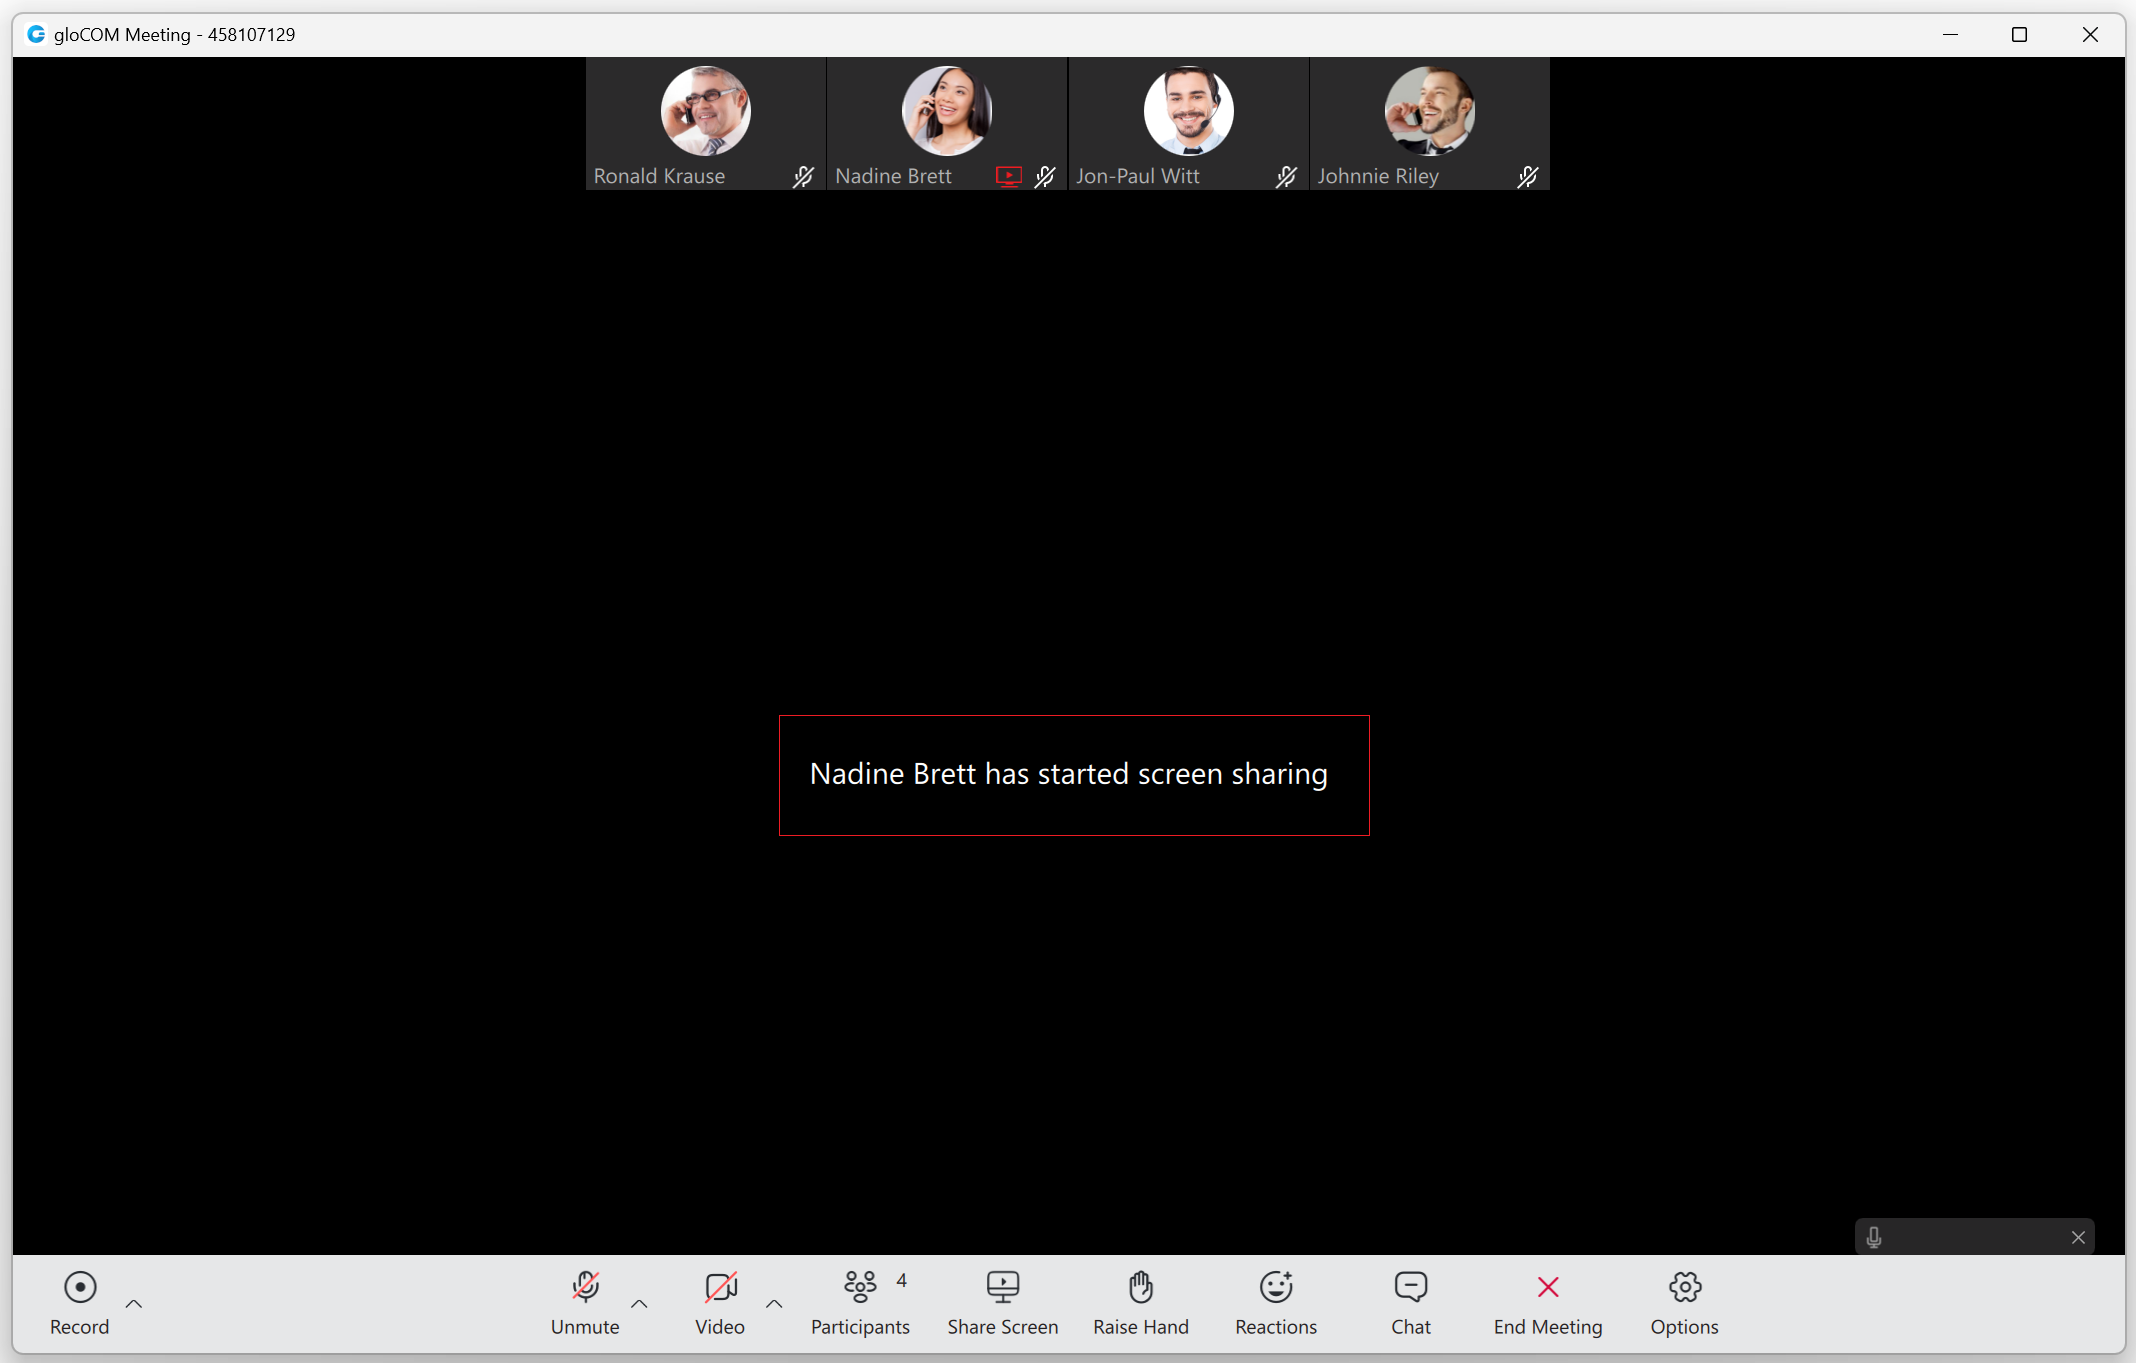
When a presenter starts screen sharing, instead of a black screen on the viewer's side, a message notifying that the screen sharing is about to start (for example, "Nadine Brett has started screen sharing") will be displayed.
¶ Notification on the Presenter's Side
When a presenter starts screen sharing, a notification message "Participants can now see your shared screen" pops up, notifying the presenter that others can see their shared screen. This way, the presenter knows if other participants can see their screen without asking them.

¶ Screen-sharing Pause Notification
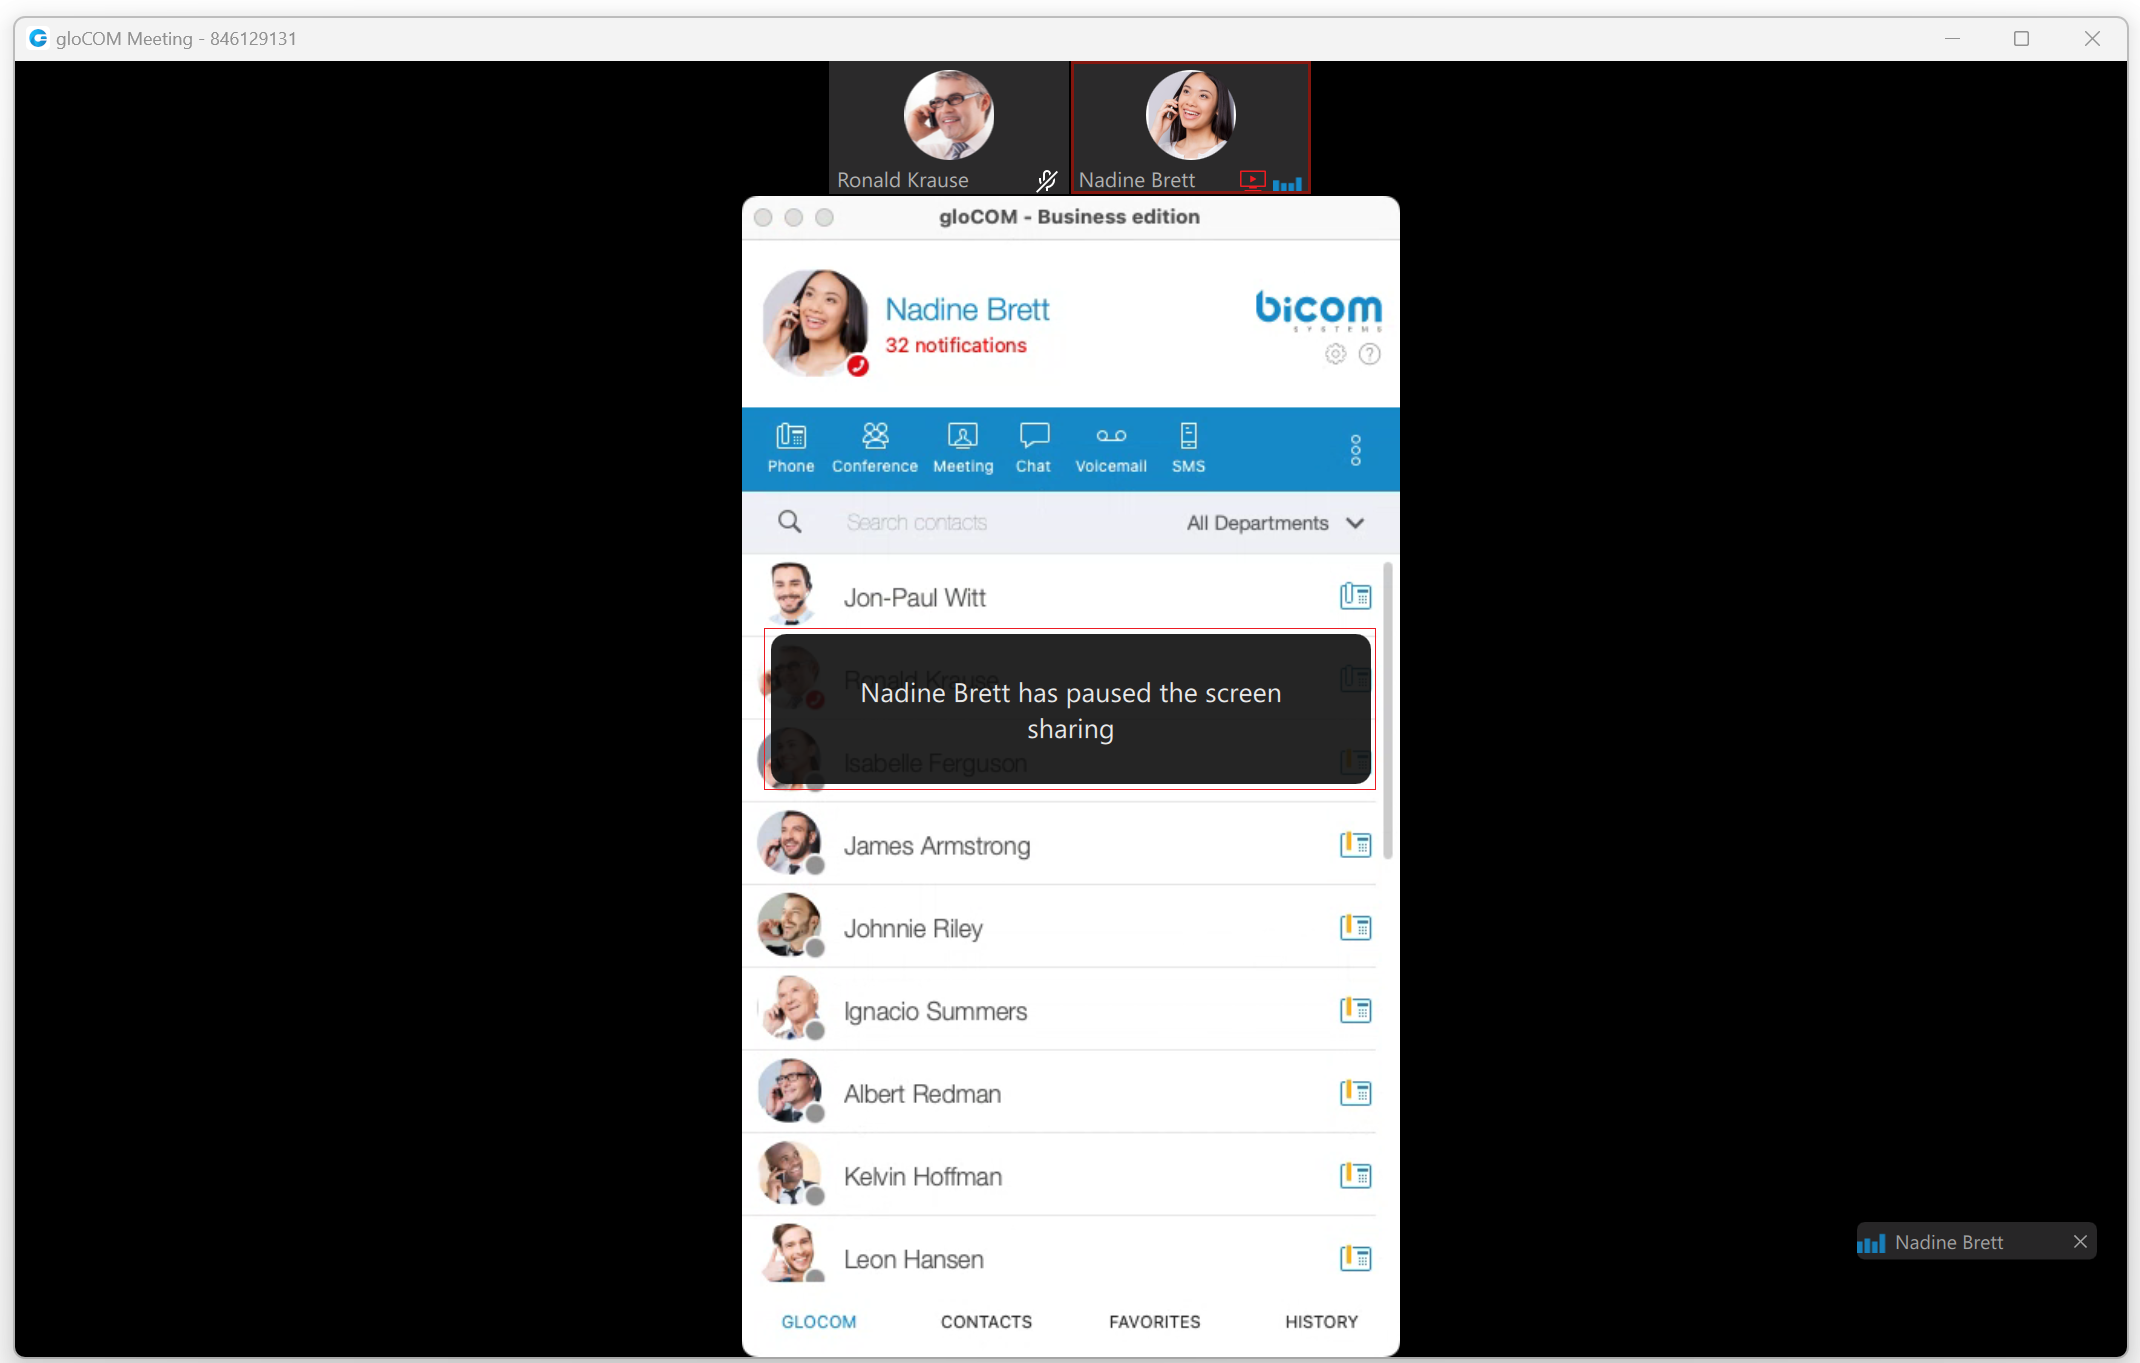
A screen-sharing pause notification will be displayed to all participants when the presenter pauses their screen-sharing during a meeting.
¶ Raise Hand
The Raise Hand feature is a straightforward option for catching a speaker's attention without interrupting them during a meeting. Users can access it from the main meeting toolbar.
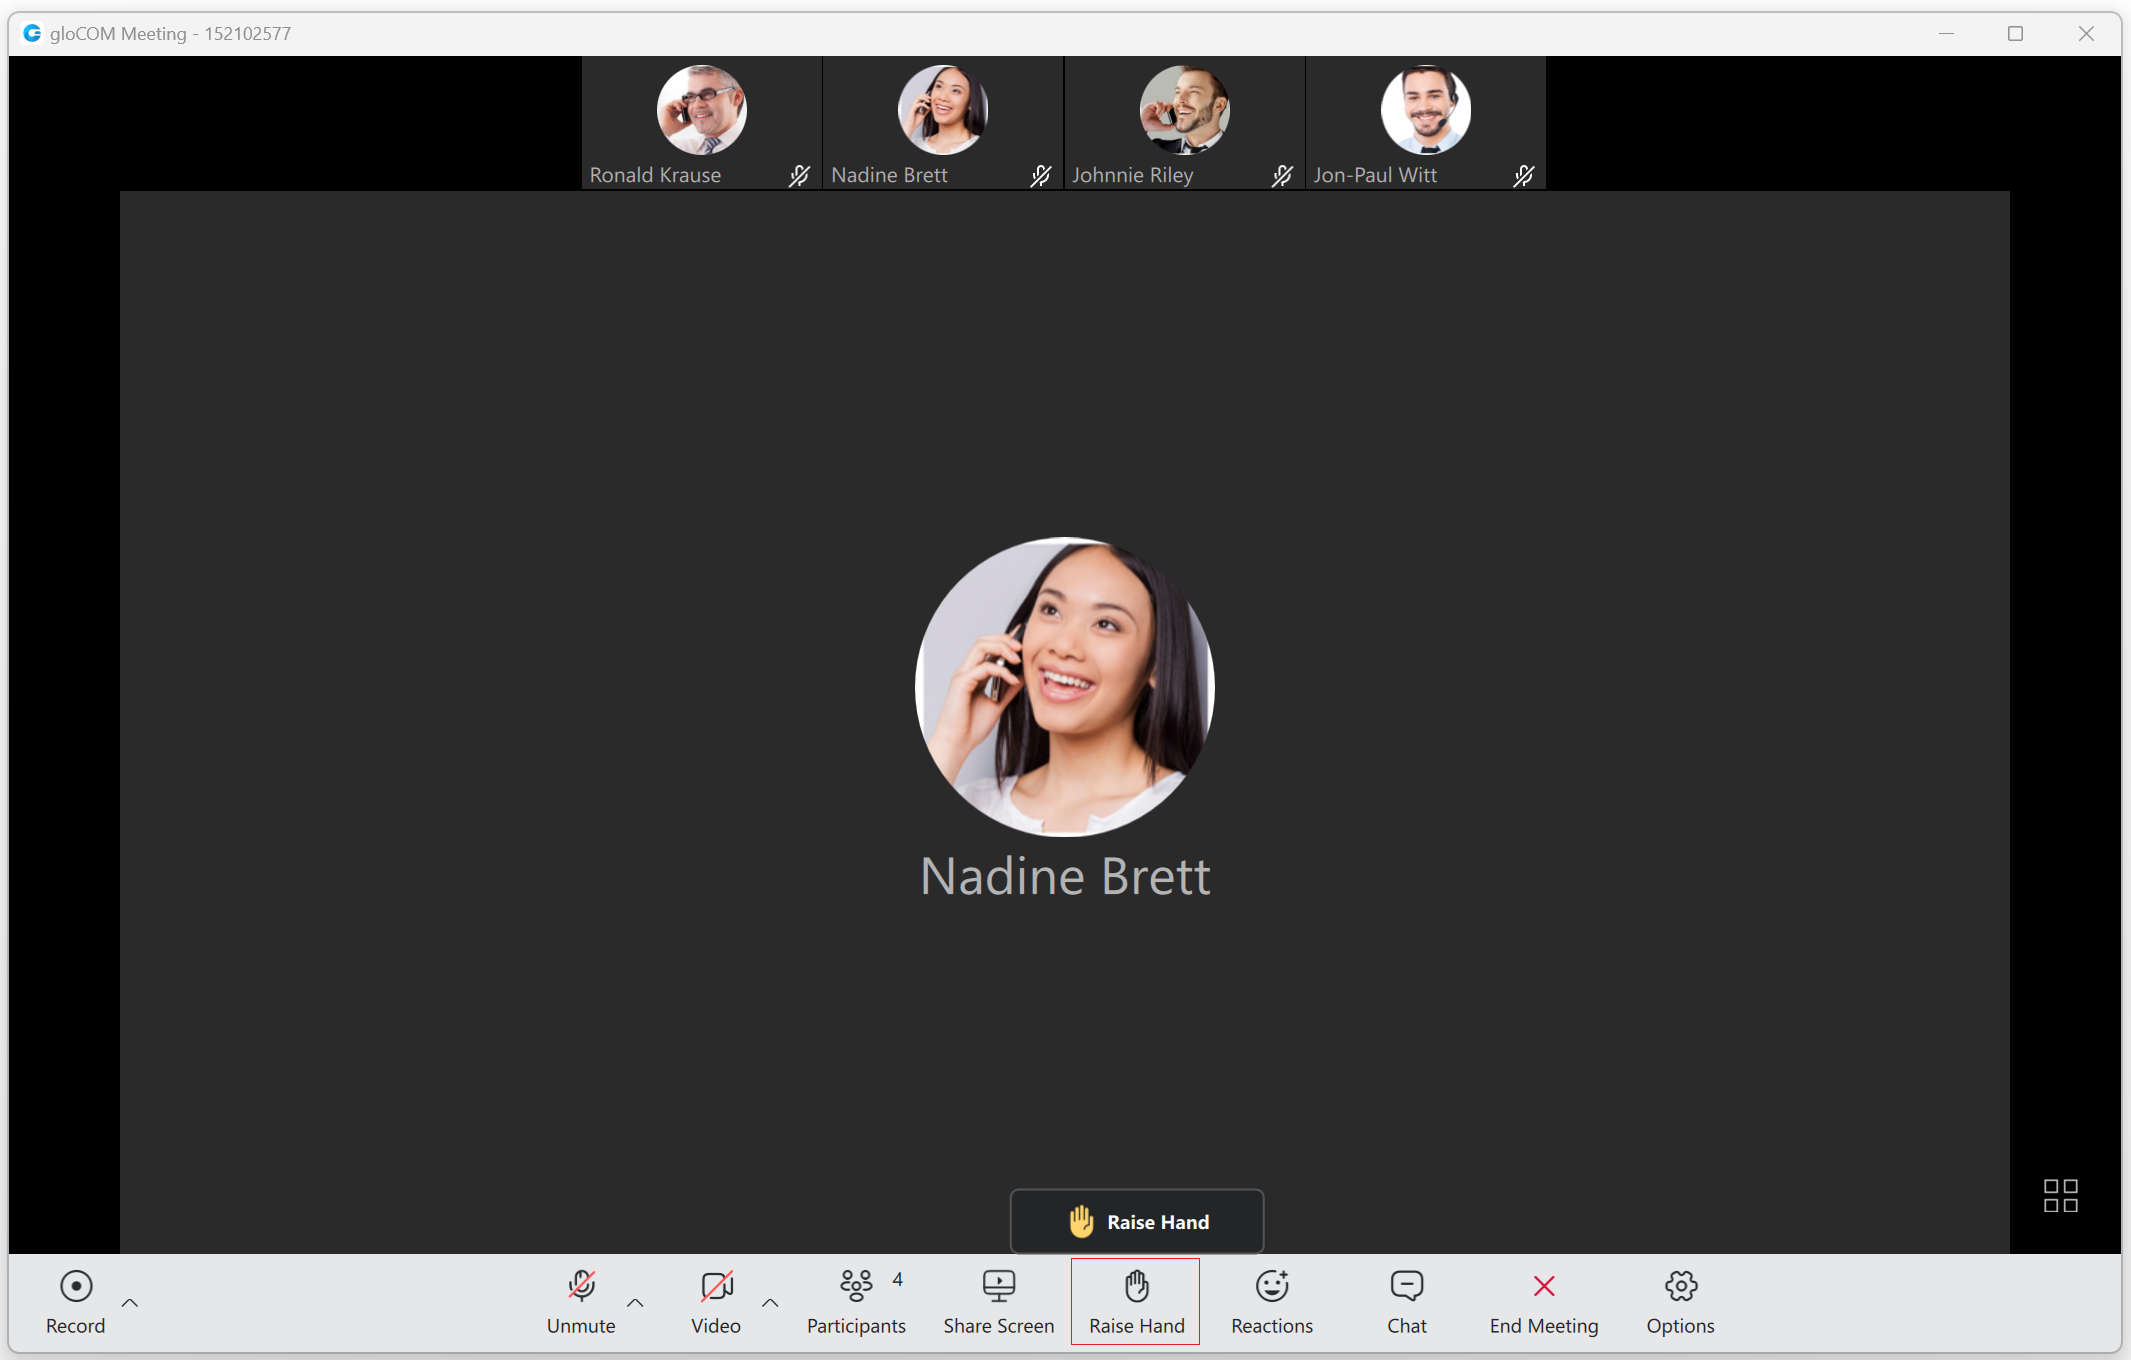
As soon as the Raise Hand option is activated, the icon color in the user's main toolbar changes to make the user aware that the option is active and vice versa.
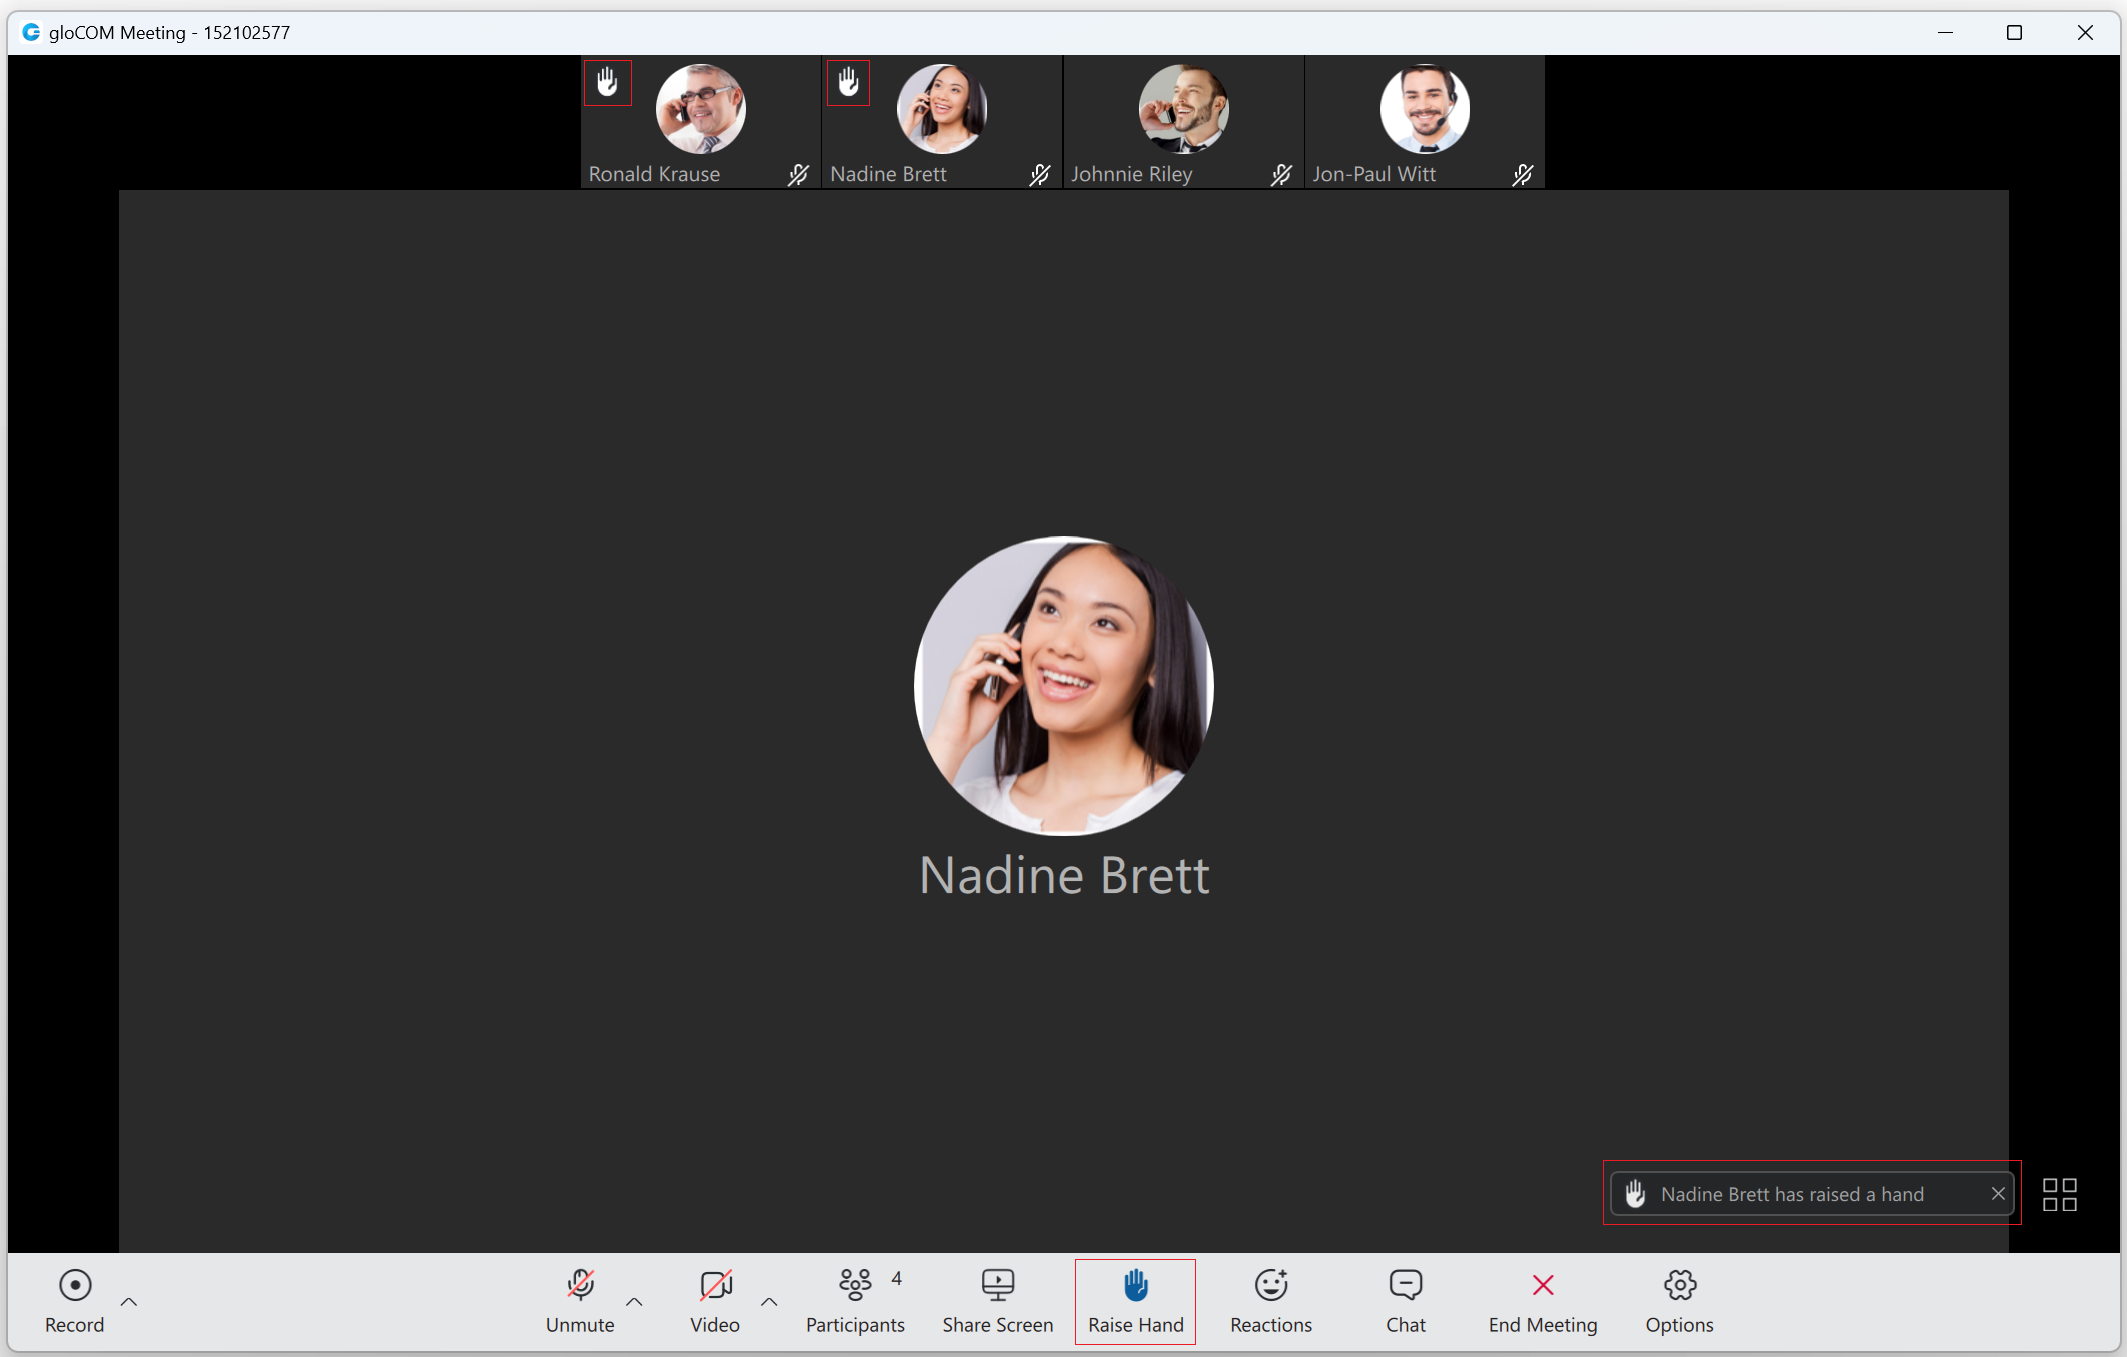
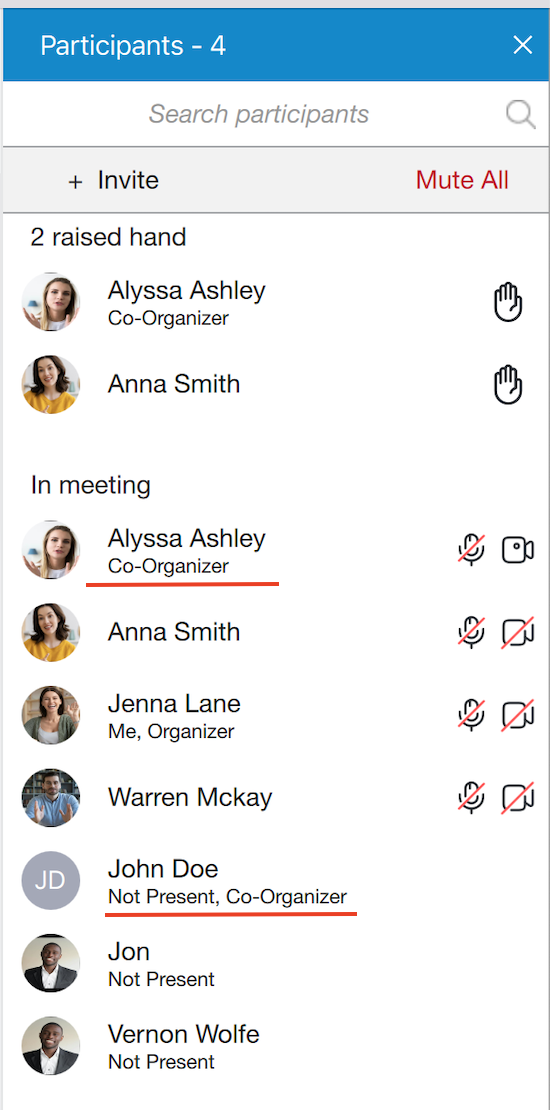
The participant's raised hand is displayed in the upper left corner of their video stream within the meeting screen (in both carousel and grid view), and they are also listed in the participants list next to their names. Additionally, on the desktop application, the user will also receive a notification message in the lower right corner that someone has raised their hand.
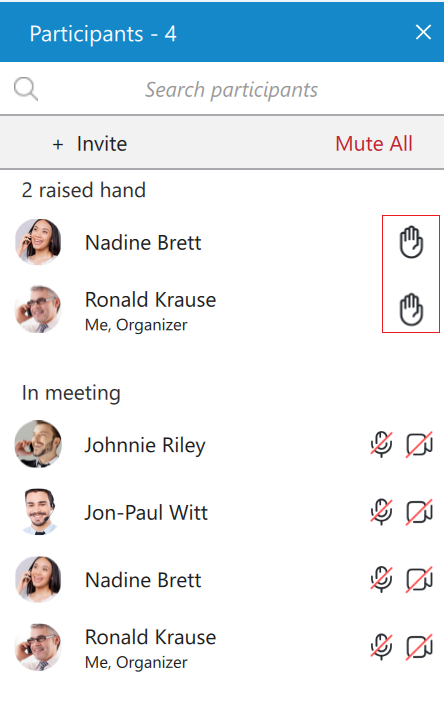
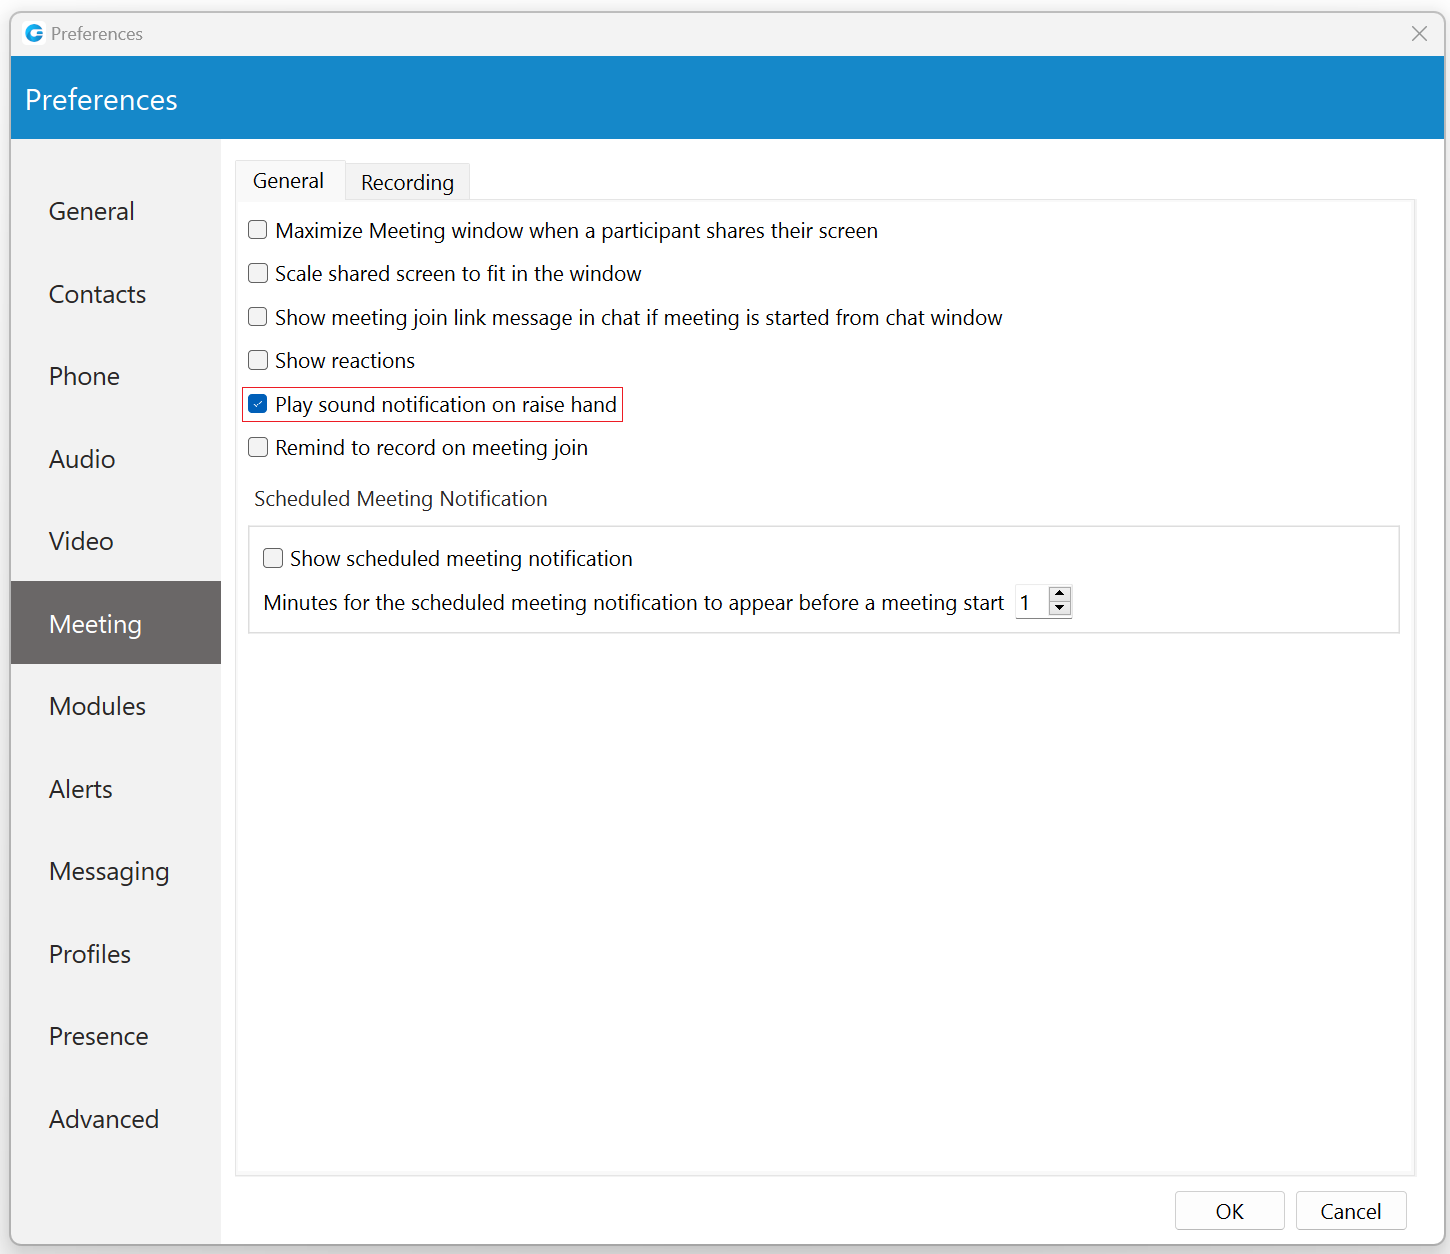
Sound notification for this option is also presented. If users want to mute it, they can do it by navigating to Preferences -> Meeting -> General and unchecking the checkbox next to the "Play sound notification on raise hand" option. This option is enabled by default.
While in screen-sharing mode, the presenter will be notified when someone has raised their hand. The floating control bar will appear with a blinking raised hand next to the Participants button, changing its color from transparent to blue to inform the presenter that somebody wants their attention. The raised hand will also appear within the participants list next to the name of the participant who raised the hand. As long as at least one hand is raised, a blinking hand will be displayed next to the Participants button.

When the participant raises their hand, the organizer and co-organizers can lower it by clicking on the raised hand icon next to the participant's name in the participants list.
¶ In-meeting Reactions
In-meeting reactions allow users to express themselves visually during the meeting by using reactions. Users can access this feature by clicking the Reactions button in the meeting's main toolbar. This will open the reactions menu, where they can choose which emoticon to use.

When the user clicks a desired reaction, an animated version of it will float upwards on the left side of the screen, along with the sender's name below the reaction.
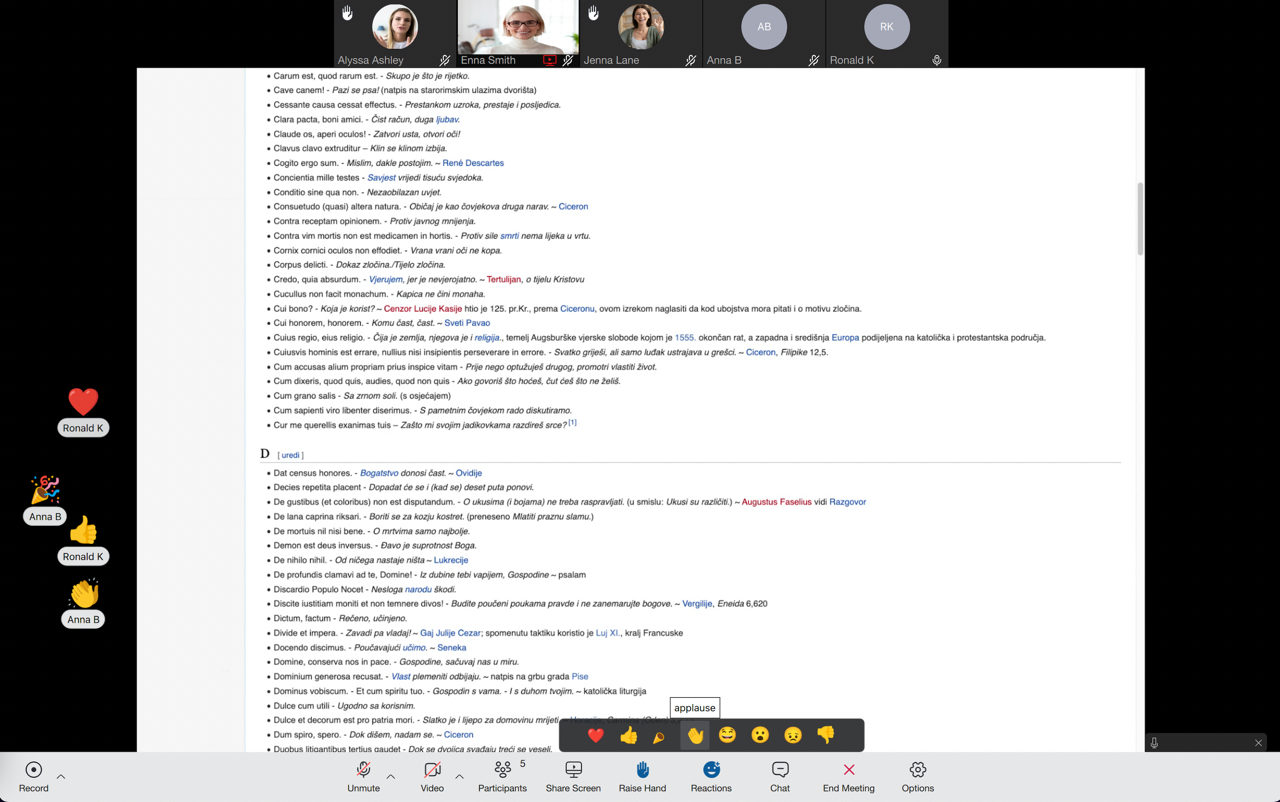
Only one reaction can be sent at a time.
Suppose users want to hide reactions from other participants. In that case, they can navigate to Preferences -> Meeting -> General and uncheck the checkbox next to the "Show reactions" option.

Reactions are enabled by default.
¶ Meeting Chat
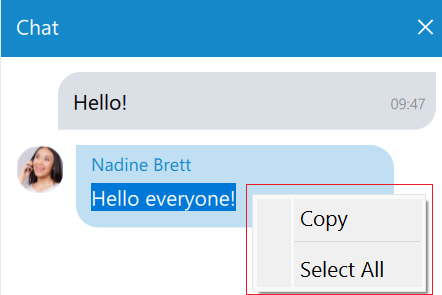
To open the chat, click on the Chat button within the main meeting toolbar. The meeting window will expand with the chat on the right side, where users can exchange text and file messages during a meeting and send emojis. To close it, click the X button in the upper right corner of the chat. Alternatively, you can click on the Chat button again to close it.
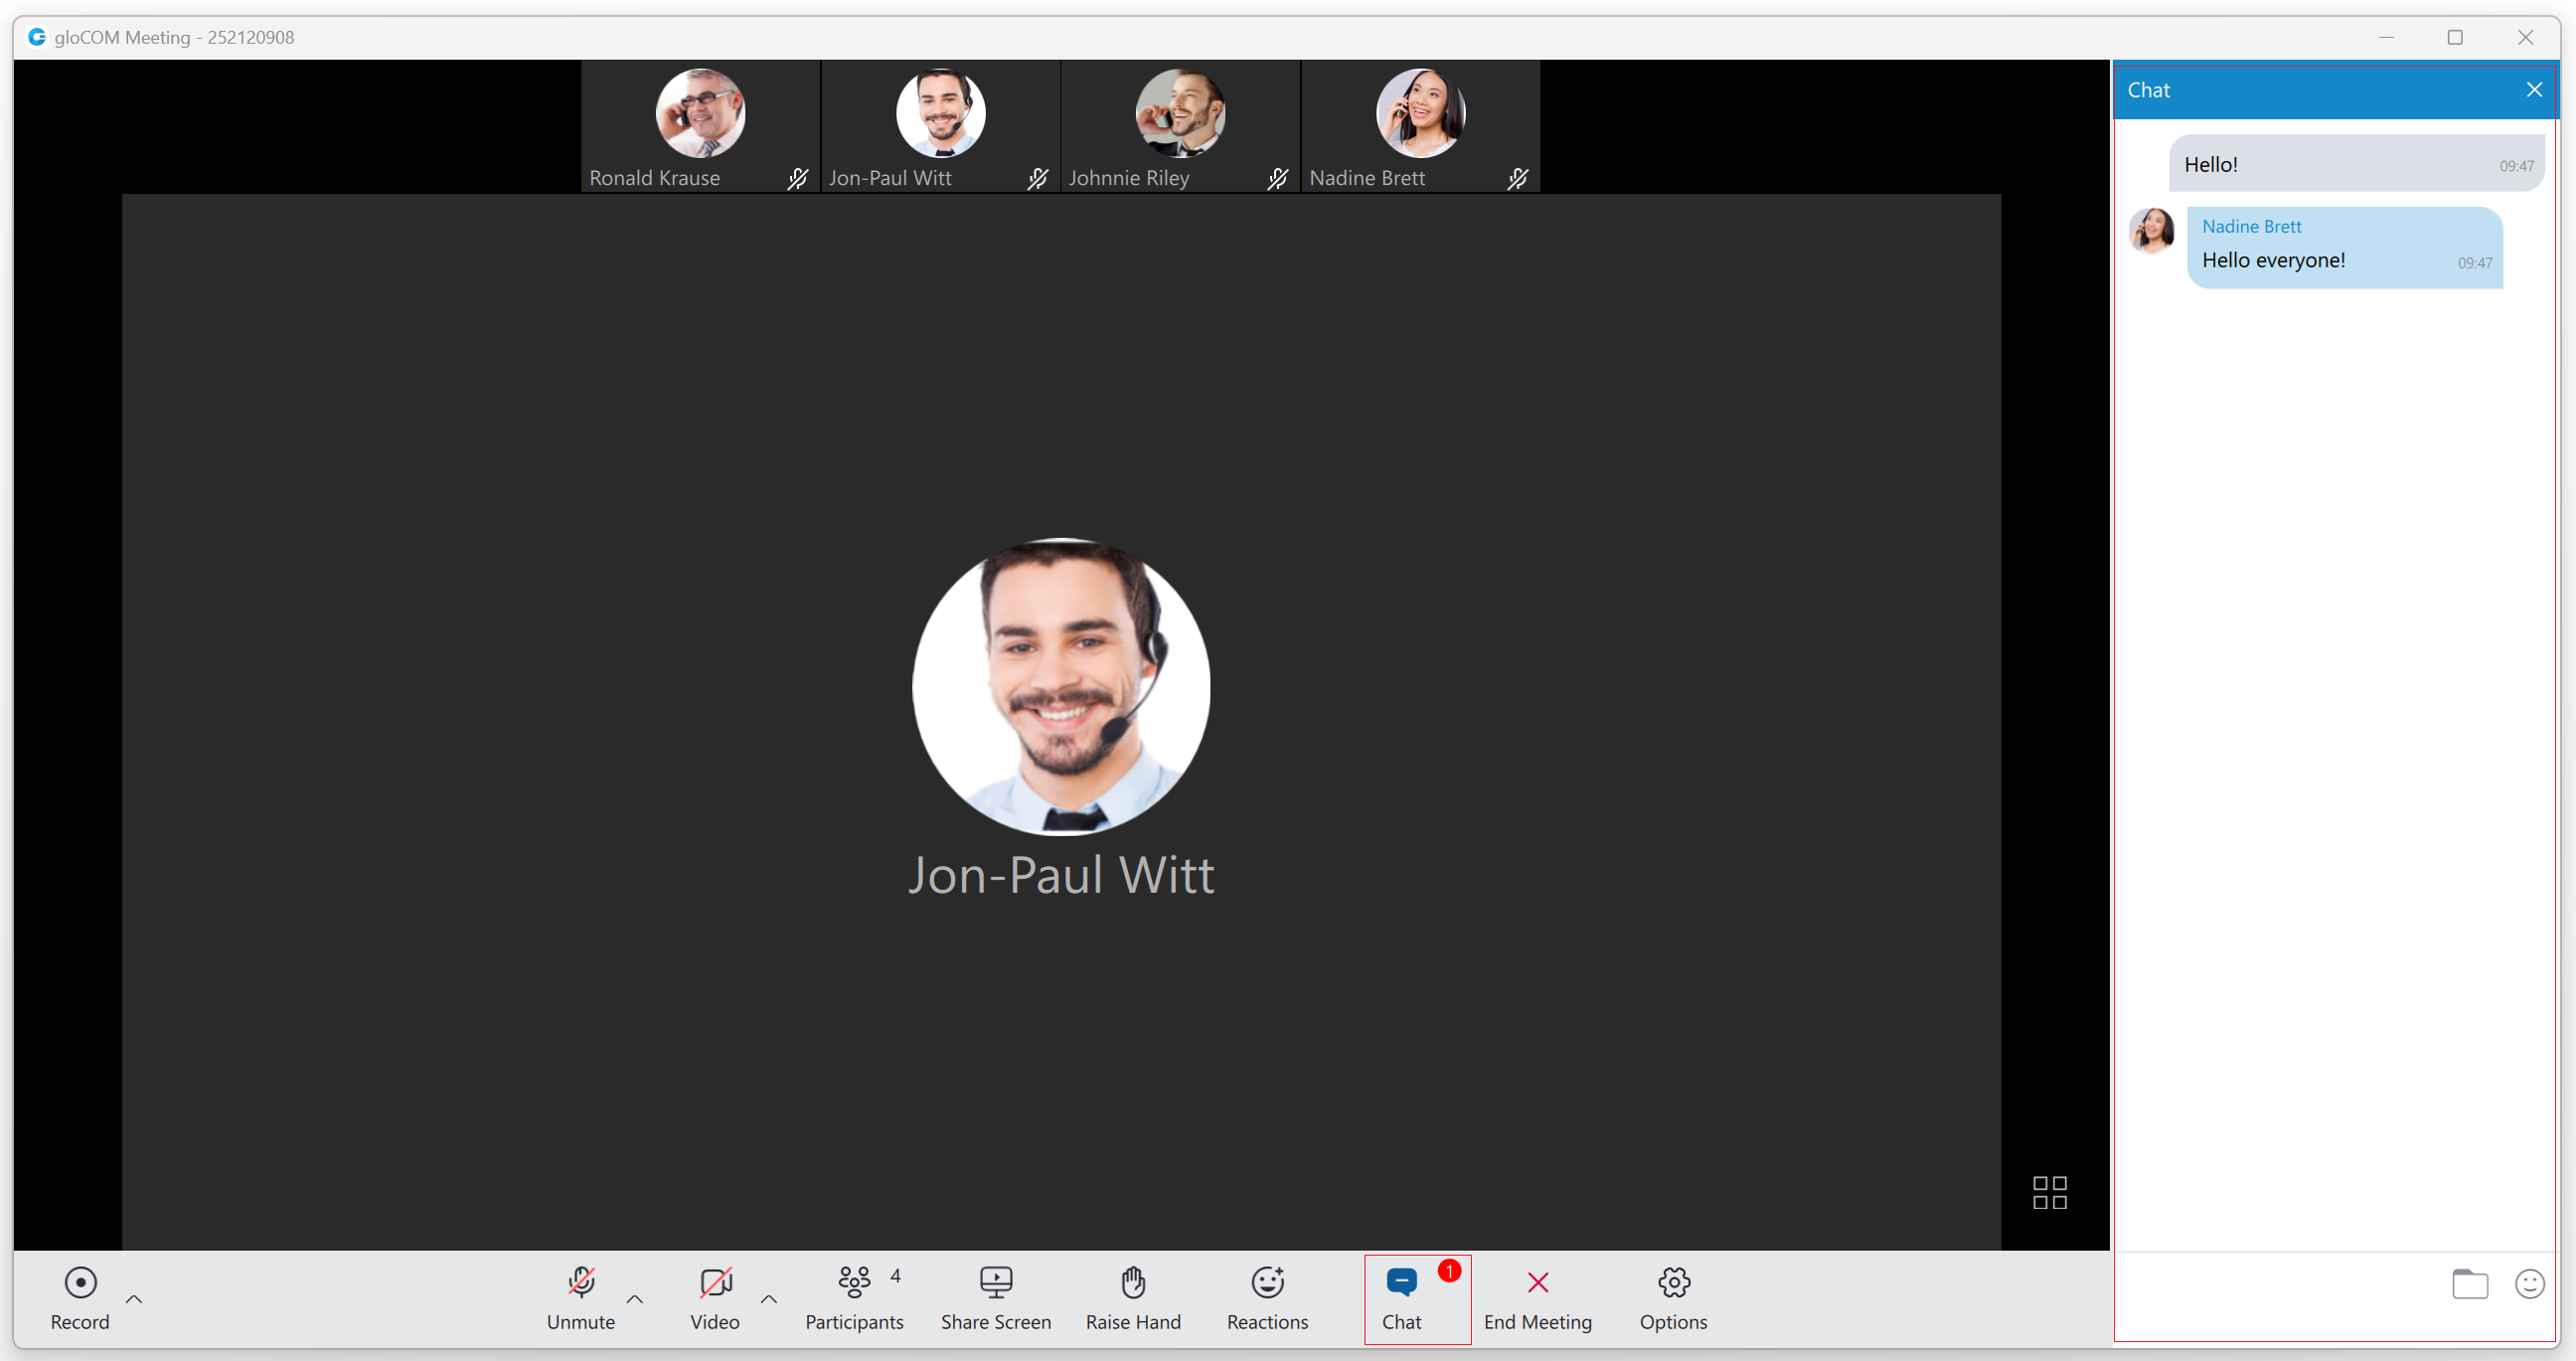
Notifications for all received messages will be displayed at the top of the Chat button as a red badge with a number representing the total number of messages received within the chat, as shown in the picture above.
If users right-click inside a message bubble (gray or blue rectangle), a context menu appears with the Copy option, which allows users to copy a selected message, and the Select All option, which allows users to select a message.
¶ File Messages
Besides regular text messages, users can use the meeting chat to share files.
Files larger than 10 MB cannot be sent.
All files within the chat are displayed as thumbnails containing information like the file name and size. At the bottom of the file message is an icon used to open, download, show upload/download progress, or retry file upload/download, depending on the file status.
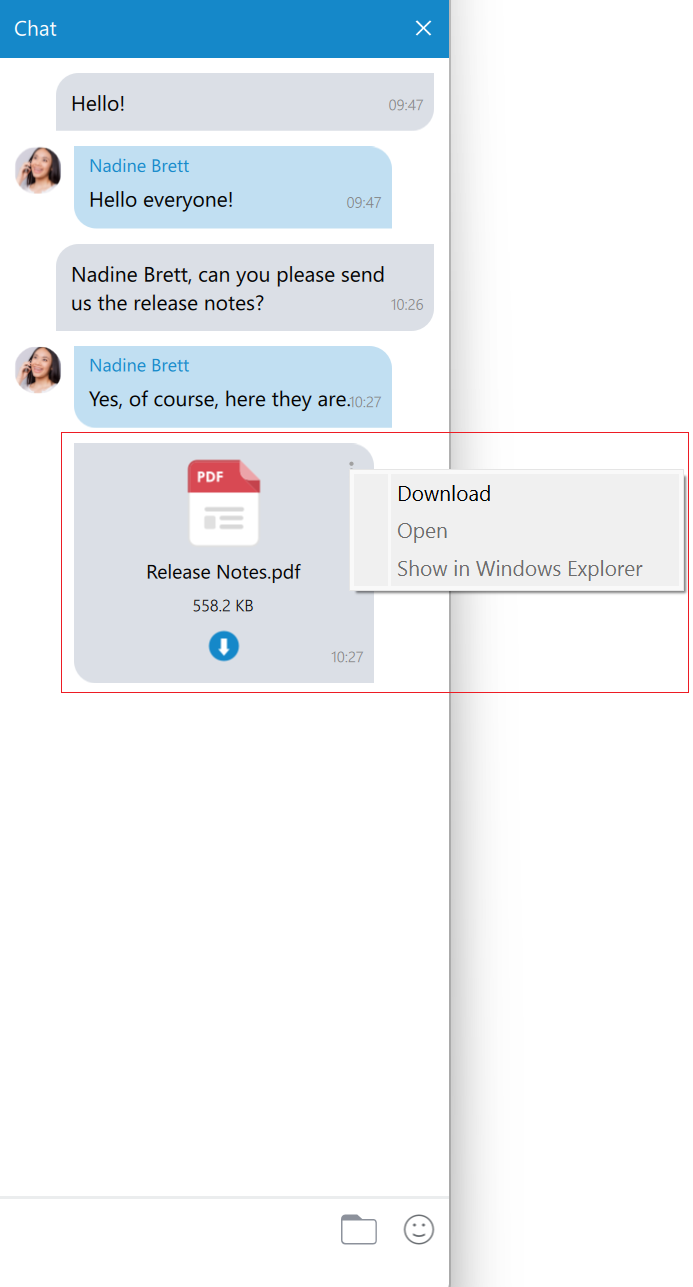
At the top right of the file message is a three dots button containing these options:
- Download: Allows the user to download a file
- Open: Will open the file in the default application.
- Show in Windows Explorer for Microsoft Windows (Show in Finder for macOS): Will open the folder containing the preselected file, which helps locate the file on the file system.
¶ Input Field
An input field at the bottom of the chat window is used to send text and file messages. After typing a message, press the Enter (Return) key on your keyboard to send a text message.
 A folder icon allows users to send files. Clicking on it opens a dialog where the user can pick up to 5 files to be sent to the chat. The user can also send files by dragging them from Windows Explorer (Finder on macOS) to the messages area within the chat.
 An emoji icon allows users to send emojis. Clicking on it shows an emojis window where they can browse through emojis separated into categories. At the bottom of the emojis window is a list of the most recently used emojis.
¶ End/Leave Meeting
As the name says, it allows users to end/leave meetings.

After clicking on it, a modal dialog will pop up with the following options:
- Leave Meeting: Allows users to leave a meeting.
- End Meeting: Allows users to end a meeting. (Only the organizer and co-organizer can end a meeting.)
- Close: Will close the modal dialog without leaving/ending a meeting.
¶ Options
It shows additional options for screen sharing, video, participants, and the meeting.
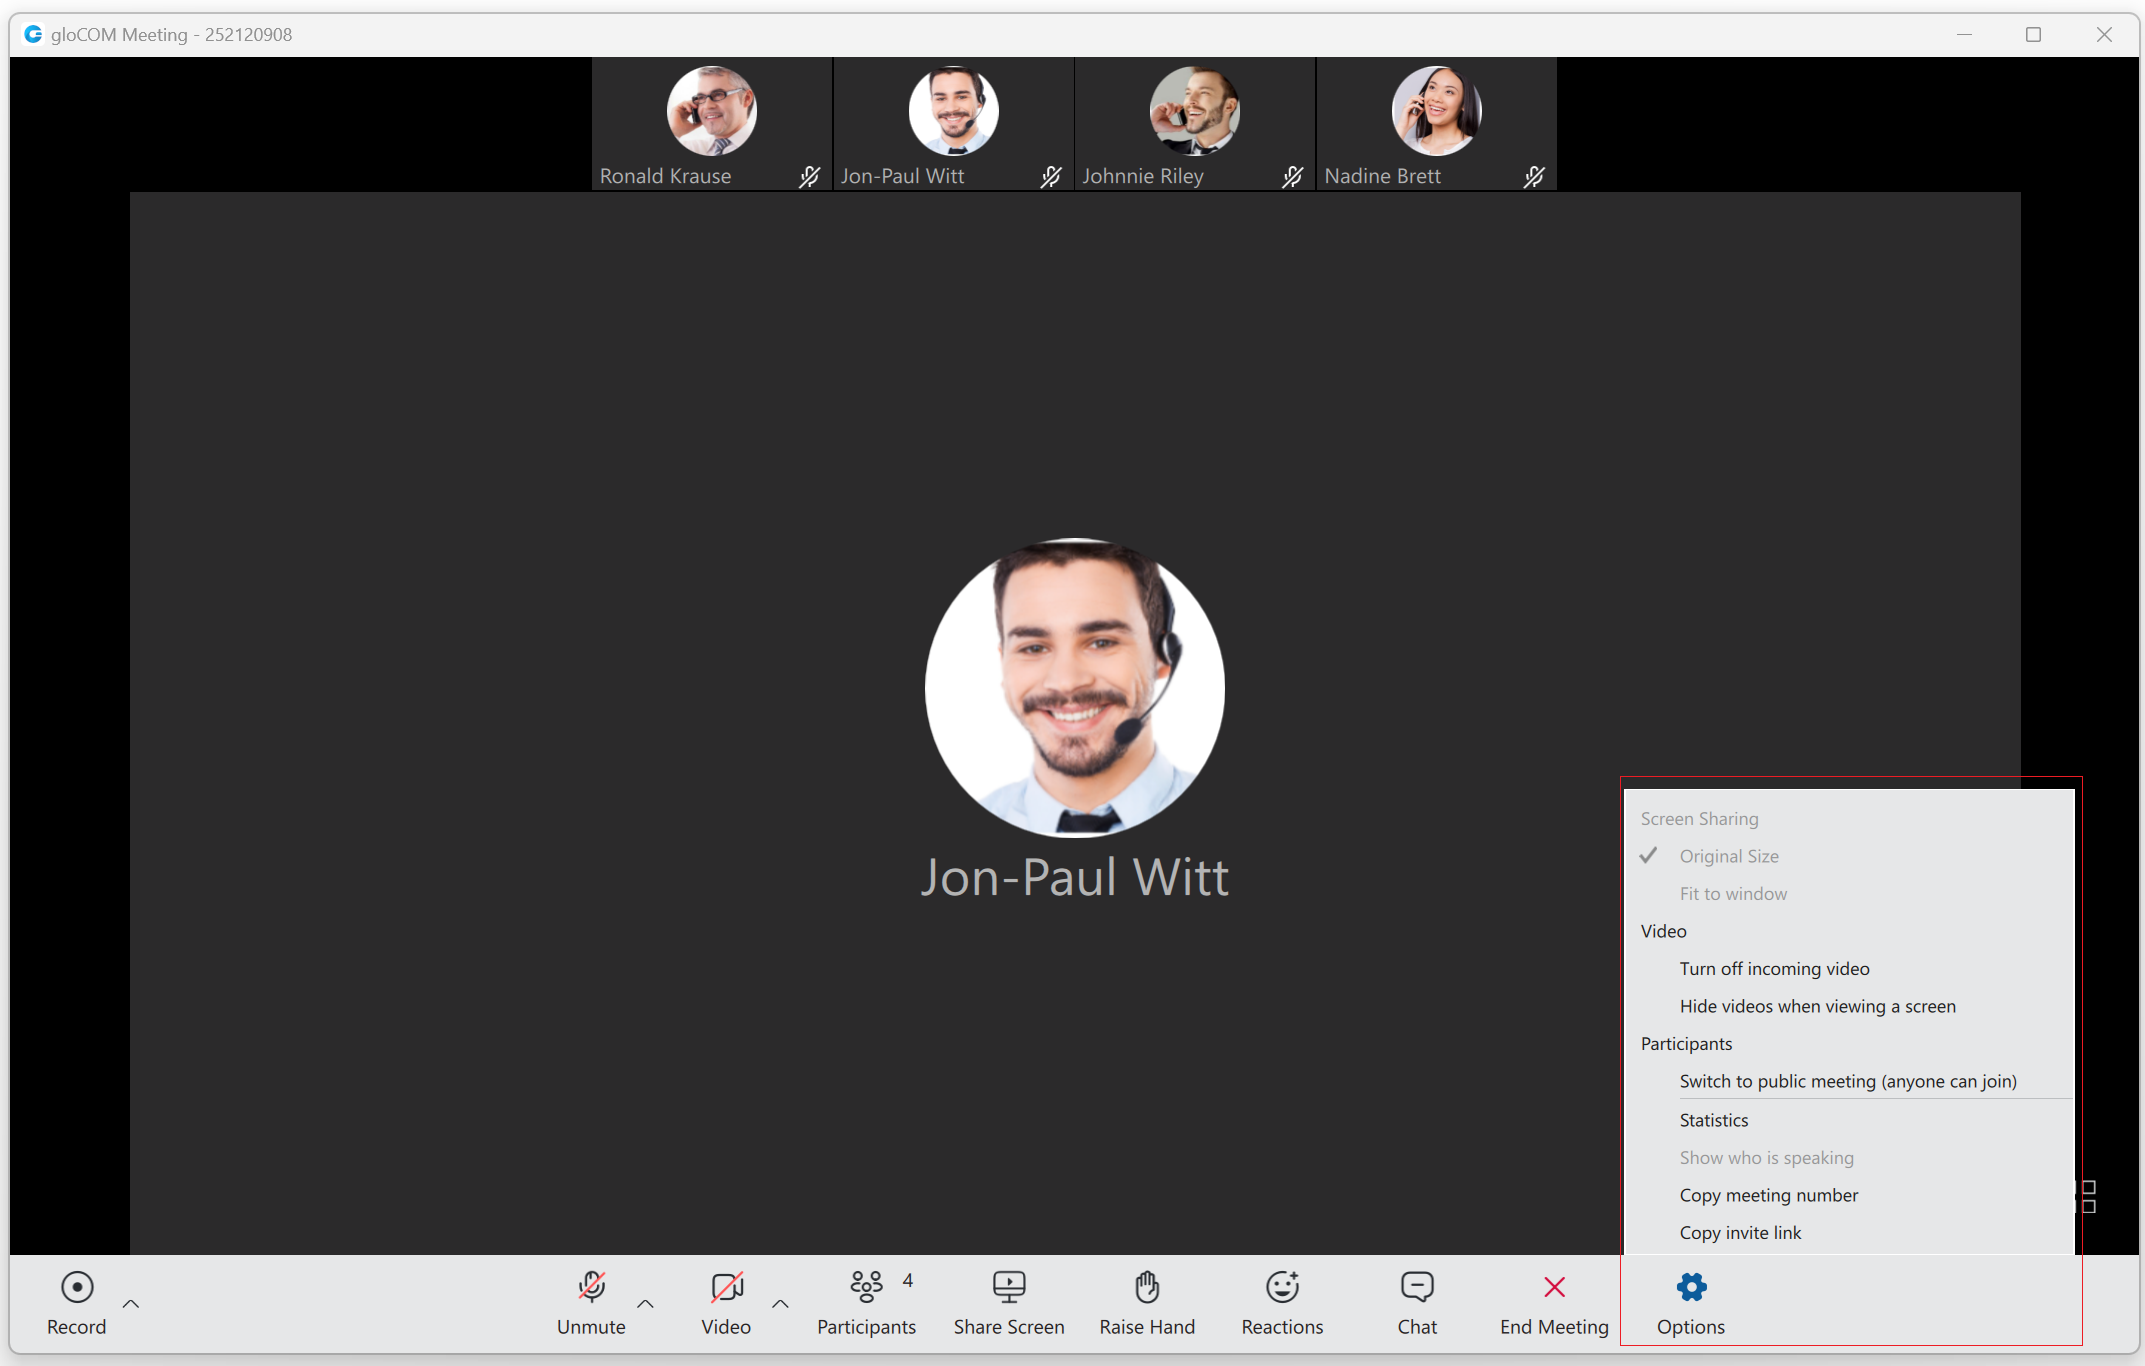
Options are as follows:
- Screen Sharing:
- Original Size: The Original Size option lets users view shared content in its actual, unscaled dimensions. When selected, the content is displayed at its native resolution, ensuring that every detail is presented as it appears on the sharer's screen. It is particularly useful for pixel-perfect work, detailed graphic design, or when precise visual accuracy is needed. However, depending on the viewer's screen resolution, this option may require scrolling to see the entire shared content if it is larger than the viewing area.
- Fit to window: The Fit to Window option sets a shared picture display mode based on the window size. In this mode, when the window is resized, the picture is resized. The picture size matches the window size apart from the window space needed to maintain the picture's height-to-width ratio.
- Video:
- Turn off/on incoming video: Turns off/on incoming videos.
- Hide videos when viewing a screen: The Hide videos when viewing a screen option hides the video panel from the top of the screen when screen sharing is active. (Only the viewer's side.)
- Participants:
- Switch to public meeting (anyone can join)/Switch to regular meeting (invitees only): The organizer and co-organizer can toggle the meeting from private to public and public to private.
- Statistics: Statistics provide the user with details about the network quality during the meeting. They include metrics about Audio, Video, and Screen sharing quality.
- Show who is speaking: The Show who is speaking option opens a speaking label that provides information about who is talking while screen sharing is active. (Only the viewer's side.)
- Copy meeting number: Copies the meeting number.
- Copy invite link: Copies the invite link.
Suppose a network connection problem affects audio quality. In that case, a notification will be displayed in the lower-left corner of the meeting window, informing the user about the cause of the bad audio.
¶ Multiple co-organizers of the meeting
Using the co-organizer role in Meetings ensures that there is more than one person that can manage important settings in a meeting. It’s a very useful role if the organizer will not be present and as a support to the organizer in terms of being able to co-manage.
¶ Assign co-organizers
One single Meeting can have multiple coorganizers. Meeting participants can be promoted to Coorganizers from desktop app as follows:
- While scheduling a meeting - participants added to the meeting can be promoted to co-organisers
- When the Meeting has already started, from the participants list - using right click on the name will allow Organizers to assign this role to the participant
¶ Add coorganizers while Scheduling meeting
After adding participants to the meeting (While scheduling a meeting), right click on the participant name will open a drop-down menu that contains the Assign Co-Organizer option. Press this option to promote the participant to the Co-organizer role. Note that the participant has been added to the Co-organizers list in the Schedule meeting window.
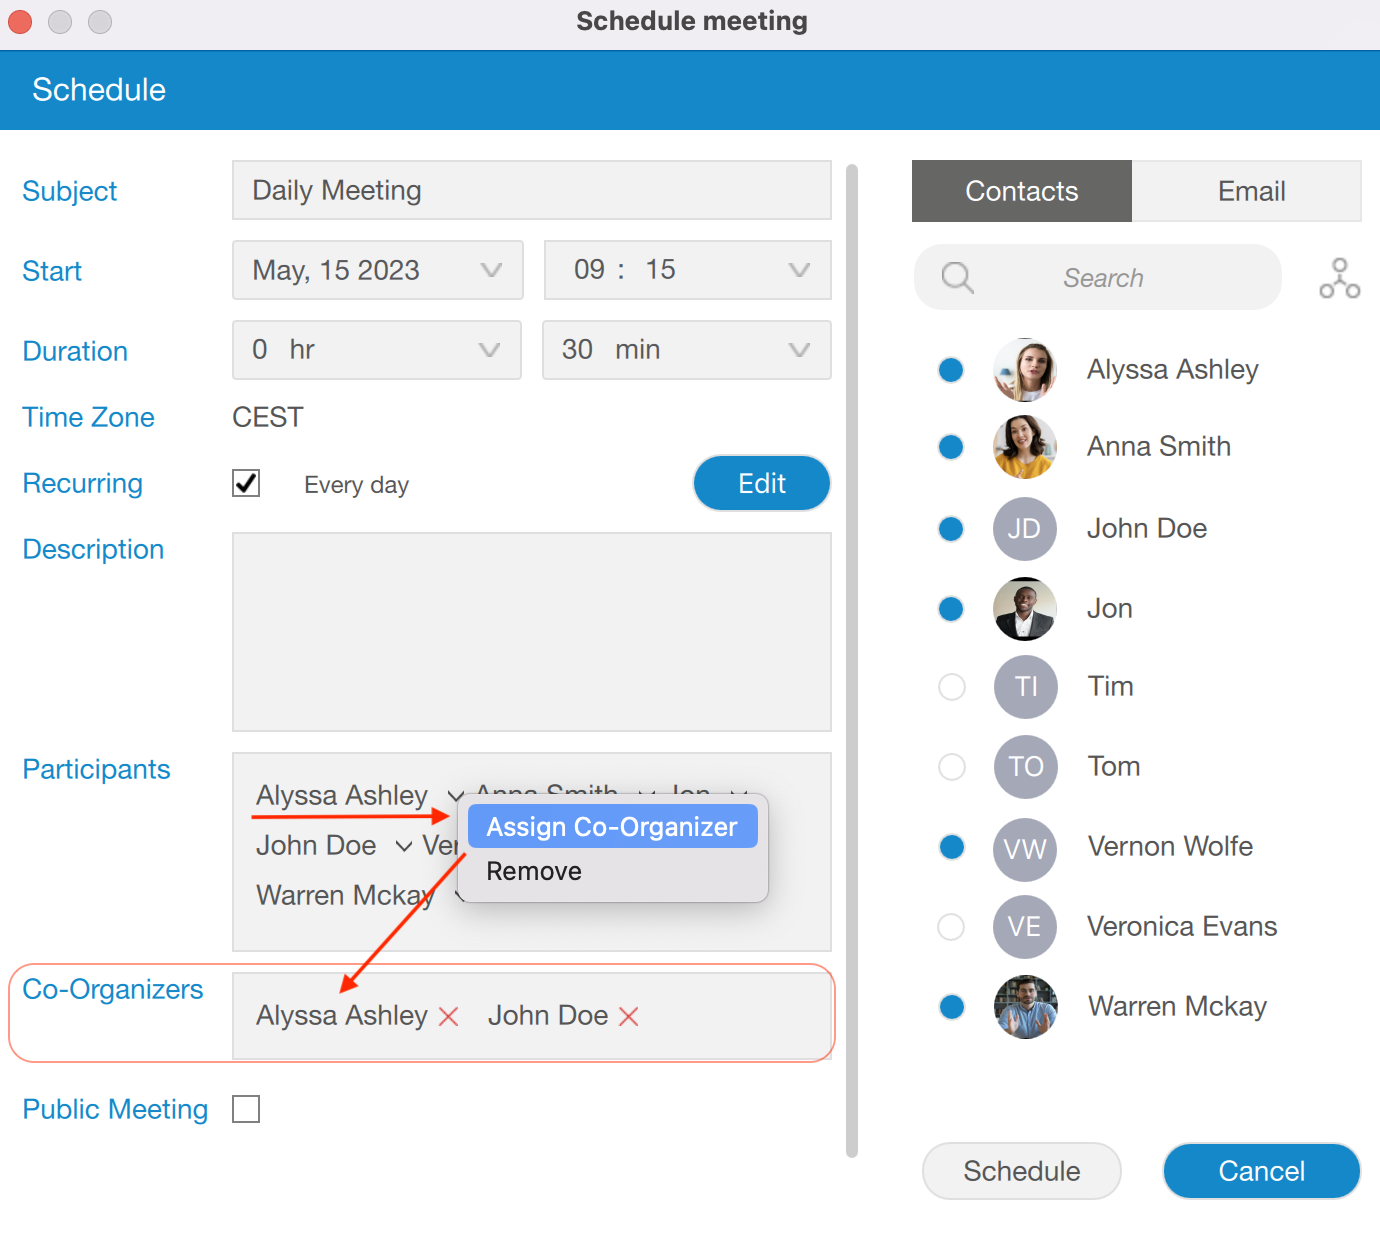
If you mistakenly promote some participants to be co-organizers and want to remove them from co-organizers, it is possible by clicking on the X sign next to the co-organizer name. Co-organizer will be removed.

These co-organizer roles are also visible in corresponding Meeting details, in the Scheduled Meetings list:
¶ Add coorganizers from Participants list
Organizers have permission to assign co-organizers during the meeting. This is possible from participant list. Right click on the participant’s name will show all options for managing participants. Press Assign Co-Organizer option to promote selected participant to Co-organizer.
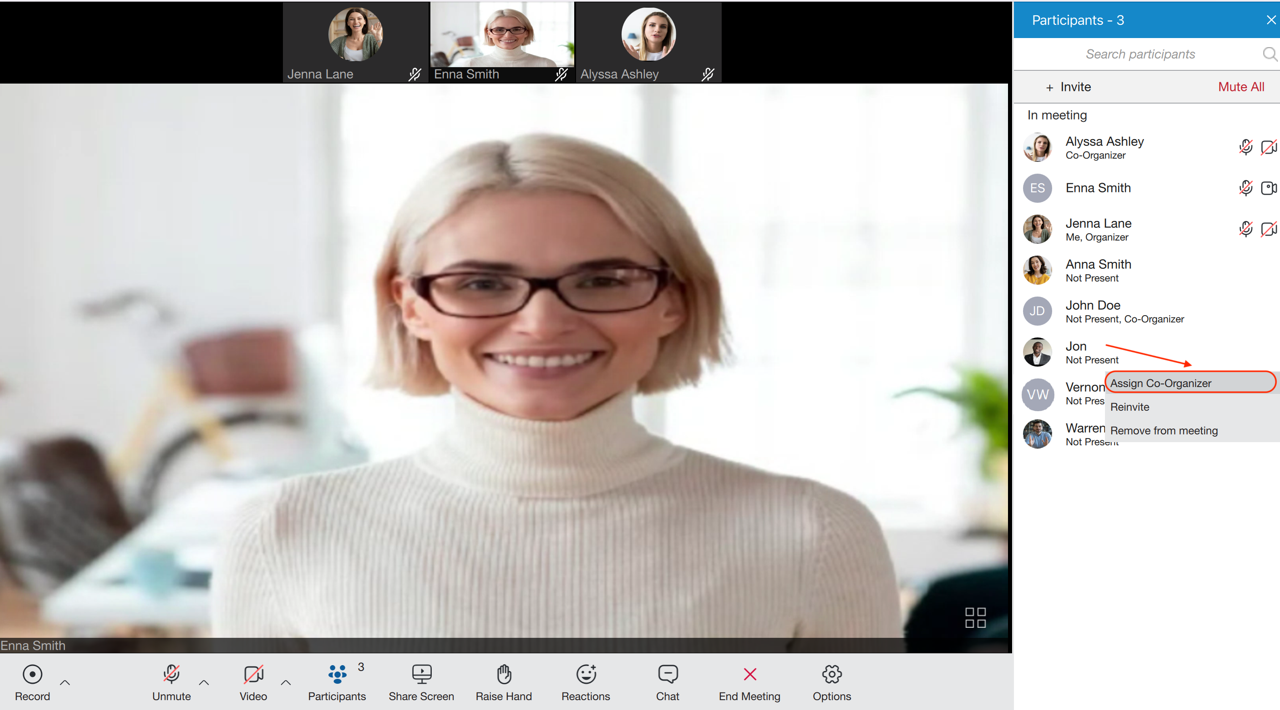
All co-organizers that join meeting via desktop app will have Co-Organizer label in meeting participants list, right below their name - the same way all other labels are added.
¶ Co-Organizers permissions
Once they are created, the Co-organizers themselves will be able to:
- Start, Edit and Delete the meeting from Schedule meetings list
- Add & remove participants, assign co-organizers, etc while editing the meeting
- Add and remove participants during the meeting
- Mute and Remove participants from the audio during the meeting
- Assign co-organizers during the meeting
- Lower participants Raised hands during the meeting
- End the meeting
¶ Start, Edit and Delete the meeting from the Schedule meetings list
As a Co-organizer, you are able to Start, Edit and Delete meetings from the meeting list. To do so, navigate to the Meeting list and select meeting. These options are available the same way as you are the organizer.

While editing the meeting from Schedule meeting list, you are allow to add & remove participants and assign co-organizers as well.
¶ Co-Organizer permissions in a Meeting
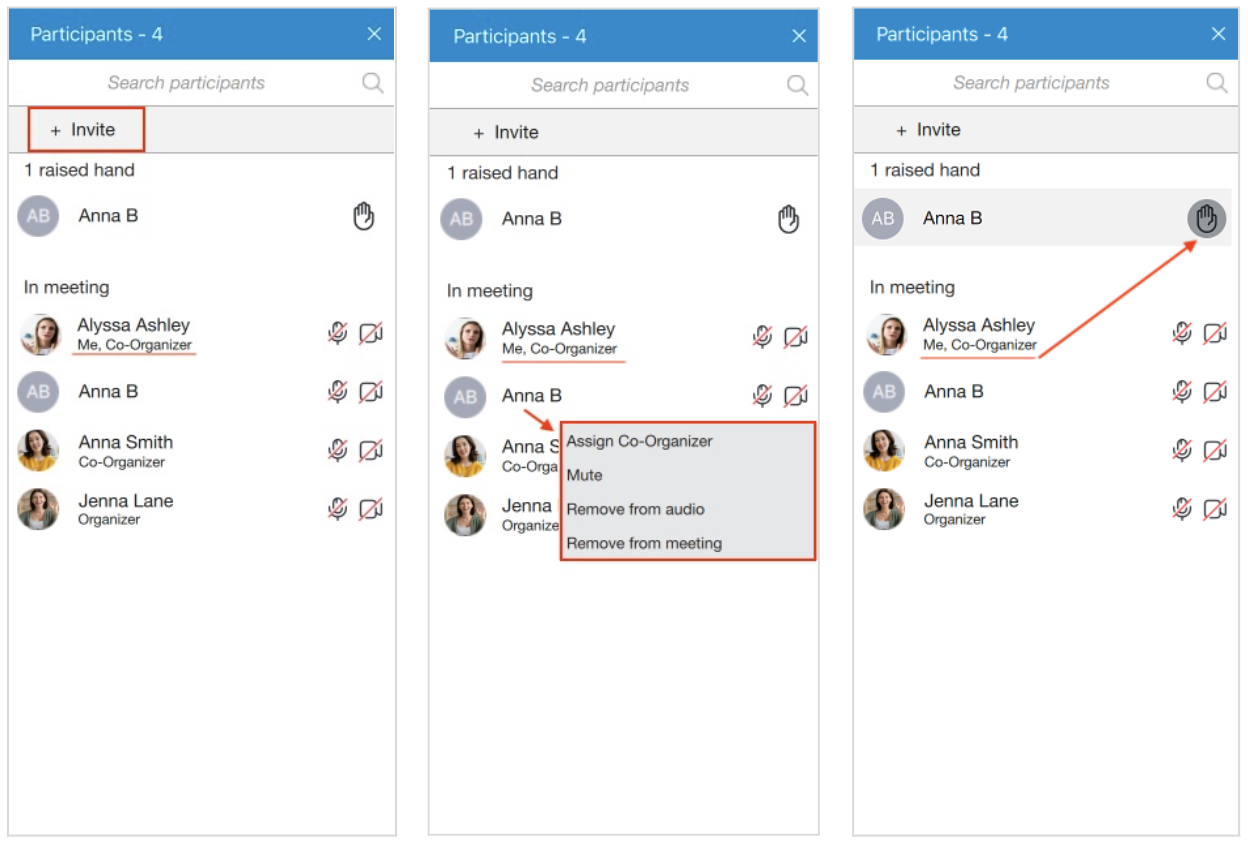
In a meeting, Co-organizer has almost the same permissions as the organizer. Most of these options are available from the Participants list:
- Click on Invite button to add new participants
- Right click on participant name in the list to manage that particular participant using one of the following options: Assign co-organizer, Mute, Remove participants from the audio and Remove participants from the meeting
- Press Raised hand icon next to the participant name to Lower the participant Raised hand
- End the meeting - Co-Organizers that join the meeting via the desktop app have the option to End the meeting - the same way as Organizers can do it.
¶ Outlook integration
Outlook integration allows user to manage gloCOM Meetings from Outlook. This includes following:
- Schedule a Meeting
- Start Instant Meeting
- Start Meeting with multiple contacts
- Cancel a Meeting
- Convert existing event to gloCOM Meeting
Schedule a meeting
User can Schedule gloCOM Meeting from outlook main tab.
After cliking on to Schedule meeting, user should see an outlook meeting appointment window with a schedule settings dialog where can set the meeting private or public.
After confirmation, outlook appointment interface is filled out with meeting data.
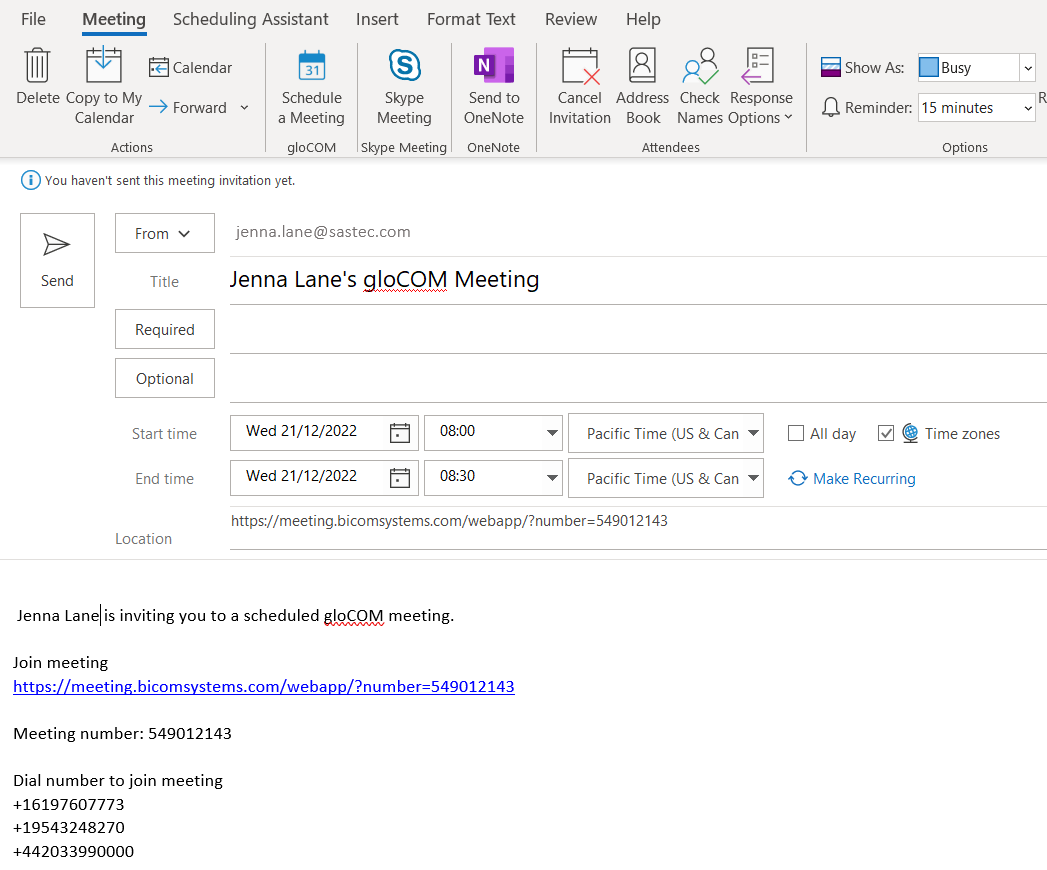
A user is allowed now to edit this invitation - to change subject, body; set date and time, add participants, etc. When enter all necessary data, user should Send invite to participants.
Meeting then will be added to gloCOM Meeting list.
Starting instant Meeting with one or multiple contacts
User is able to Start Instant Meeting from outlook main tab if press gloCOM Start Instant Meeting icon. This will start instant meeting without any participants.
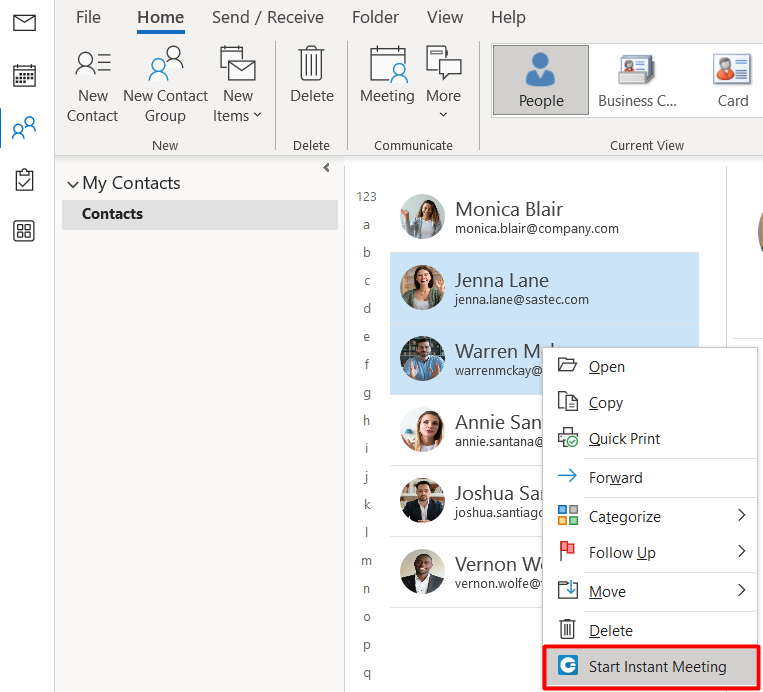
Another option is to Start Instant Meeting with one or multiple contacts, by selecting them from the contact list in outlook. Selected contacts will receive a Meeting invitation.
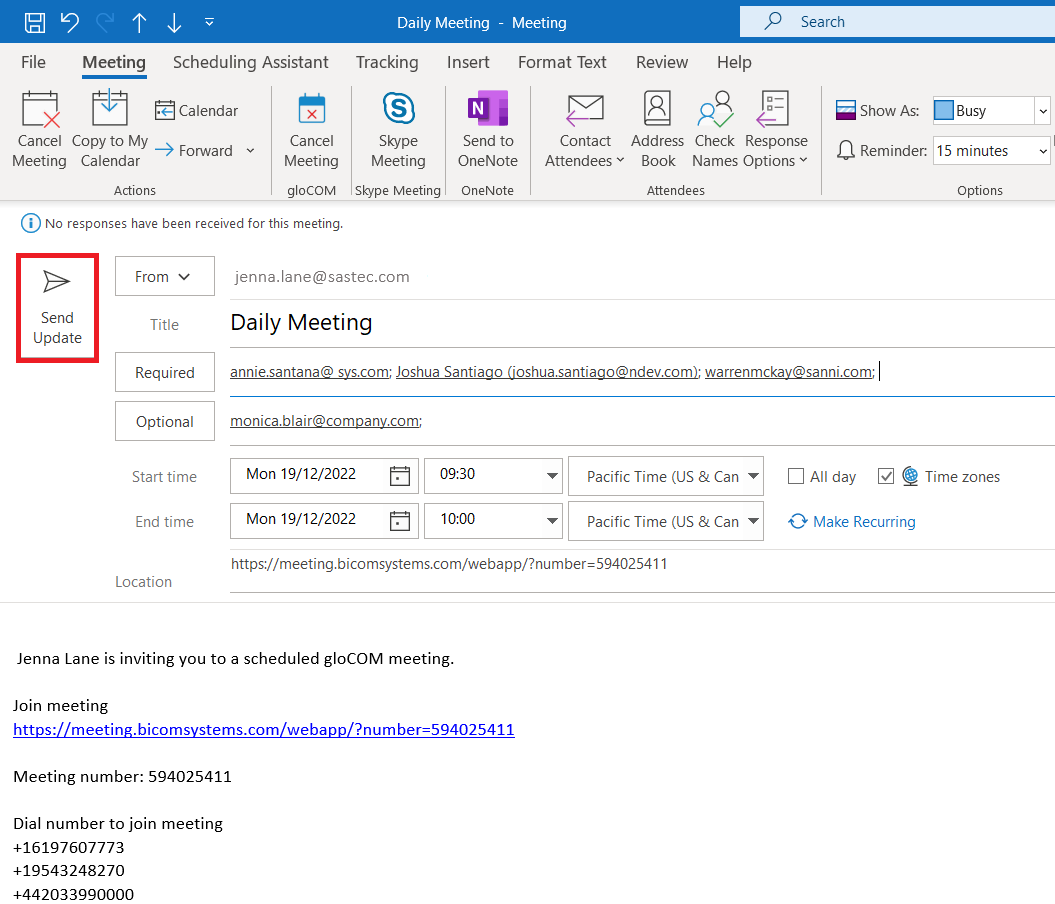
Cancelling a Meeting
In order to Cancel the Meeting, user should open that Meeting from the outlook calendar list, and choose gloCOM Cancel Meeting option.
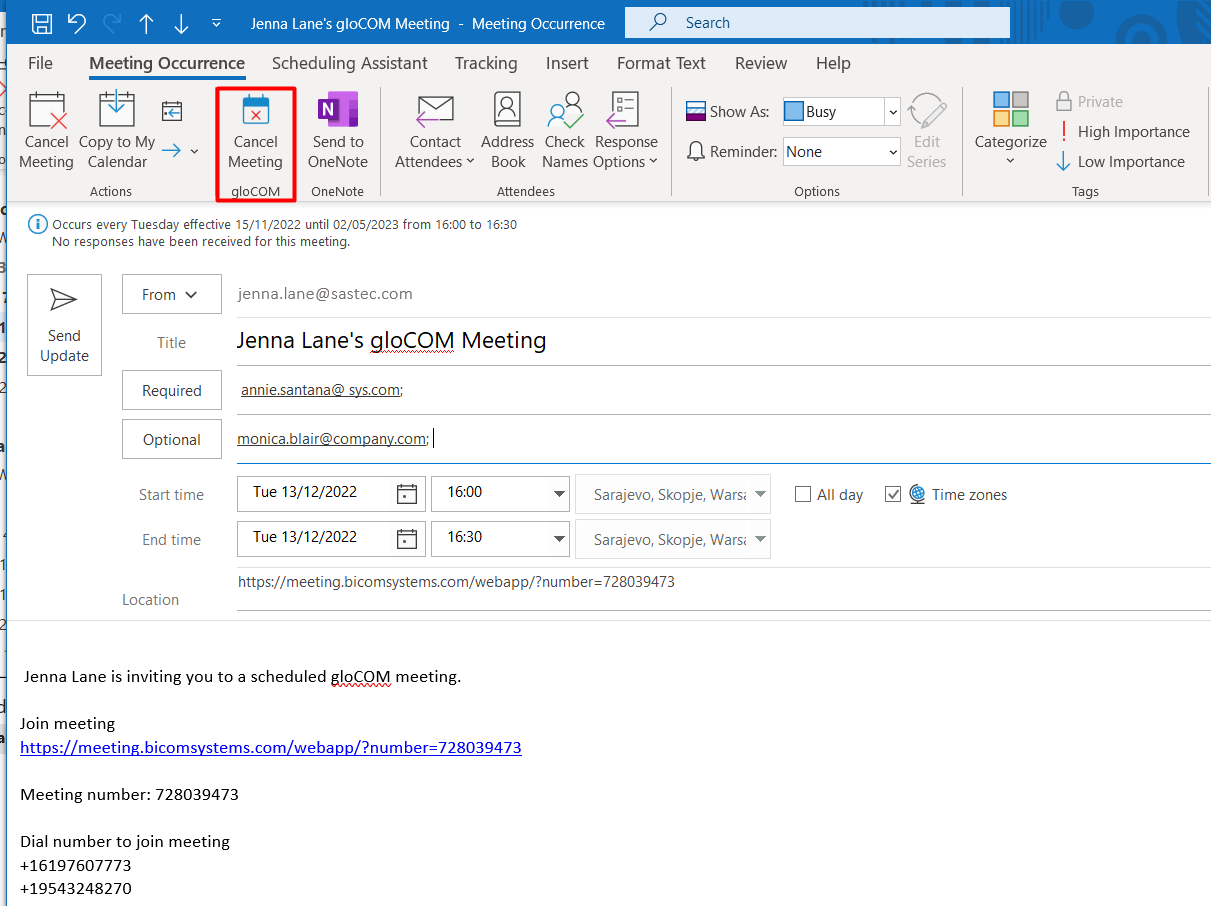
After that, user should press Sent Update icon to inform all invitees about cancellation.
Meeting then will be removed from gloCOM Meeting list.
This option will only delete gloCOM Meeting. Outlook appointment will not be deleted.
Convert existing event to gloCOM Meeting
To convert outlook appointment into gloCOM Meeting, user should do the following steps:
- Find an existing event in Outlook calendar and open it
- Click on Schedule meeting icon
- Edit your meeting if needed
- Send Update to participants
Meeting is now added to gloCOM Scheduled Meetings list.
¶ Meeting Licences
The limitations of the Meeting packages are as follows:
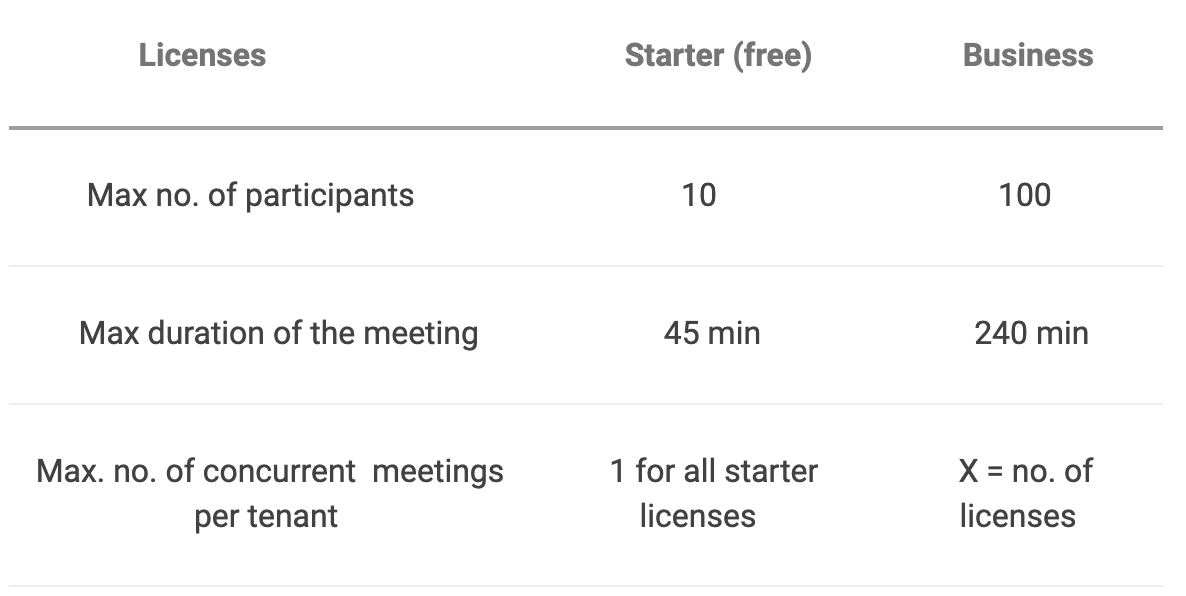
Starter package is defaualt one. This means that will be automatically assigned to all gloCOM Meeting users.
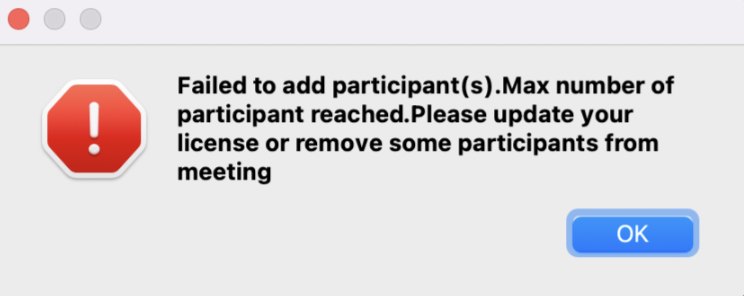
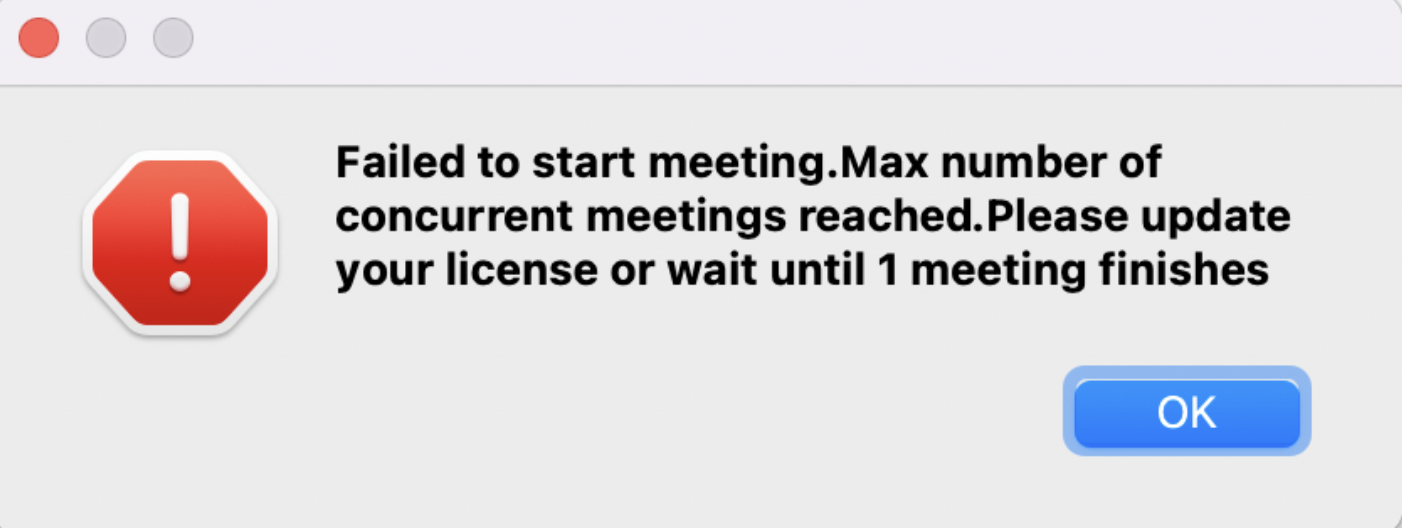
So, if user exceeds limitations for current package type, following info messages appears:
- Message when user exceed number of invitees - when scheduling meeting or adding participant to existing meeting
- Message when user exceed number of meetings for current license type
- Message when user does not have license
Previous: Main Window
Next: Chat