¶ HOW TO Google OAuth Workaround
- Log in to your google account with which you want to setup OAuth application.
- Visit https://console.cloud.google.com/projectselector2/apis/dashboard?supportedpurview=project
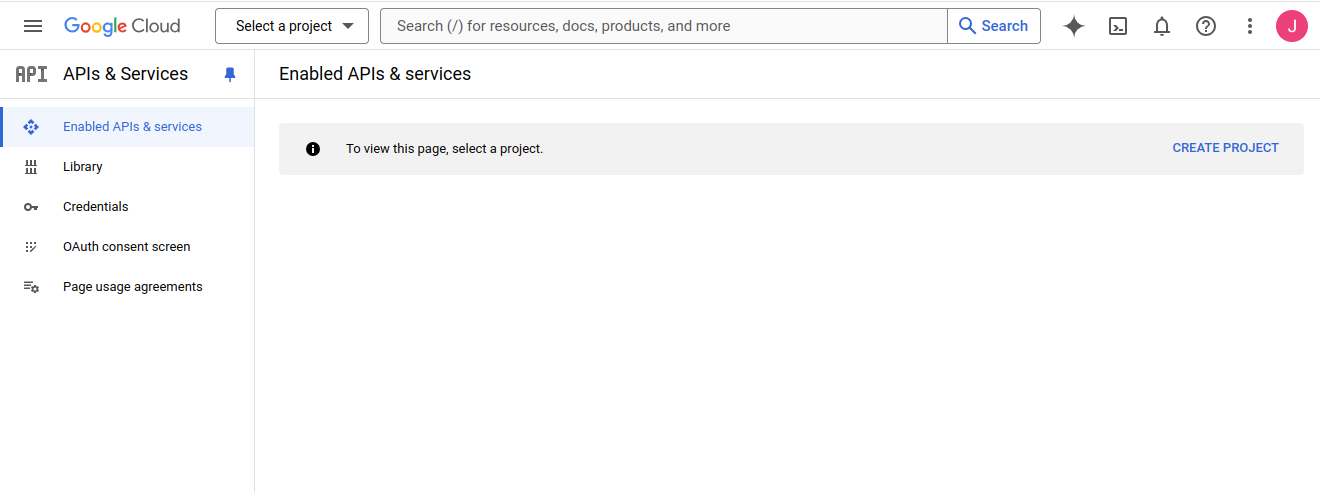
-
Click on “CREATE PROJECT” and supply a project name (ie. oauth-proj).
-
Click on “Credentials”.
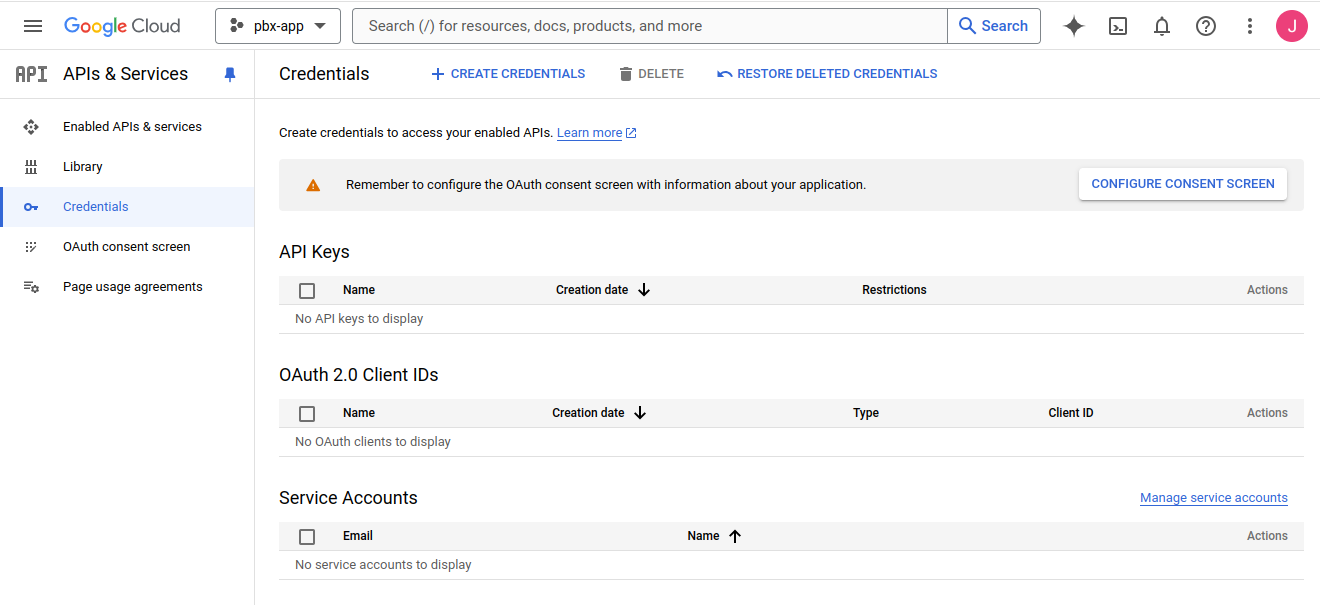
- Click on “CONFIGURE CONSENT SCREEN”.
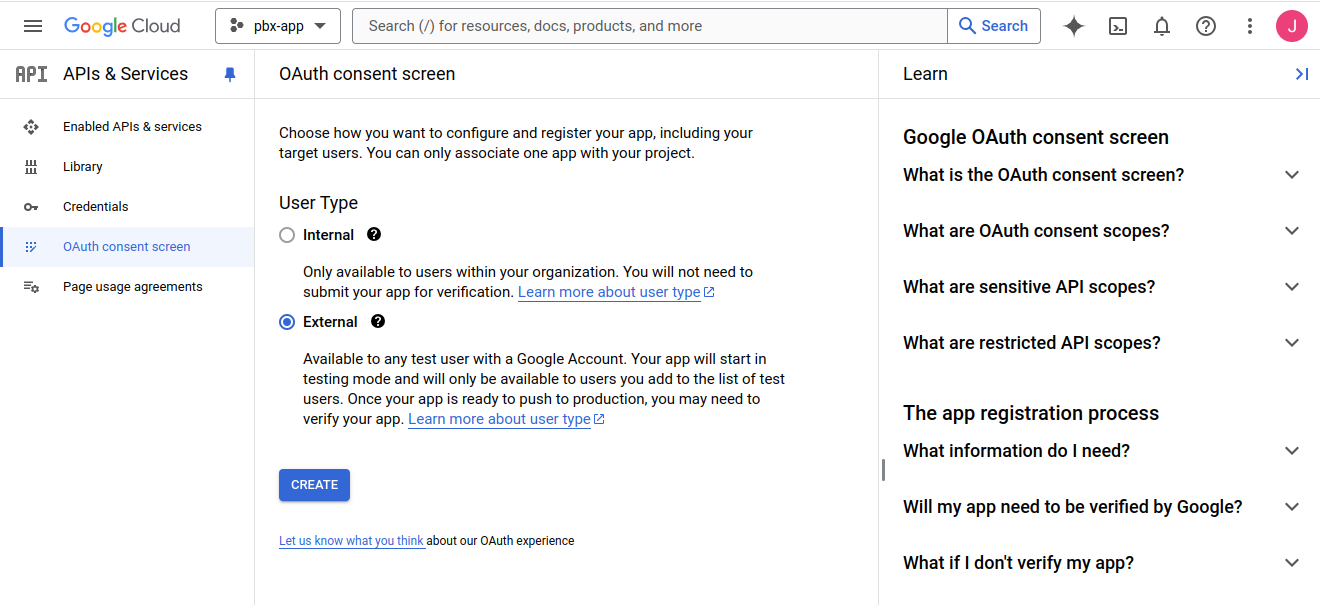
- Select “External” and click on “CREATE”.
-
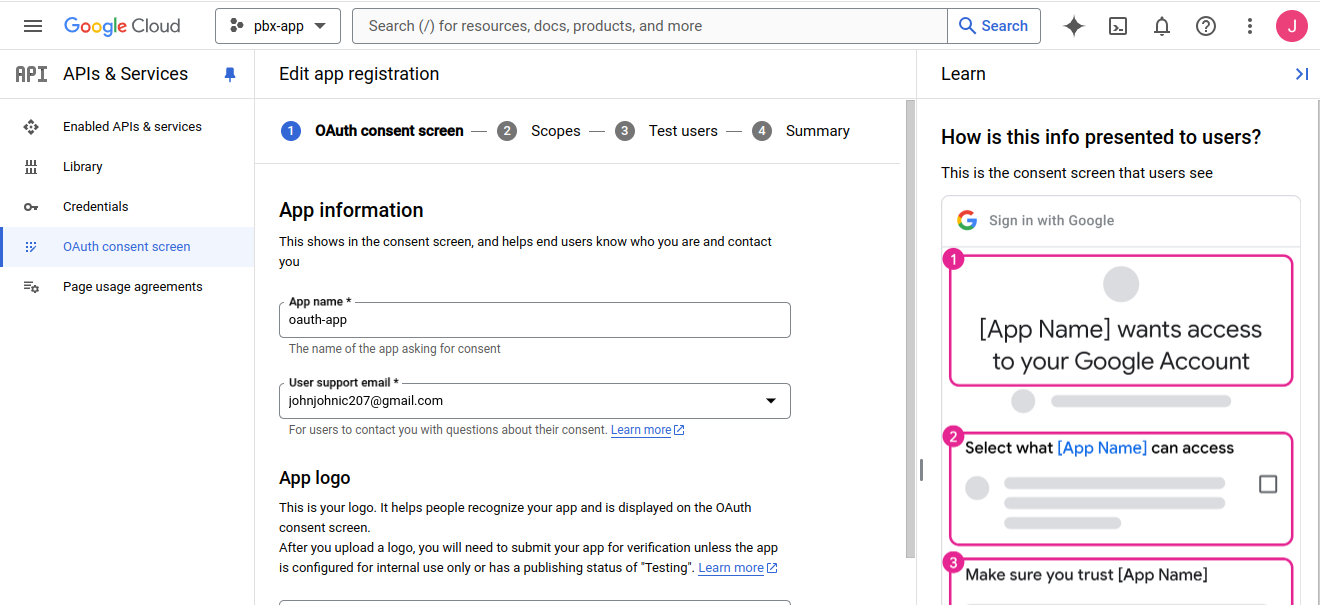
Supply App name, User support email, scroll to the bottom and supply Developer contact information.
-
Click on “Save and Continue”.
-
On this screen click on “ADD OR REMOVE SCOPES”.
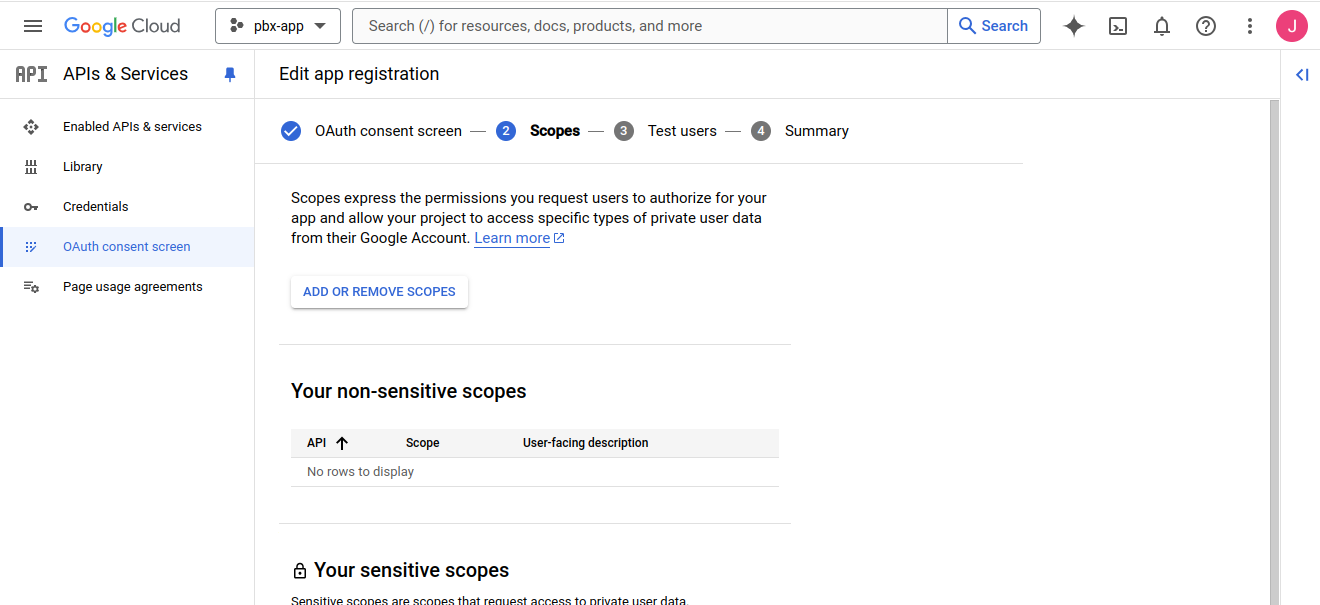
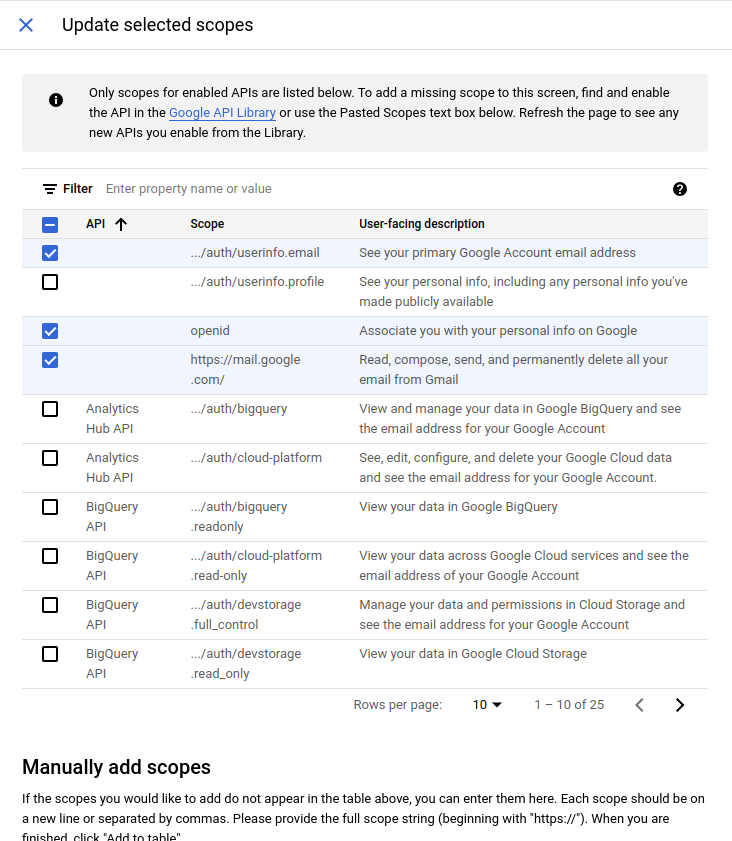
- On the scope selection check the following scopes:
-
If missing on the list, add scopes manually.
-
Click on “UPDATE”.
-
Click on “SAVE AND CONTINUE”.
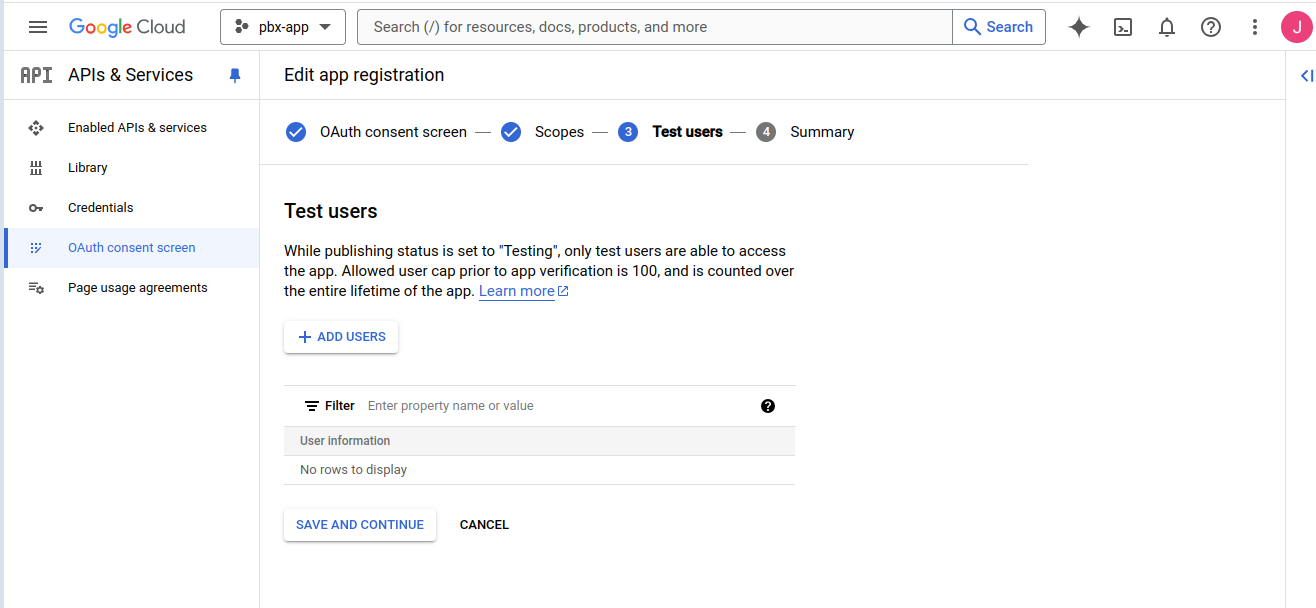
-
You can leave your app in the Test phase if you are not going to verify it and allow other users to use it for OAuth authentication. In the test phase you should add emails of users that you will allow usage of the said app.
-
Click on “SAVE AND CONTINUE” and then on “BACK TO DASHBOARD”.
-
Click on “Credentials” again and then on “CREATE CREDENTIALS”.
-
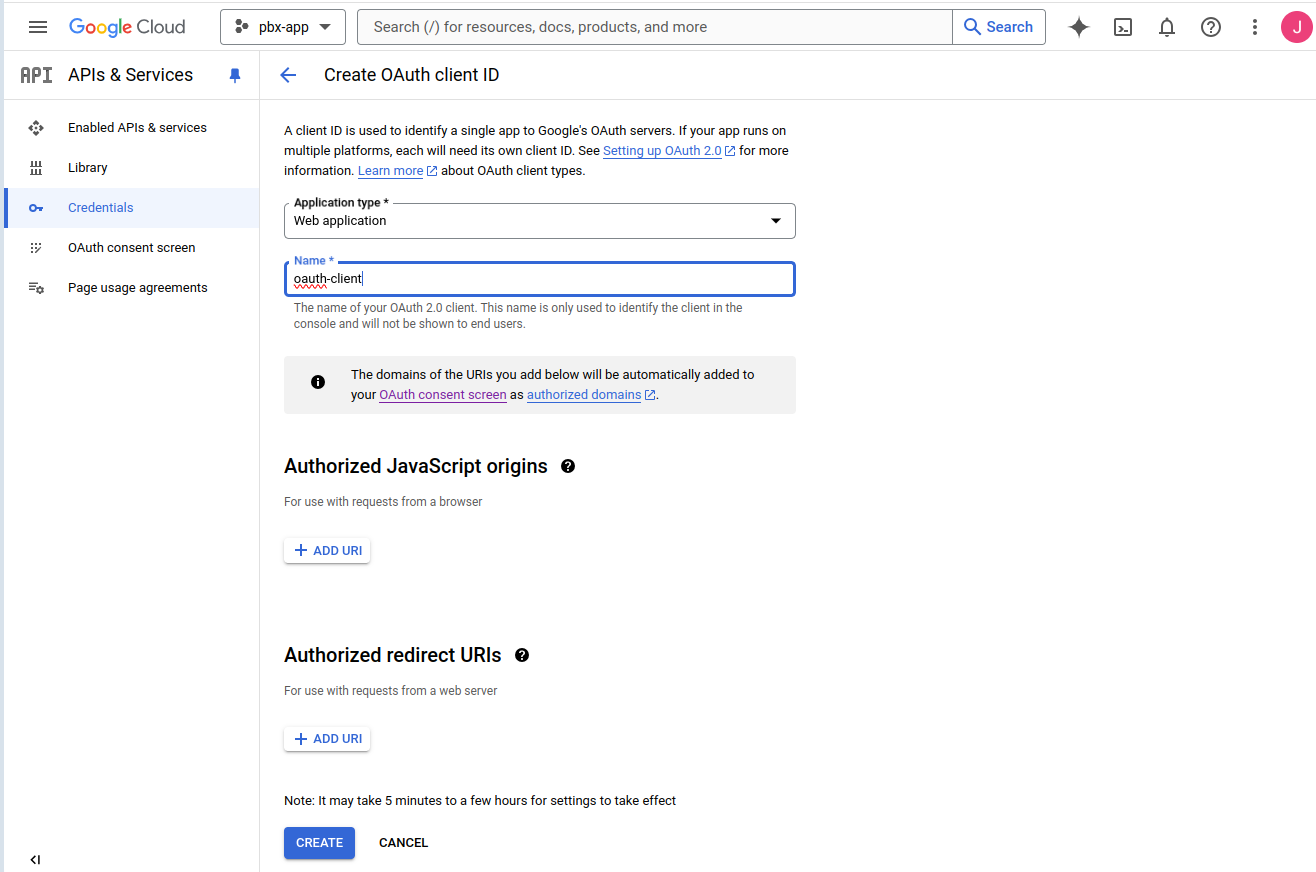
Click on “OAuth client ID”.
-
As “Application type” select “Web application”.
-
Supply a Name for the application.
-
For “Authorized redirect URIs” click on “ADD URI”
Input “https://YOURPBXWAREDOMAIN/google-code” -
Click on “CREATE” and “OK”.
-
You will see your credential on the list. Click on it.
-
Copy “Client ID” and “Client Secret” as they will be used later for system configuration.